Element 1 — Identify and assess risks
Identify and assess risks
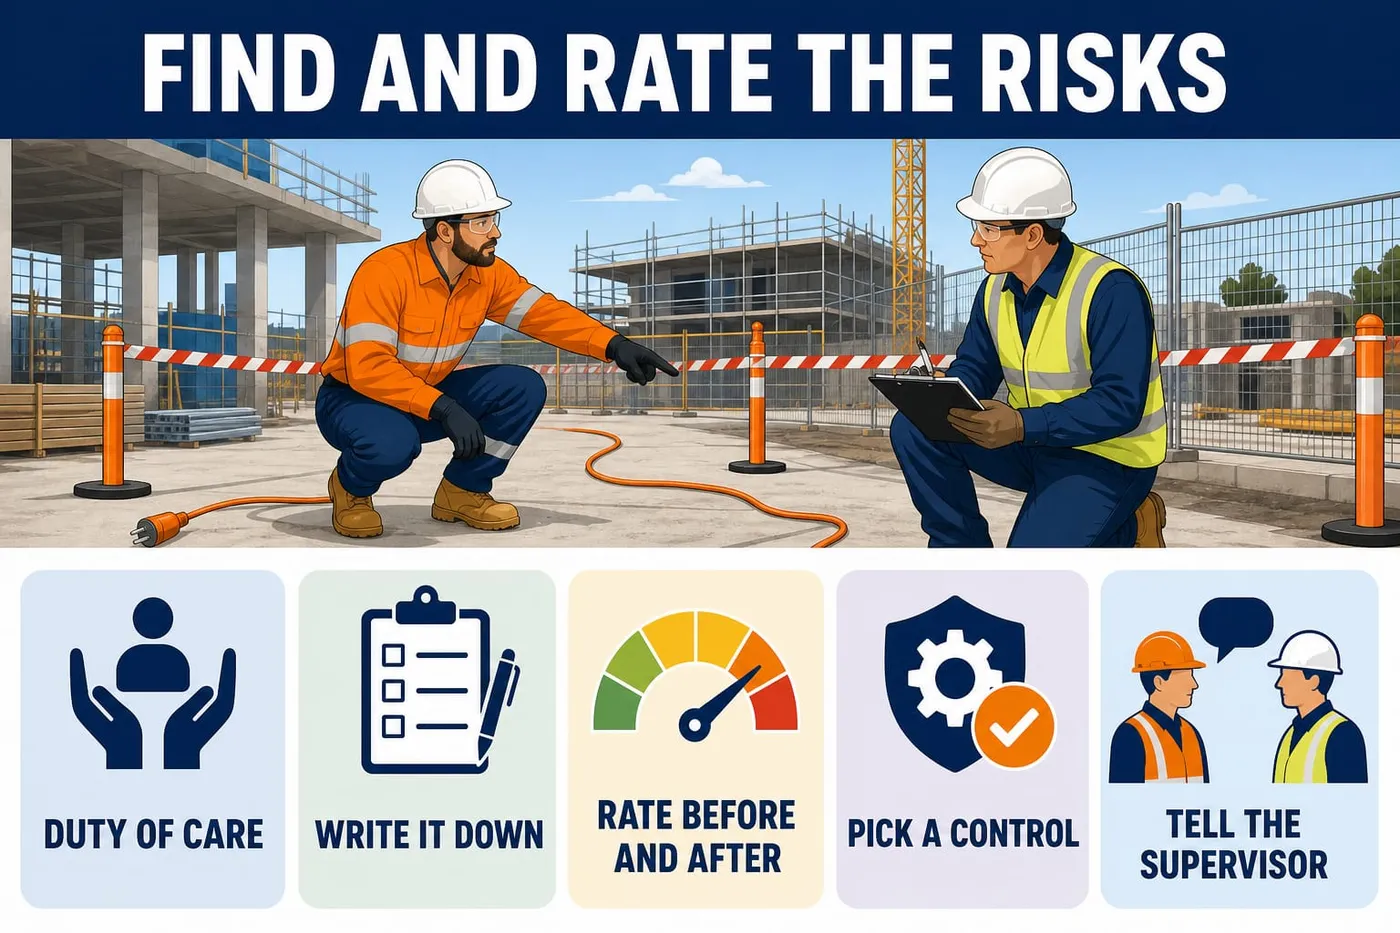
When this element is done properly you are holding a hazard report form you filled in on the spot. It names the hazard, where it is and who could be harmed. It shows the risk rating before and after controls, what you did straight away and who you told. The supervisor has the form the same shift, and the hazard is taped off or fixed.
A worker on a Hobart site put a lead across a doorway for 'just five minutes'. An apprentice tripped, went down a step and broke a wrist. The hazard took ten seconds to see and ten seconds to fix.
A hazard is anything that could hurt someone or make them sick: a trailing lead, dust, a hole in a floor. A risk is the chance that hazard hurts someone, and how badly. You spot the hazard. You work out how big the risk is. You do what you safely can straight away. Then you tell the supervisor - on this job, Sam Rivera.
Know this: in Tasmania the law is the Work Health and Safety Act 2012 and the Regulations 2022. WorkSafe Tasmania enforces it. Your boss - the PCBU, the business running the job - must make the workplace safe so far as is reasonably practicable. You have a duty of care too: take care of yourself, do not put others at risk, and follow safe work instructions.
Key points
- You have a duty of care: look after yourself, don't put workmates or the public at risk.
- The PCBU (the business you work for) carries the main safety duty. You report to your supervisor, the leading hand or the HSR. An HSR is a health and safety representative: a worker elected to speak up on safety.
- Write the hazard on the form as you find it, never from memory at knock-off.
- Rate the risk twice on the site matrix: before controls, then again after the controls you chose.
- Pick controls down the tiers - eliminate; then substitute, isolate or engineer; then administrative; PPE last - and name the tier you used.
- Do what you safely can right now (tape it off, tag it out) and still report it the same shift.
- High or extreme rating means work does not start until the supervisor approves the controls.
- Fix a wrong entry with one line through it, the right words beside it, your initials and the date - never rub out.
What you need
- Hazard Report form from the site pad, plus a clipboard and a blue or black pen
- Site WHS Management Plan (hazard reporting section) and the daily Pre-start Record
- A copy of the site 5 x 5 risk matrix (likelihood against consequence)
- Safety helmet with chin strap, close-fitting clear safety glasses, hi-vis long-sleeve shirt, long trousers, lace-up safety boots
- Riggers gloves and earmuffs or earplugs for the walk-through of noisy areas
- Red and white hazard tape and witches hats for putting an immediate barrier around a hazard
- A phone or site radio to tell the supervisor straight away
Performance criteria: 1.1, 1.2, 1.3, 1.4
Learning content on this page was drafted with AI assistance by VET Creator and must be reviewed by a qualified trainer before use with students.
Element 1 — Identify and assess risks
Prepare: know your duty before you walk the area
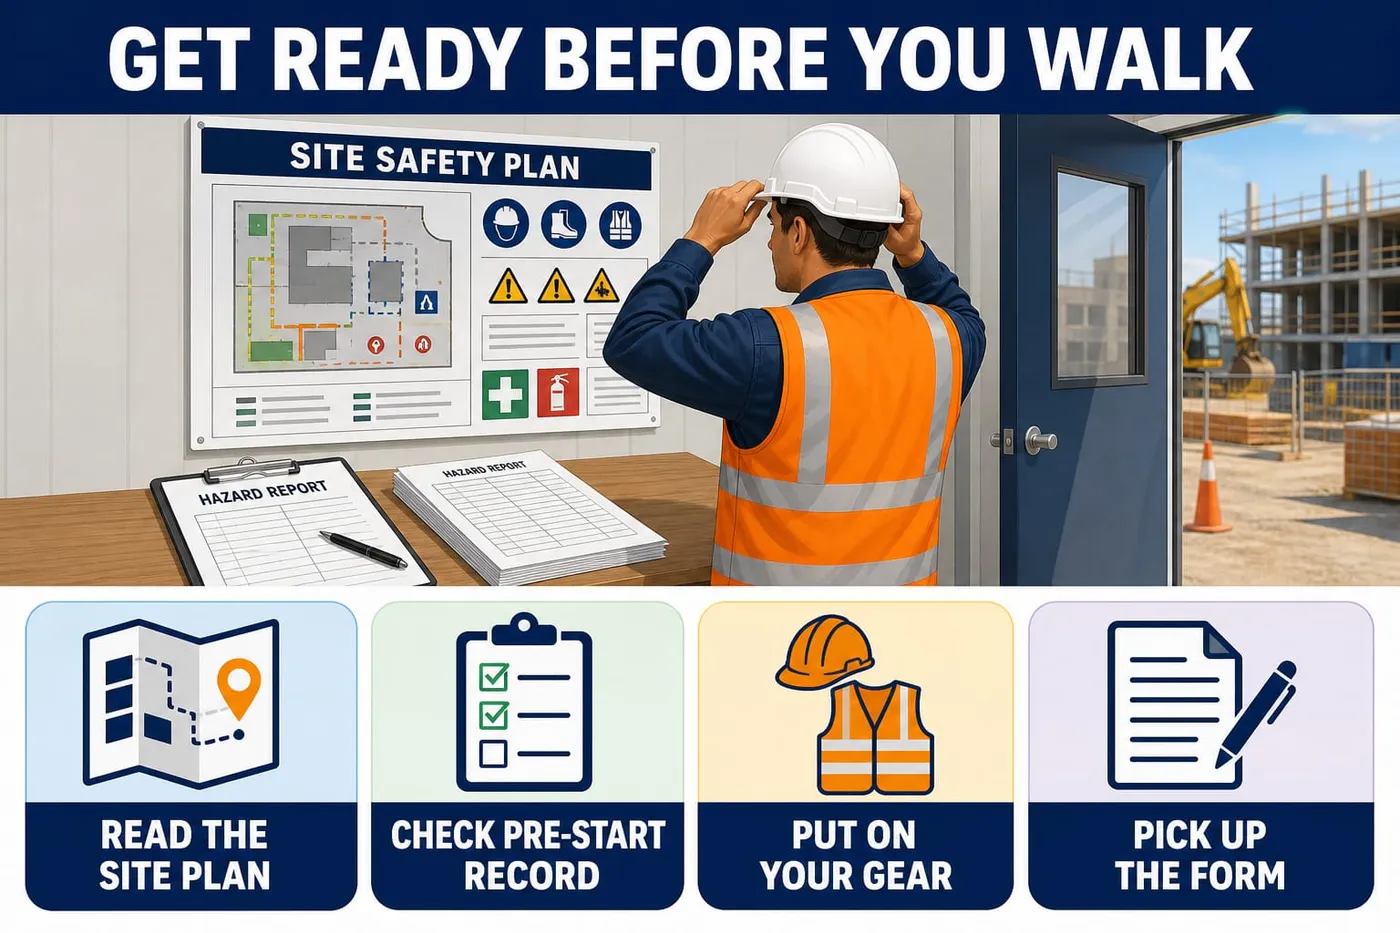
Done right when
- You can name the supervisor, the leading hand and the HSR for this job.
- You know which hazards are already on the record and which are new.
- You are carrying a blank form before you set foot in the work area.
Read the hazard reporting section of the Site WHS Management Plan.
It names the people hazards and risks are reported to on this site.
If: nobody is named, ask the supervisor who to report to before you start.
Check You can name the supervisor, the leading hand and the HSR for this job.
Check today's Pre-start Record for hazards already reported.
Controls already in place do not need reporting twice, but new ones do.
Check You know which hazards are already on the record and which are new.
Put on the PPE listed for the area you are walking.
Warning: Damaged PPE is replaced, never patched or taped.
Helmet level and not rocking, glasses close fitting, boots laced, hi-vis on.
If: an item is cracked, torn or scratched, swap it before you enter the area.
Collect a hazard report form, clipboard and pen from the site office.
Why: Hazards are written down as you find them, not from memory later.
Check You are carrying a blank form before you set foot in the work area.
Activity: Pair talk: who do you tell, and when
Verbal, about 25 minutes
Use with the page: Prepare: know your duty before you walk the area. You and a partner work through four short site situations and decide who you tell, how fast, and what you do while you wait. Talking it through is how it happens on a real job - the paperwork comes second.
- Pair up and decide who speaks first for each situation; swap after each one.
- Situation 1: you find the guard missing from a drop saw in the lunch shed. Say who you tell, what you do with the saw, and how soon.
- Situation 2: a lead on the RCD board has a taped-up cut in it. Say what you do before anyone plugs in and who you report it to.
- Situation 3: you are told to carry sheets past the 5 tonne excavator while it is slewing. Say what you do about the instruction and who you talk to.
- Situation 4: you grazed your hand on a picket and Kofi the first aider cleaned and dressed it. Say who you report the treatment to and where it is written down.
- Report your answers to the class for one situation and listen for anything another pair thought of that you missed.
Performance criteria: 1.3
Learning content on this page was drafted with AI assistance by VET Creator and must be reviewed by a qualified trainer before use with students.
Element 1 — Identify and assess risks
Know the WHS and environment laws behind the job
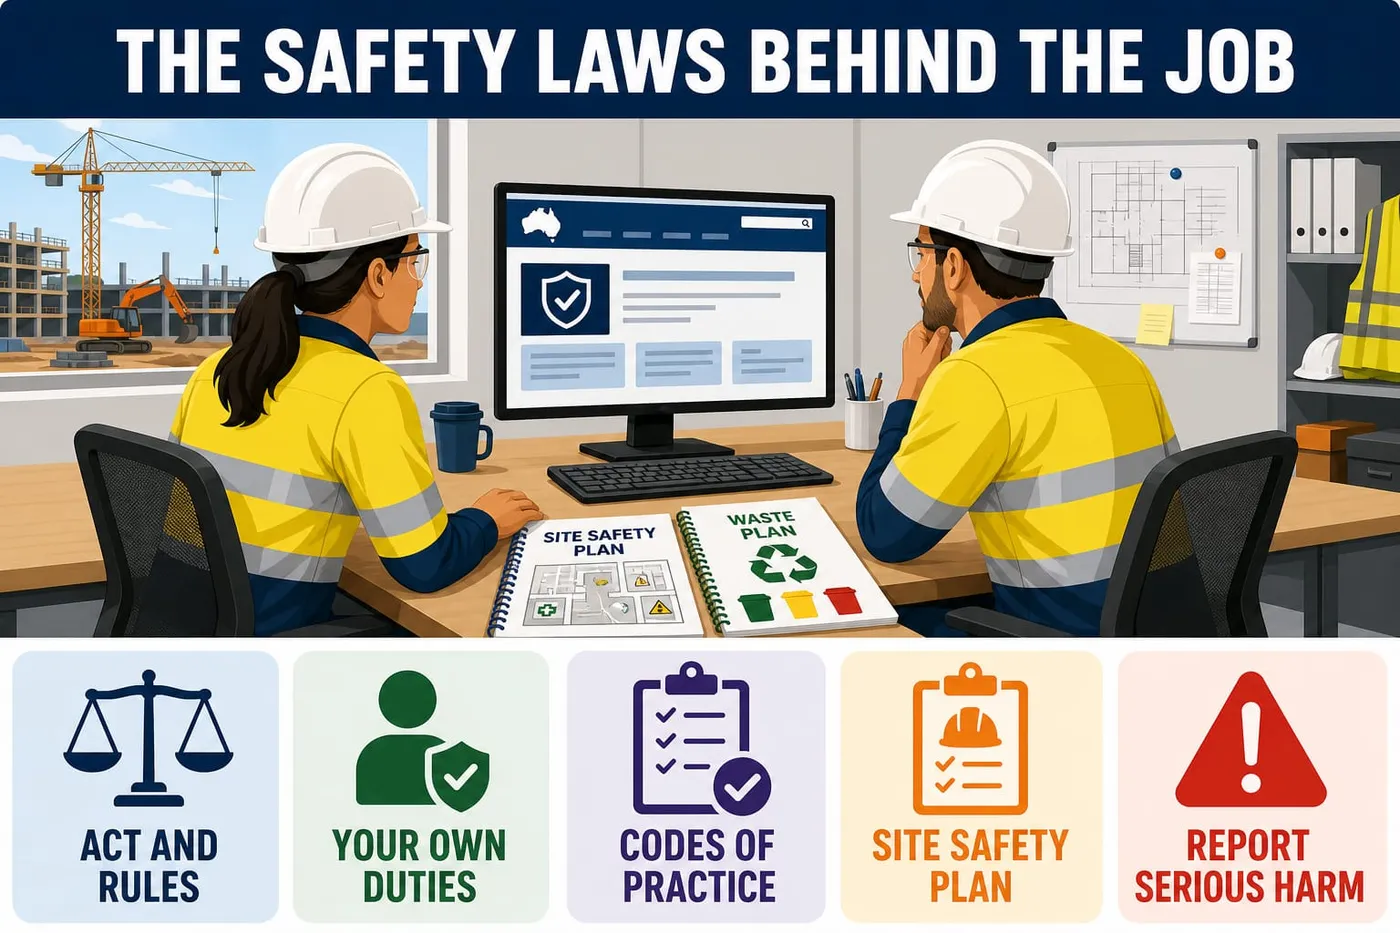
Done right when
- You can name the state you are working in and say that its own WHS laws apply.
- You can show both documents on screen or in the site office folder.
- You can say in your own words two things the PCBU must provide.
- You can state your three worker duties without reading them out.
- You locate one code of practice that fits a task you will do this week.
Check which state or territory your work site is in.
Each state and territory makes its own work health and safety (WHS) laws. In Tasmania they are the Work Health and Safety Act 2012 and the Work Health and Safety Regulations 2022.
Why: A worker who moves interstate for work is covered by that state's laws, not Tasmania's.
Check You can name the state you are working in and say that its own WHS laws apply.
Open the WorkSafe Tasmania website and find the Act and the Regulations.
The Act sets the duties in plain terms. The Regulations set the detail, such as which work is high risk construction work.
Check You can show both documents on screen or in the site office folder.
Read the duty your employer owes you under the Act.
Your employer is a PCBU - a person conducting a business or undertaking. The PCBU must keep you safe so far as is reasonably practicable: safe plant, training, supervision, toilets and first aid.
Why: Knowing the duty tells you what you are entitled to ask for before you start a task.
Check You can say in your own words two things the PCBU must provide.
Read your own duties as a worker under the Act.
You must take reasonable care for your own safety and for others, follow reasonable instructions, and co-operate with site policies.
Check You can state your three worker duties without reading them out.
Find the code of practice that matters for your task.
A code of practice is practical guidance approved under the Act, such as the codes for hazardous manual tasks or managing asbestos. It shows an accepted way to meet the law.
Why: Codes of practice can be used in court as evidence of what was reasonably practicable.
Check You locate one code of practice that fits a task you will do this week.
Check how the site WHS Management Plan turns the law into site rules.
The plan is the site's own written system: inductions, PPE, permits, reporting. It must meet the law but can be stricter.
Check You can point to one site rule and name the legal duty behind it.
Ask who your health and safety representative is.
A health and safety representative (HSR) is a worker elected by their work group to speak up on safety matters. In class your teacher plays the supervisor and can name a student HSR.
Why: You have the right to raise a safety issue without being punished for it.
Check You can name the HSR or say the site has none and you raise issues with the supervisor.
Read the site waste management plan before you bin anything.
Warning: Never burn treated timber offcuts or sawdust. Burning it is prohibited waste disposal and the smoke and ash are toxic.
Environmental law is separate from WHS law. In Tasmania the Environment Protection Authority sets the state rules and the local council sets collection and landfill rules.
Check You can say which bin a given offcut goes in and why.
Check the safety data sheet for disposal rules on any chemical.
The safety data sheet (SDS) is the supplier's information sheet for a hazardous chemical. Section 13 covers disposal.
Why: Tipping a chemical down a drain can breach environment law and pollute a waterway.
Check You can show the disposal section of one SDS from the site folder.
Tell the supervisor straight away about any serious injury or dangerous incident.
Some incidents must be notified to the regulator by the PCBU, and the scene must be left undisturbed until they say otherwise.
If: you are unsure which law or rule applies to your task, ask the supervisor before you start.
Check You report it immediately and do not move anything at the scene.
Activity: Law finder: match the rule to the law
Written, about 25 minutes
Use with the page: Know the WHS and environment laws behind the job. In pairs, you match everyday site rules to the law or document behind them, then write one short reference sheet for a job. Your teacher plays the supervisor. You hand in the finished reference sheet.
- Sit in pairs and take one set of 12 cards from the teacher.
- Sort the rule cards into three piles: WHS Act or Regulations, code of practice, environment rules.
- Check your piles against the class list the teacher shows on the board.
- Write a reference sheet for this job: repainting the school shed's timber fence.
- Copy this header: Job: repaint timber fence, school yard. Name: ______. Date: __/__/____. Supervisor: (teacher).
- Write three lines under the headings Law or document / What it says / What I do.
- Use this finished example line. 'WHS Regs 2022 (Tas) / manage risk by the hierarchy of control / set up a trestle instead of standing on a drum.'
- Write a second example line yourself about the paint, starting: 'Safety data sheet, section 13 / ... / ...'
- Write a third line about the fence offcuts, starting: 'Site waste plan and council rules / ... / ...'
- Swap sheets with another pair and check each line names a real document.
- Hand your reference sheet to the teacher at the end of the lesson.
Quick check
1. Which two laws set work health and safety duties for a construction worker in Tasmania?
- A. The Road Rules and the site traffic plan
- B. The Building Code and the local council by-laws
- C. The Work Health and Safety Act 2012 and the WHS Regulations 2022
- D. The Fair Work Act and the award
Show the answer
C. Tasmania's WHS duties come from its own Act and Regulations, in effect from 12 December 2022.
Performance criteria: 1.3, 1.4
Learning content on this page was drafted with AI assistance by VET Creator and must be reviewed by a qualified trainer before use with students.
Element 1 — Identify and assess risks
Walk the work area and identify hazards
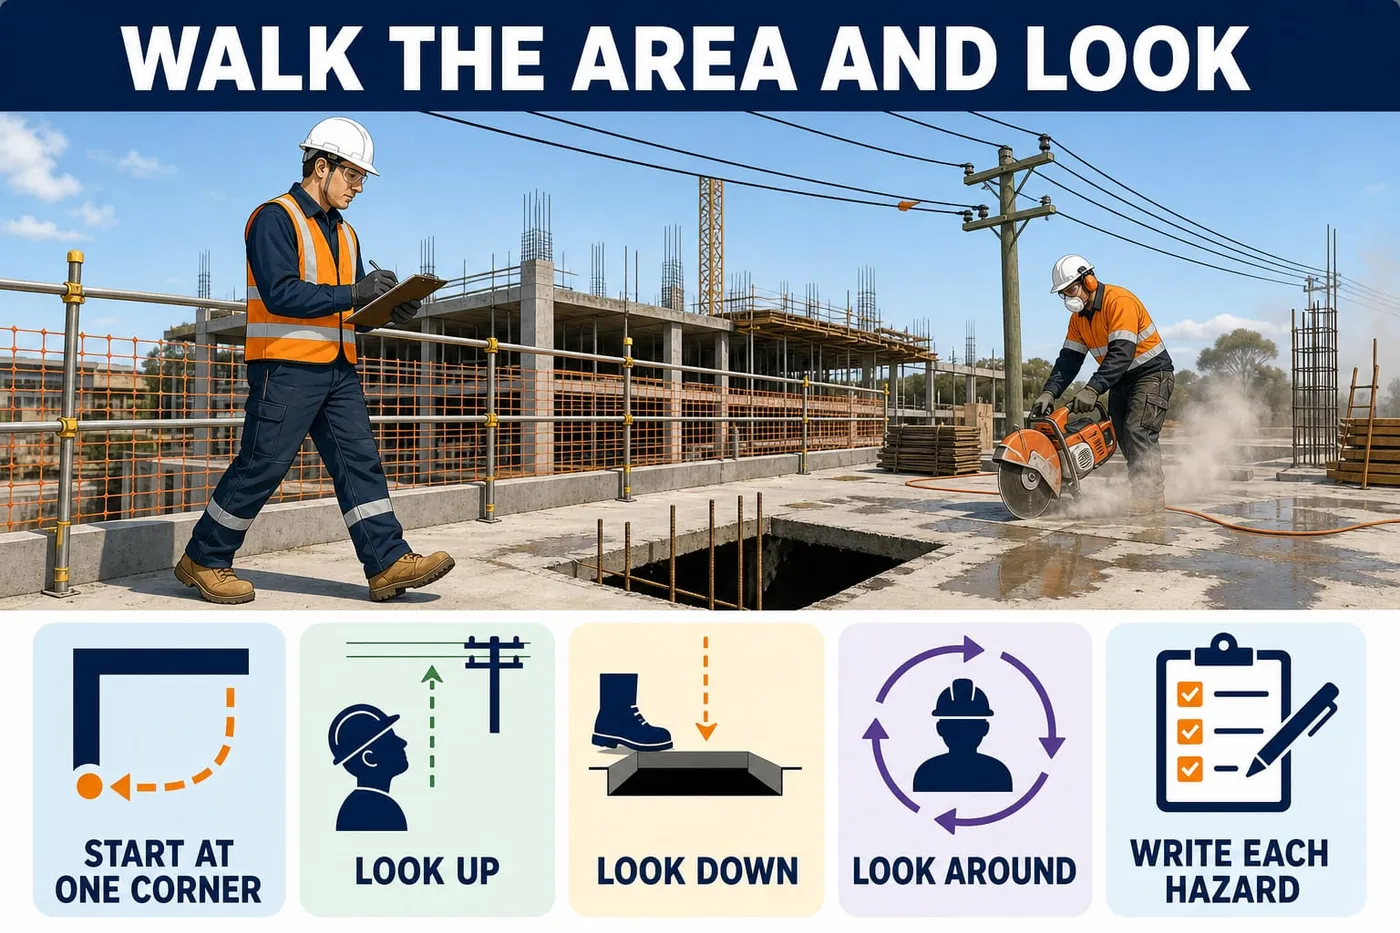
Done right when
- Every part of the area has been walked, not just the part you work in.
- Each one is written on the form with its exact location.
- Every line shows the hazard and the exact location.
- Each hazard line lists at least one group of people.
Start your walk at one corner of the work area.
A set path around the edge then across the middle means you miss less.
Check Every part of the area has been walked, not just the part you work in.
Look up for overhead hazards.
Warning: Never measure your distance to a power line with a tape or staff; keep well clear and ask the supervisor.
Loose ceiling linings, stacked materials above head height, overhead lines in the yard.
Look down for trip, slip and hole hazards.
Leads, offcuts, tools, spills, uneven ground, penetrations in the floor.
Check Each one is written on the form with its exact location.
Look around for dust, noise, chemicals and moving plant.
If you must raise your voice to be heard a metre away, noise needs controlling.
If: plant is moving in the area, stay out of its path and talk to the operator's spotter.
Write each hazard on the form as you find it.
Warning: Never fill the form in from memory at the end of the shift.
Say where it is in a way a stranger could find: 'north side of the ramp, third board down'.
Check Every line shows the hazard and the exact location.
Name who could be harmed by each hazard.
Think crew, other trades, school staff and the public.
Check Each hazard line lists at least one group of people.
Activity: Hazard spotting walk in the school yard
Practical, about 45 minutes
Use with the page: Walk the work area and identify hazards. Your teacher sets up a work area in the yard with staged hazards (props only). You walk it in pairs like a real pre-start check and write down what you find as you find it. This is the exact job a first-year worker gets asked to do on a Monday morning.
- Put on your helmet, glasses, hi-vis, boots and gloves, and have your buddy check your helmet sits level and does not rock.
- Collect a clipboard, a hazard report form and a pen from the teacher, who is playing the supervisor.
- Walk your taped work area in pairs, starting at one corner and working around the edge, then across the middle.
- Look up, then down, then around: overhead gear, trip and hole hazards at your feet, dust, noise, chemicals and moving plant around you.
- Write each hazard on the form the moment you see it, with the exact location, not 'near the shed'.
- Report your top three hazards to the teacher out loud, saying what the hazard is and who could be harmed.
- Swap areas with another pair while the first pair debriefs with the teacher, then compare what each pair missed.
Performance criteria: 1.1
Learning content on this page was drafted with AI assistance by VET Creator and must be reviewed by a qualified trainer before use with students.
Element 1 — Identify and assess risks
Assess the risk with the site matrix
Done right when
- One word from the matrix is written on the line.
- One word from the matrix is written beside the likelihood.
- The level is low, medium, high or extreme, taken straight off the matrix.
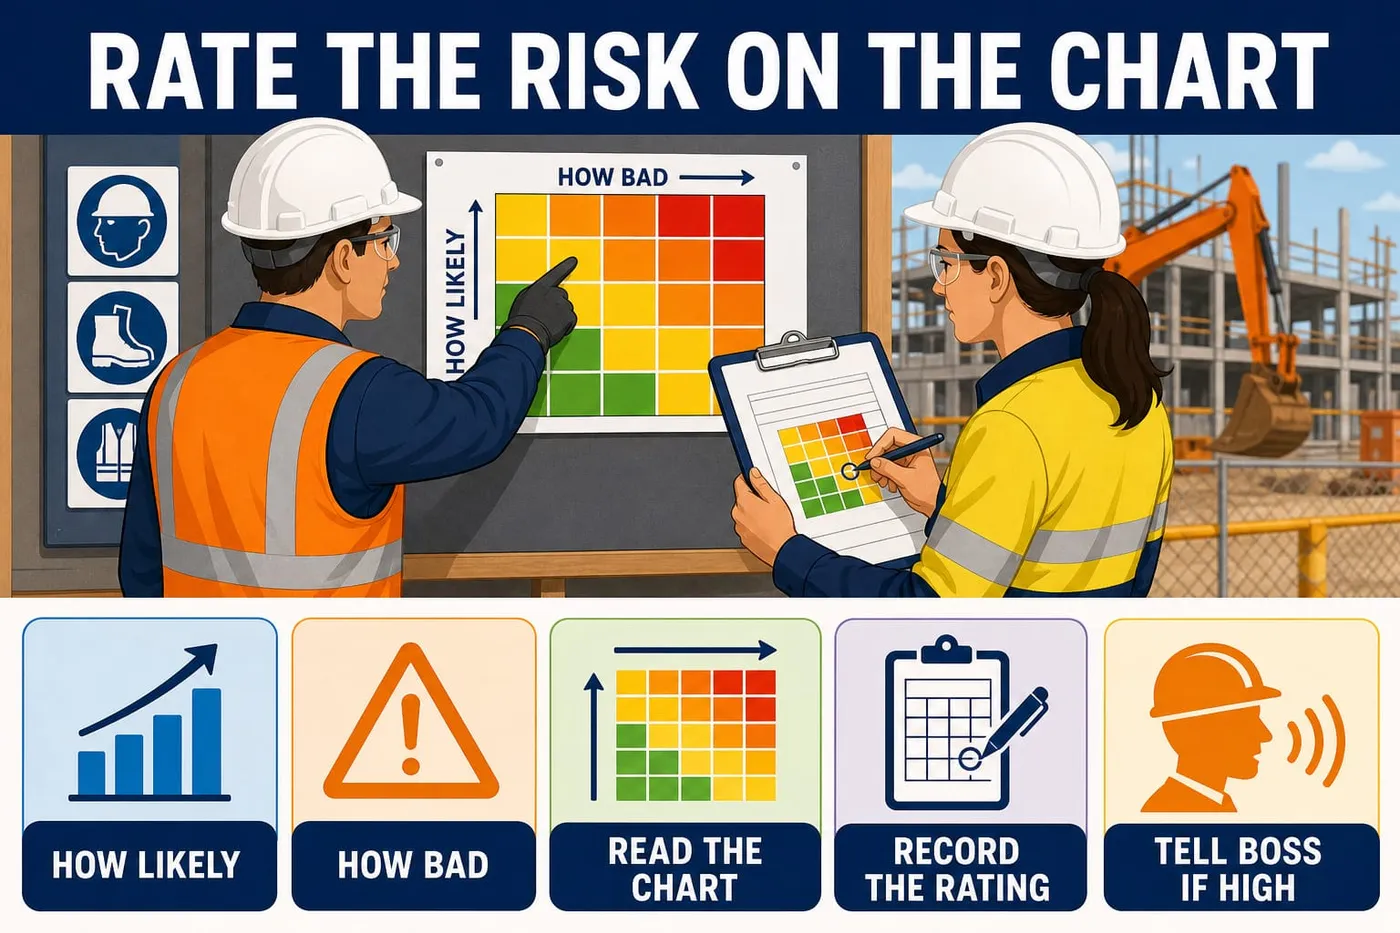
Rate the likelihood of harm for one hazard.
Use the matrix words: rare, unlikely, possible, likely, almost certain.
Check One word from the matrix is written on the line.
Rate the consequence if it does happen.
Insignificant, minor, moderate, major or catastrophic - rate the worst believable outcome.
Check One word from the matrix is written beside the likelihood.
Read the risk level where the two words meet on the matrix.
Check The level is low, medium, high or extreme, taken straight off the matrix.
Record the before-controls rating on that line of the form.
Both words and the level, so anyone can check your thinking.
Stop and tell the supervisor when the rating is high or extreme.
Go to them straight away, in person if you can.
If: the rating is high or extreme, work does not start until the supervisor approves the controls.
Activity: Worked example: risk rating a trailing lead before and after controls
Written, about 30 minutes
Use with the page: Assess the risk with the site matrix. You follow a worked risk rating all the way through for a real hazard from the Riverbend job, then do a second one yourself. Every number and rating is written on the same line of the form, before controls and after.
- Read the hazard. A 10 m extension lead for the corded circular saw runs across the doorway of Classroom 3. The crew is carrying ceiling lining sheets through that doorway.
- Name who could be harmed: Kofi carrying sheets, Jess, you, and any school staff who walk through.
- Rate likelihood before controls on the site matrix: people carry loads through that doorway all day, so likelihood = likely.
- Rate consequence before controls: a fall while carrying a sheet onto a concrete floor could break a bone, so consequence = major.
- Read where likely meets major on the 5 x 5 matrix: risk level before controls = high. High means tell the supervisor and do not keep working as is.
- Choose controls down the tiers. Re-route the lead outside the doorway so nobody crosses it (elimination of the crossing). Hang the lead on insulated hooks off the floor (engineering). Brief the crew at smoko (administrative).
- Rate again after controls: likelihood = unlikely, consequence = minor, so residual risk level = low.
- Write both ratings on the same line of the hazard report: 'Before: likely x major = HIGH. Controls: lead re-routed (elimination), hung on hooks (engineering). After: unlikely x minor = LOW.'
- Check your work: the control named is above PPE in the tiers, and the residual rating is lower than the first rating. If PPE is your only control, go back up the tiers.
- Now rate this one yourself and write both ratings: offcuts and pinch bars left on the floor of Classroom 3 while the crew strips linings.
Performance criteria: 1.1, 1.2
Learning content on this page was drafted with AI assistance by VET Creator and must be reviewed by a qualified trainer before use with students.
Element 1 — Identify and assess risks
Control the risk and report it
Done right when
- The control chosen is the highest tier that is reasonably practicable, not just a mask.
- Nobody can walk into the hazard while you go and report it.
- The residual rating sits on the same line and is lower than the first rating.
- The supervisor has heard about it in the same shift you found it.
- The form is signed, dated and handed over on the day, not the next morning.
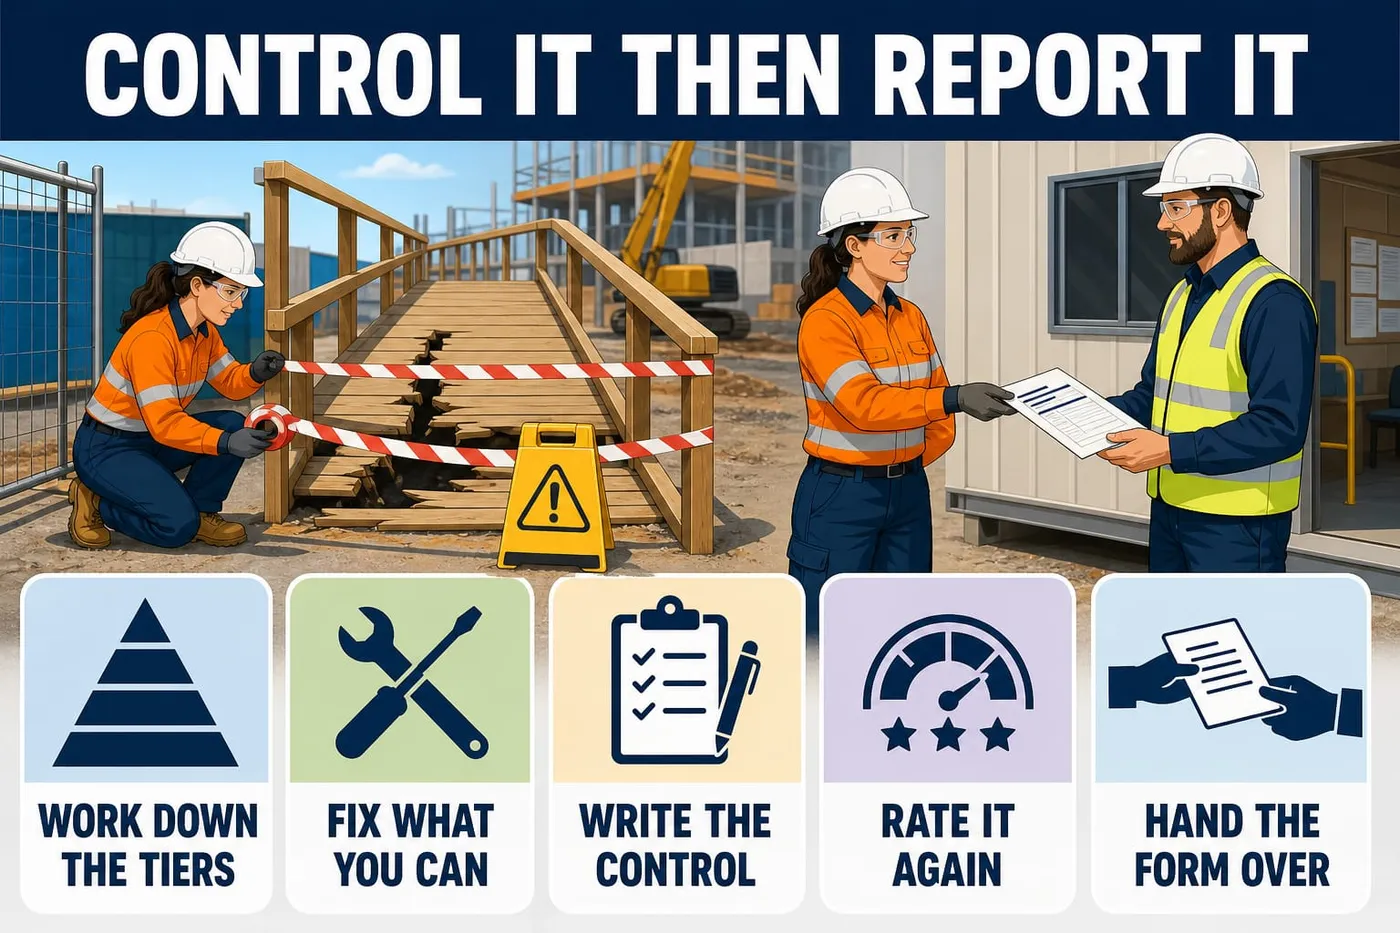
Work down the tiers to choose a control.
Warning: Never offer PPE as the only control when a higher tier can be done.
Eliminate first; then substitute, isolate or engineer; then administrative; PPE last.
Check The control chosen is the highest tier that is reasonably practicable, not just a mask.
Put an immediate control in place within your training.
Tape and cone the area, tag out faulty gear, re-route a lead, move the offcuts.
If: the fix needs training or tools you do not have, isolate the area and report it now.
Check Nobody can walk into the hazard while you go and report it.
Write the control and its tier on the form.
Write it like this: 'mesh panels around the opening (isolation)'.
Rate the risk again after the control.
If: the residual rating is still high, go back up the tiers and add a stronger control.
Check The residual rating sits on the same line and is lower than the first rating.
Tell the supervisor or other designated person face to face.
Say what it is, where it is and what you have already done.
Check The supervisor has heard about it in the same shift you found it.
Hand the completed form to the supervisor before you leave the site.
Check The form is signed, dated and handed over on the day, not the next morning.
Activity: Filling in a hazard report for the timber ramp
Written, about 40 minutes
Use with the page: Control the risk and report it. You fill in a hazard report form for a hazard on the external timber ramp at Riverbend Primary School. A finished sample is given so you can see what a good one looks like before you write your own.
- Copy this sample header onto your form: Site: Riverbend Primary School refurbishment, 42 Bridge Road, Glenorchy TAS. Principal contractor: Derwent Build Pty Ltd. Date: 14/05. Time found: 8:20 am. Reported by: (your name).
- Read the finished sample body: 'Location: external timber ramp, north side, third board from the top. Hazard: a decking board has lifted and two nails are standing proud about 20 mm. Who could be harmed: crew carrying timber up the ramp, and school staff using the north door. Immediate action taken: closed the ramp with hazard tape and two witches hats. Put a Danger - Do Not Enter sign at the bottom (isolation). Rating before controls: possible x moderate = MEDIUM. Rating after controls: unlikely x minor = LOW. Reported to: Sam Rivera, site supervisor, 8:25 am, face to face.'
- Write your own report for this hazard. A stack of ceiling lining sheets is leaning against the classroom wall, with no strapping. It sits next to the doorway the crew uses.
- Use these sentence starters: 'Location is...', 'The hazard is...', 'The people who could be harmed are...', 'Straight away I...', 'I rated it... before controls and... after controls', 'I reported it to... at...'.
- Make one deliberate wrong entry, then correct it properly. Put one line through it so it is still readable. Write the correct words beside it, then add your initials and the date.
- Hand your completed form to the teacher, who is playing the supervisor, and say the hazard out loud as you hand it over.
Quick check
1. True or false: handing out gloves and glasses is a fine control on its own if it stops the injury.
- A. False — try the higher tiers first, PPE is last
- B. True — it works, so it's a good control
Show the answer
A. PPE sits at the bottom of the hierarchy. You only rely on it after you have tried to eliminate, substitute, isolate or engineer the hazard out.
Performance criteria: 1.2, 1.3, 1.4, 2.2
Learning content on this page was drafted with AI assistance by VET Creator and must be reviewed by a qualified trainer before use with students.
Element 1 — Identify and assess risks
Finish the record and keep working safely
Done right when
- Both the old and new entries can be read.
- Your initials and the date sit next to the change.
Check every field on the form is filled in.
Date, time, exact location, hazard, who could be harmed, both ratings, controls, who you told.
If: a field does not apply, mark it the way your site marks blanks; in class, write N/A.
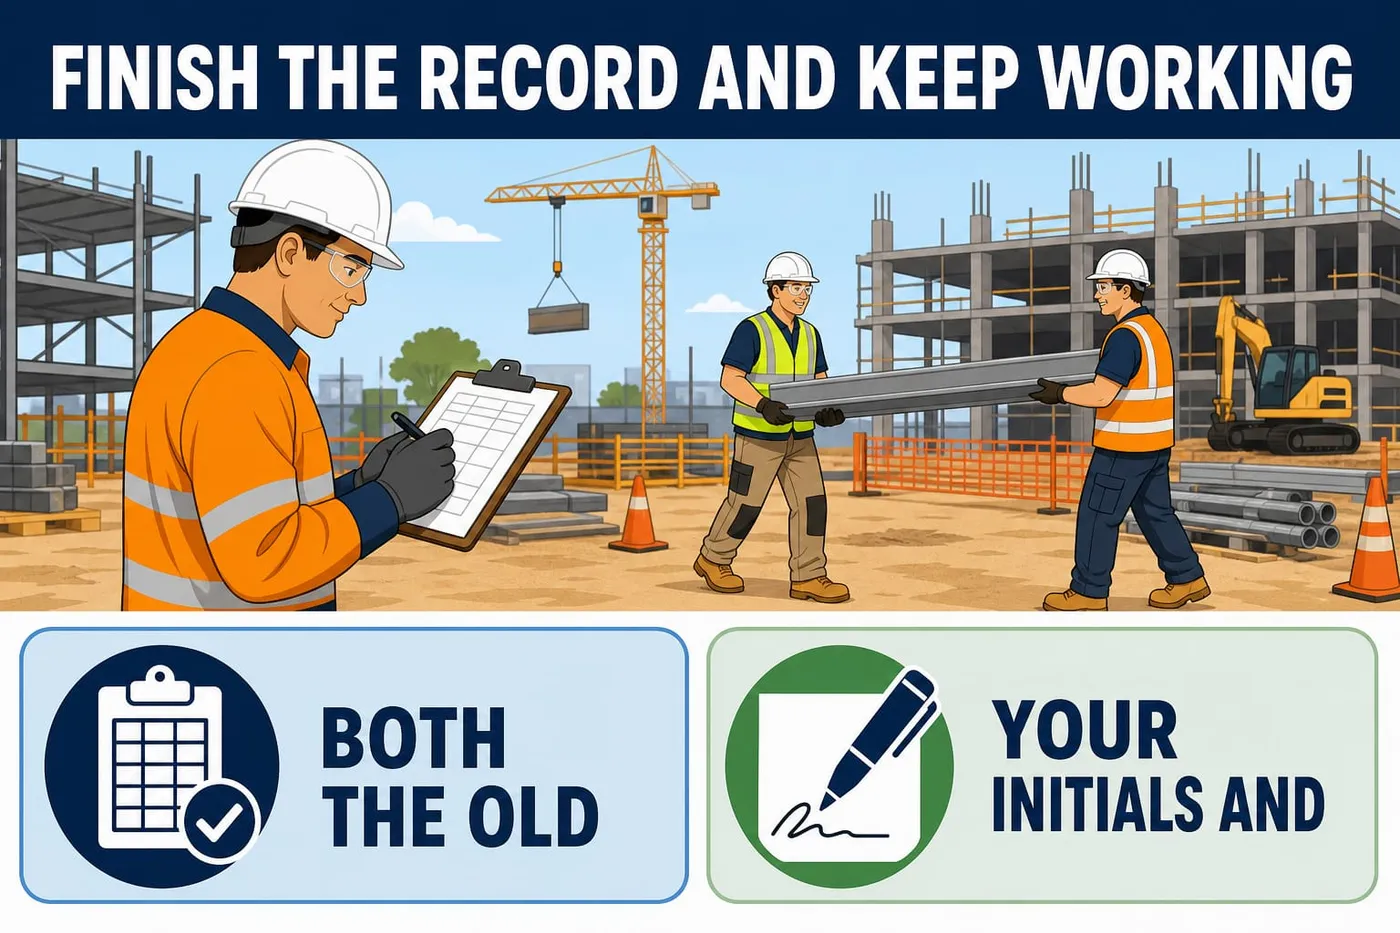
Strike a wrong entry through with one single line.
Warning: Never rub out, white out or write over an entry on a safety record.
The old entry must still be readable underneath.
Write the correct entry beside the struck-through one.
Check Both the old and new entries can be read.
Initial and date the correction.
Check Your initials and the date sit next to the change.
Keep working to the interim control until it is fixed.
Tape and signs stay up until the supervisor says the hazard is cleared.
If: someone removes your barricade, put it back and tell the supervisor.
Report any injury or near miss on an Incident/Injury Report the same day.
Warning: For a death or serious injury, tell the supervisor immediately and leave the scene undisturbed.
A near miss is reported the same way as an injury.
Activity: Quick quiz: hazards, risks and reporting
Written questions, about 30 minutes
Use with the page: Assess the risk with the site matrix. Eight questions on what you have learned about spotting hazards, rating risk and reporting it. Open each card, answer it in your head or on paper, then check the answer.
- Work through the eight questions on your own first, writing your answer before you look.
- Mark your own answers, then talk through any you got wrong with the person next to you.
1. You walk into Classroom 3 and see a power lead lying across the doorway. Which of these is the hazard?
- A. The lead across the doorway
- B. Someone tripping and breaking a wrist
- C. The hazard report form
- D. The high risk rating
2. You find a decking board with nails standing proud and the crew is about to walk up the ramp. What do you do first?
- A. Write it on the hazard report and finish your shift
- B. Make the area safe straight away with tape and a sign, then report it
- C. Tell everyone at smoko to watch their step
- D. Wait for the supervisor to notice it
3. Dust is coming off the strip-out in Classroom 3. Which control is the best choice?
- A. Hand out P2 respirators
- B. Tell the crew to hold their breath walking through
- C. Use on-tool dust extraction so the dust is caught at the source
- D. Open a window
4. On the site matrix you rate a hazard as 'likely' and 'major'. The matrix gives HIGH. What does that mean for the job?
- A. Keep working and mention it tomorrow
- B. Work does not start until the supervisor approves the controls
- C. Only the supervisor can rate it, so ignore your rating
- D. Put it in the incident report instead
5. You wrote the wrong time on your hazard report. How do you fix it?
- A. Rub it out and write the right time
- B. White it out neatly
- C. One line through it so it is still readable, the right time beside it, your initials and date
- D. Start a brand new form and bin the old one
6. Who do you give a completed hazard report to on this job?
- A. Any worker who is passing
- B. The school principal
- C. Sam Rivera, the site supervisor, or another designated person named by the site
- D. Nobody, you keep it in your ute
7. You are told to carry sheets through an area where the excavator is slewing. What do you do?
- A. Go quickly and keep an eye on it
- B. Stop, stay out of the area and raise it with the supervisor before going on
- C. Wave at the operator and walk behind the machine
- D. Put your earmuffs on and go
8. A pallet of bricks tips over in the yard. Nobody is hurt and nothing is damaged. What do you do?
- A. Nothing, because no one was hurt
- B. Stand it back up and say nothing
- C. Report it as a near miss, the same way you would an injury
- D. Only mention it if it happens again
9. Which of these is your own duty of care on site?
- A. Writing the site WHS Management Plan
- B. Taking reasonable care for your own safety and not putting others at risk
- C. Making sure the site is safe so far as is reasonably practicable
- D. Training the apprentices
10. When should you write a hazard down on the form?
- A. At the end of the week
- B. At the time you find it
- C. After the supervisor confirms it is real
- D. Only if it gets fixed
Quick check
1. A stack of bricks is leaning near a walkway. You tape it off. What now?
- A. Report it to your supervisor this shift
- B. Write it up next week with the others
- C. Tell the next crew when you see them
- D. Leave it — the tape fixes it
Show the answer
A. Doing what you safely can right now doesn't replace reporting — the hazard still needs someone with the authority and gear to fix it properly.
Performance criteria: 1.3, 1.4, 4.3
Learning content on this page was drafted with AI assistance by VET Creator and must be reviewed by a qualified trainer before use with students.
Element 1 — Identify and assess risks
Check your understanding
Check your understanding
1. You spot a cracked extension lead at 9am. Smoko is at 10. When do you write it on the hazard form?
- A. At knock-off with the other jobs
- B. Only if someone gets a shock
- C. Straight away, as you find it
- D. At smoko, while you remember
Show the answer
C. Write the hazard down as you find it — memory fades and details get lost or wrong by the end of the shift.
2. True or false: you rate a hazard's risk once, before you pick your controls.
- A. True — one rating is all the form needs
- B. False — rate it again after the controls
Show the answer
B. You rate it twice: before controls, then again after, and if the rating is still high you go back up the tiers for something stronger.
3. A code of practice is just advice, so it has no weight if something goes wrong.
- A. True
- B. False
Show the answer
B. A code of practice is approved guidance and can be used as evidence of what was reasonably practicable.
Performance criteria: 1.1, 1.2, 1.3, 1.4
Learning content on this page was drafted with AI assistance by VET Creator and must be reviewed by a qualified trainer before use with students.
Element 2 — Identify hazardous materials and other hazards on work sites
Identify hazardous materials and other hazards on work sites
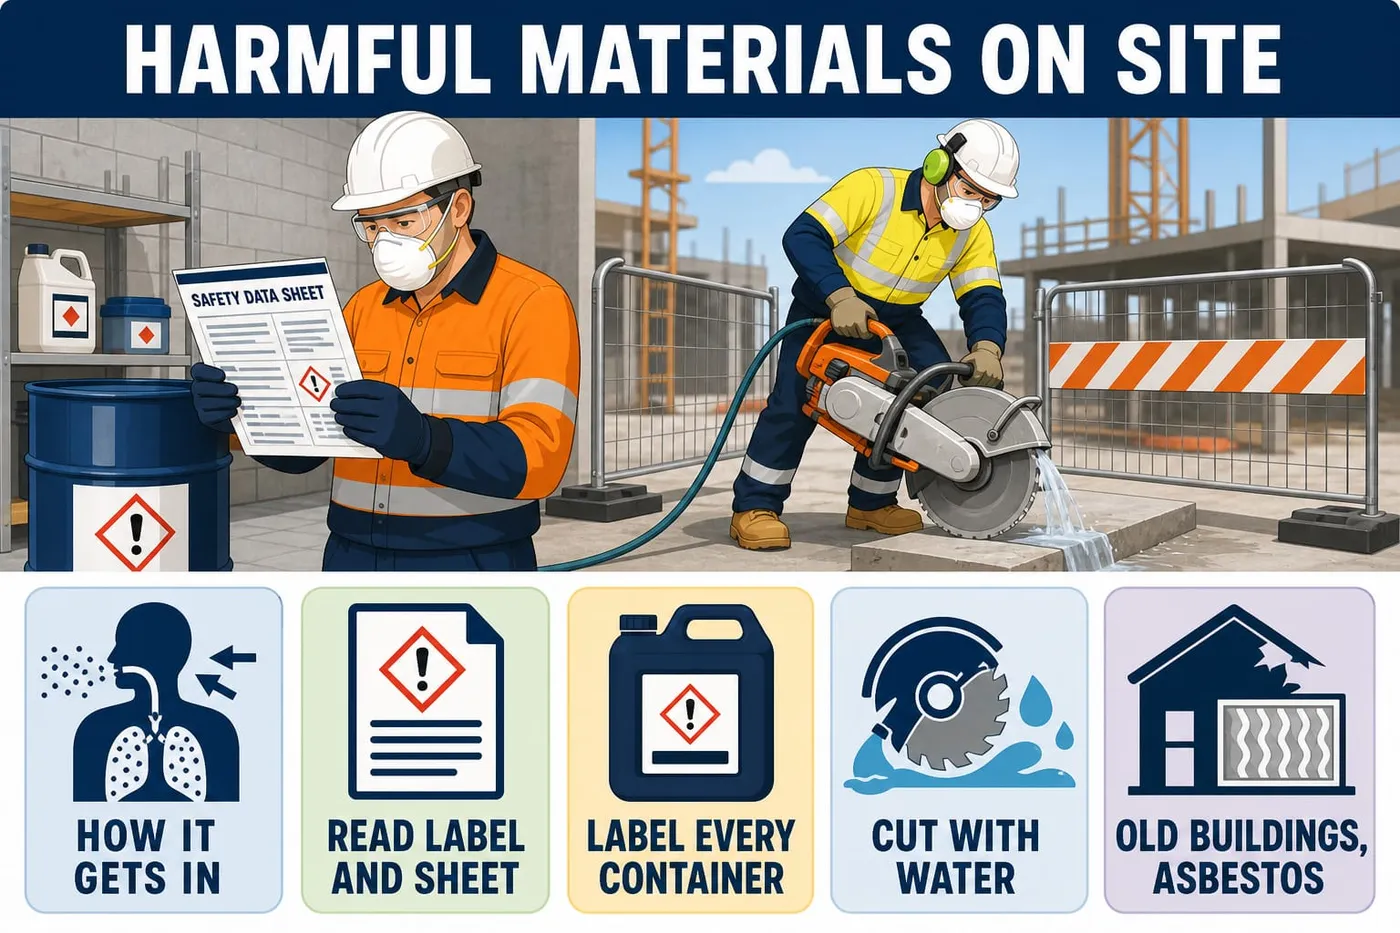
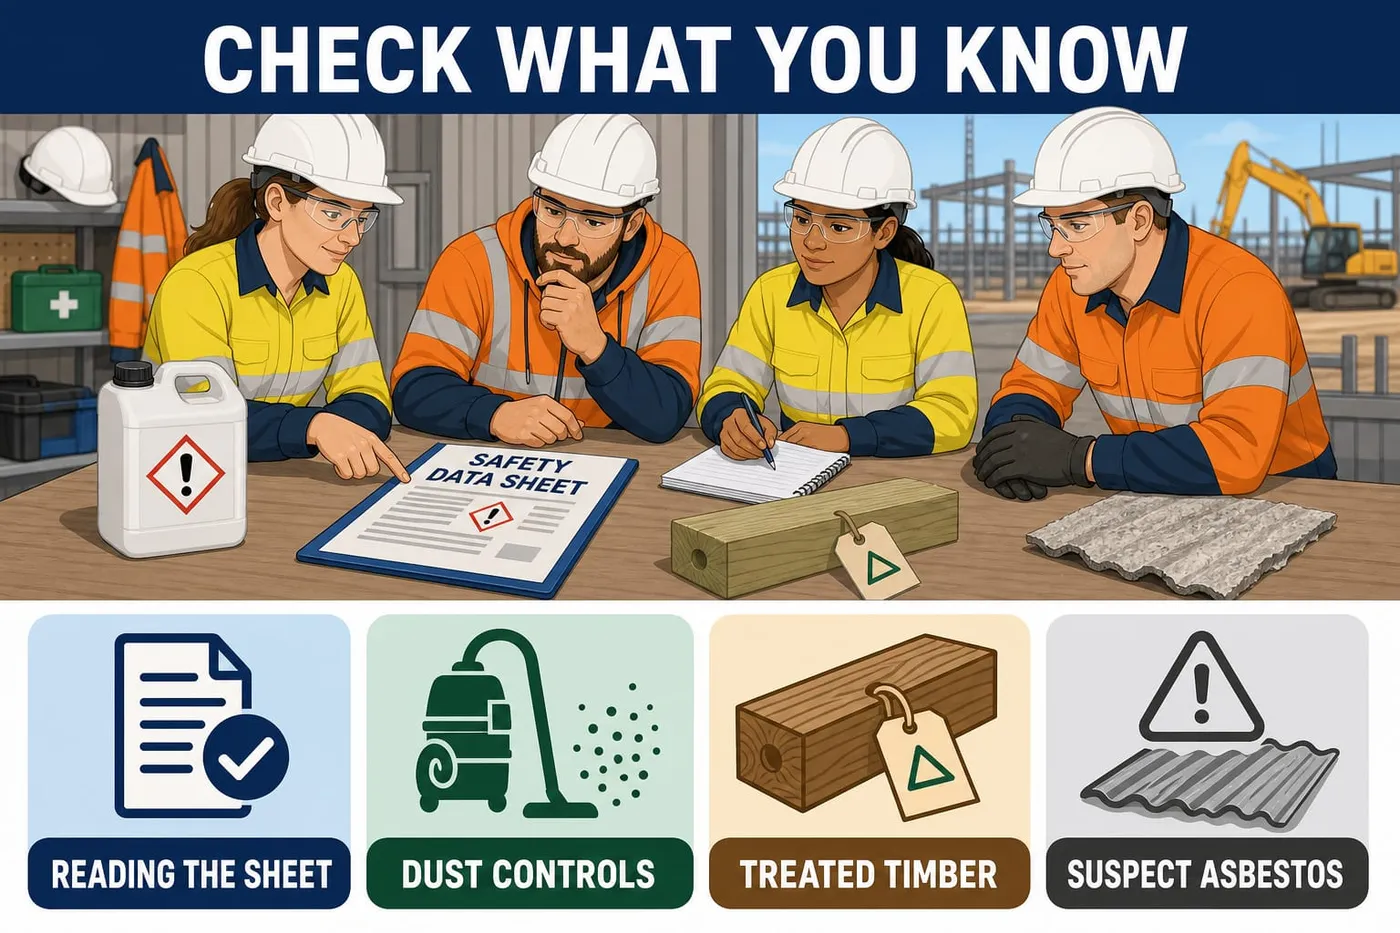
When you finish this element, you can walk a work area and point out what can harm you. That includes chemicals, dust, treated timber and asbestos-containing material (ACM) — building material that contains asbestos. You read the label and the safety data sheet (SDS), the supplier's information sheet for a chemical. You put a control in straight away. Anything dangerous is barricaded and signed, and suspected asbestos is reported to the supervisor.
On the Riverbend Primary School job at 42 Bridge Road, Glenorchy, you are stripping linings out of a 1974 classroom block. The things most likely to hurt you here will not cut you today. They are breathed in, swallowed or soaked through your skin. The damage shows up years later.
A hazardous material is anything on site that can harm people: solvents, sealers, silica dust from cutting concrete, timber dust, treated timber and asbestos. Asbestos is a fibrous mineral used in building products until it was banned in Australia from 31 December 2003. Breathing its fibres causes fatal lung disease. There is no safe amount.
So: identify the material before you touch it, put a control in straight away, then barricade, sign and report it.
Key points
- Hazardous materials get in by breathing, swallowing or skin contact — you often feel nothing at the time.
- Read the label and the safety data sheet (SDS) before the lid comes off: hazards, first aid, handling, PPE.
- Never decant a chemical into an unlabelled drink bottle — label every container you pour into.
- Cut concrete, brick and tile with water or on-tool dust extraction; a P2 respirator alone is never the only control.
- Treated timber is identified by the end tag or H-class stamp, never by colour; its offcuts and sawdust are never burned.
- Anything built or renovated before 2004 may contain asbestos; before 1990 very likely does.
- If you cannot identify a material in an old building, presume it is asbestos: stop, do not disturb it, keep people away.
- Secure it the moment you find it — barricade, sign, tag — then report to Sam Rivera or another designated person.
What you need
- Safety helmet with chin strap, clear close-fitting safety glasses, hi-vis long-sleeve shirt, long trousers, lace-up safety boots
- Riggers gloves, Class 5 earmuffs or earplugs, P2 disposable respirators (a mask that filters fine dust)
- Empty or dummy product containers with current labels: water-based sealer, solvent-based adhesive, concrete cleaner, two-pack epoxy
- Site SDS folder (hard copy) and the Asbestos Register from the site office
- Spill kit: absorbent booms, pads, bags and a scoop
- Offcuts of treated pine with the end tag or stamp visible, and offcuts of untreated pine
- Barricade kit: 2.4 m mesh fence panels with feet and clamps, witches hats, red and white hazard tape, A-frame stands
- Laminated signs: "Danger — Do Not Enter", "Caution — Asbestos", "Authorised Personnel Only"
- Out-of-service tags, marker pen, clipboard, Hazard Report forms and a JSA pad
- Sample building materials for identification practice: fibre cement sheet offcut (asbestos-free sample), vinyl floor tile, pipe lagging mock-up
Performance criteria: 2.1, 2.2, 2.3, 2.4
Learning content on this page was drafted with AI assistance by VET Creator and must be reviewed by a qualified trainer before use with students.
Element 2 — Identify hazardous materials and other hazards on work sites
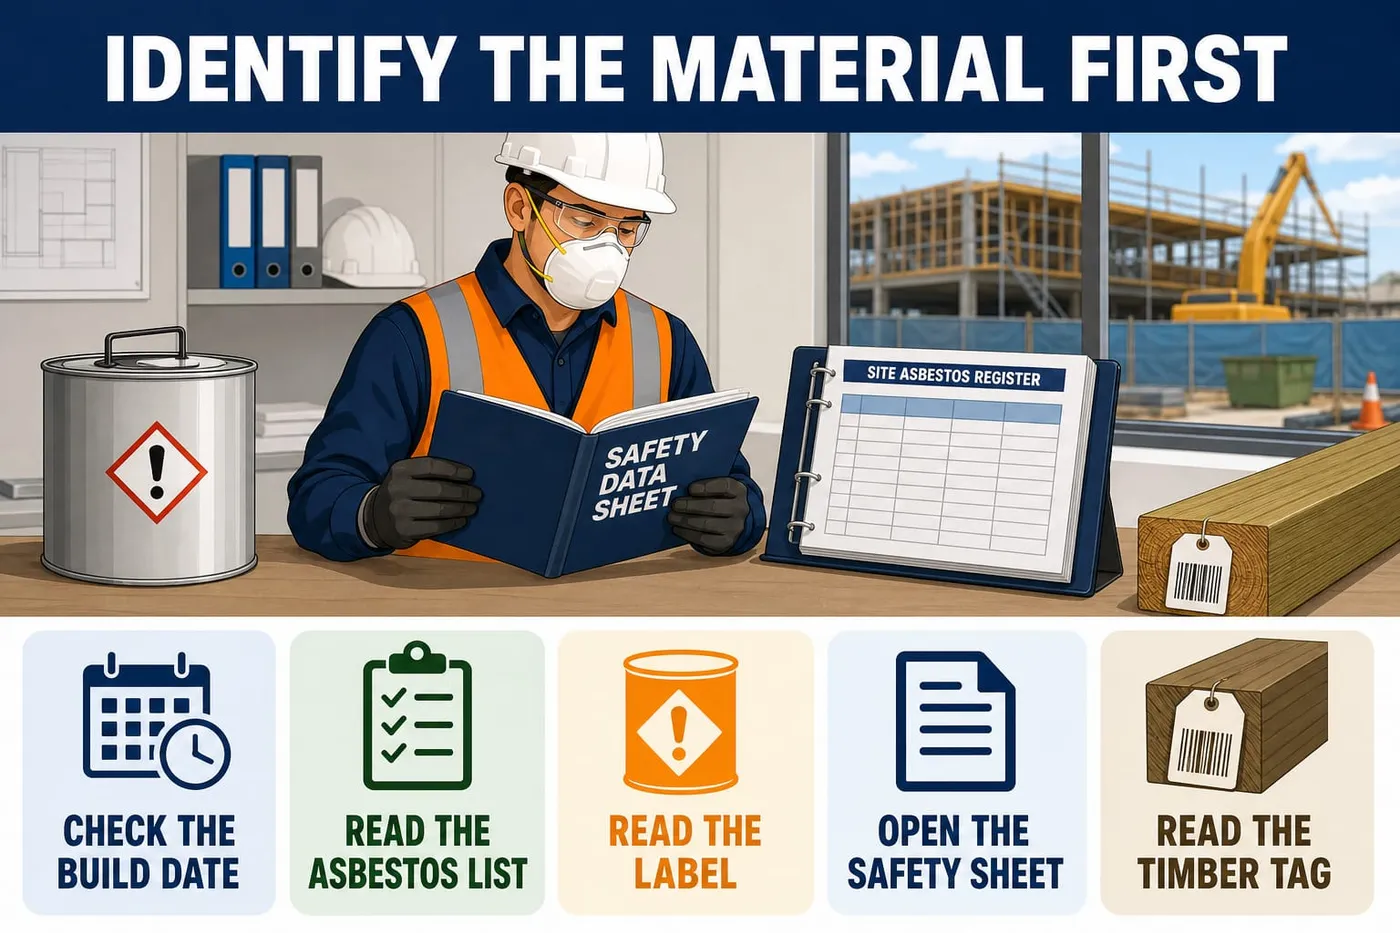
Before you touch anything — identify the material
Done right when
- You can state the year and whether it is before 2004.
- You can name each location in your work area the register flags.
- You can say the product name, the signal word and what the pictogram warns about.
- You have the correct sheet for the exact product in front of you.
- You can name the PPE required and the first aid for eye contact.
Check the build or renovation date of the area you are working in.
The Riverbend classroom block was built in 1974, so asbestos is presumed.
Why: Anything built or renovated before 2004 may contain asbestos; before 1990 very likely does.
If: nobody can tell you the date, treat the building as pre-2004 and ask the supervisor.
Check You can state the year and whether it is before 2004.
Read the asbestos register in the site office for your work area.
The register lists where asbestos is, or is presumed to be, in the building.
If: the register is silent about a material you find, presume it is asbestos.
Check You can name each location in your work area the register flags.
Read the label on every chemical container before you pick it up.
Warning: Never use a product from an unlabelled container, and never decant into a drink bottle.
Look for the product name, the signal word and the red-bordered GHS pictogram.
If: the container is unlabelled, do not use it and tell the supervisor.
Check You can say the product name, the signal word and what the pictogram warns about.
Open the safety data sheet (SDS) for that product in the site SDS folder.
The SDS folder is in the site office, with a QR code at the chemical store.
If: there is no sheet for the product, do not open it; ask the supervisor.
Check You have the correct sheet for the exact product in front of you.
Read SDS sections 2, 4, 7 and 8 in that order.
Section 2 hazards, 4 first aid, 7 handling and storage, 8 exposure controls and PPE.
Why: Those four sections tell you what it does to you and how to work with it safely.
Check You can name the PPE required and the first aid for eye contact.
Check the issue date on the SDS.
An SDS is reviewed at least every 5 years.
If: the sheet is out of date, ask the supervisor for the current one before you start.
Check The sheet is dated within the last 5 years.
Read the end tag or stamp on any timber before you cut it.
Warning: Never judge treated timber by colour — treat any timber you cannot identify as treated.
The tag shows the preservative and the hazard class, H1 to H6.
Check You can state the H class for each piece.
Activity: Label and pictogram sorting at the bench
Practical, about 30 minutes
Use with the page: Before you touch anything — identify the material. You get eight product containers used on the Riverbend job. Reading a label fast and correctly is the first thing a tradesperson does with any product. It takes about ten seconds once you know what to look for.
- Put on safety glasses and gloves before you touch any container.
- Lay the eight containers out on the bench so every label faces you.
- Write down the product name and the signal word for each one — "Danger" means the more serious hazard, "Warning" the lesser.
- Sketch or name the GHS pictogram on each label — the red-bordered diamond showing flame, corrosion, health hazard or skull and crossbones.
- Sort the containers into two groups: ones you could use under direction today, and ones you would stop and ask the supervisor about.
- Explain to your partner why you put the two-pack epoxy where you did.
Activity: Reading an SDS before you open the tin
Practical, about 25 minutes
Use with the page: Before you touch anything — identify the material. You are about to use a solvent-based adhesive in Classroom 3. Before the lid comes off, you read four sections of the safety data sheet. This is the habit that stops burns, poisonings and ruined lungs.
- Find the solvent-based adhesive in the site SDS folder on the bench.
- Read section 2 (hazards) and write down in your own words what this product can do to you.
- Read section 4 (first aid) and write down what you do if it gets in your eyes.
- Read section 7 (handling and storage) and write down where this product is stored on site.
- Read section 8 (exposure controls and PPE) and list every item of PPE it calls for.
- Check the issue date on the front page; if it is more than 5 years old, write "ask supervisor for current SDS" on your sheet.
Activity: Treated timber identification and disposal sort
Practical, about 30 minutes
Use with the page: Before you touch anything — identify the material. The external ramp at Riverbend is built in treated pine. You will be cutting it and you will be cleaning up after it. Getting the sort wrong means treated sawdust goes into green waste, which is illegal and poisons soil.
- Collect the box of timber offcuts and lay them out with the end tags facing up.
- Read each end tag and write down the preservative and the hazard class (H1 to H6).
- Separate the offcuts into treated and untreated piles, using the tag or stamp only — never the colour.
- Put any offcut you cannot identify into the treated pile and say out loud why.
- Point to the correct bin on the site waste plan poster for each pile, including the lidded labelled bin for treated offcuts and sawdust.
- Describe to your partner what you do to a freshly cut end of treated timber before it goes back in the ramp.
Quick check
1. You can tell treated pine from untreated pine by its green colour.
- A. True
- B. False
Show the answer
B. Colour fades, and some treatments aren't green at all. Check the end tag or H-class stamp. Treat any timber you can't identify as treated.
Performance criteria: 2.1, 2.4
Learning content on this page was drafted with AI assistance by VET Creator and must be reviewed by a qualified trainer before use with students.
Element 2 — Identify hazardous materials and other hazards on work sites
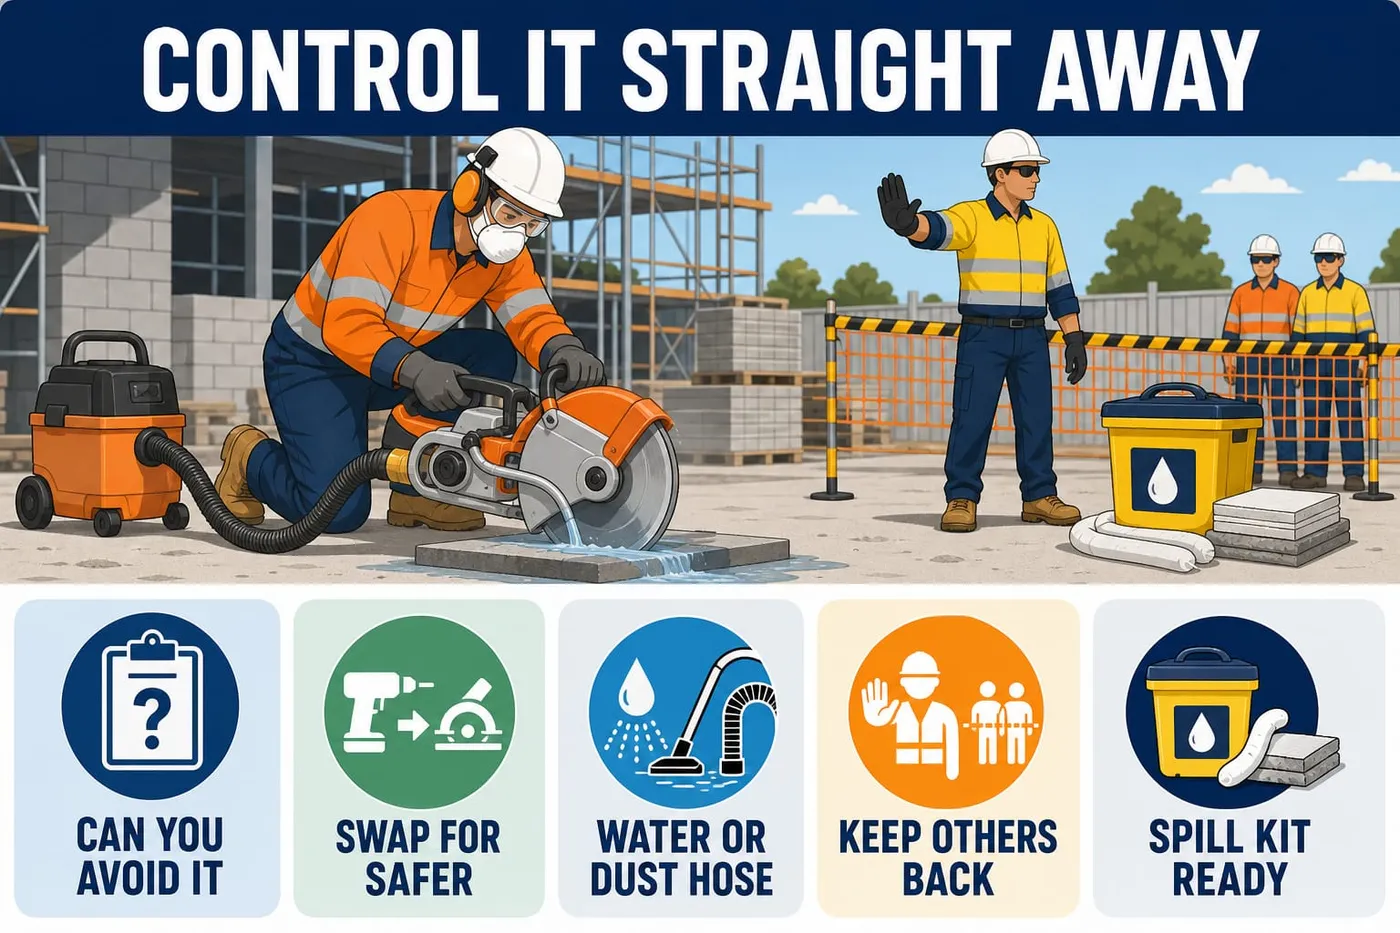
Control the risk immediately
Done right when
- You can name the tier you used — elimination.
- The substitute does the same job with a lower hazard on its label.
- No visible dust cloud leaves the cut.
- Nobody without the right PPE is inside the zone.
- P2 seals on a clean-shaven face: cover it, breathe in, it pulls onto your face with no edge leak.
Decide whether the task can be done without the hazardous material at all.
Order the ramp decking pre-cut so nobody cuts treated timber on site.
Why: Eliminating the hazard is the most effective control; everything below it is weaker.
Check You can name the tier you used — elimination.
Swap the product for a safer one if you cannot eliminate it.
A water-based sealer instead of a solvent-based one.
If: no safer product will do the job, move to the next tier.
Check The substitute does the same job with a lower hazard on its label.
Fit water suppression or on-tool dust extraction before cutting concrete, brick or tile.
Warning: Never dry-cut concrete or masonry without water or extraction.
The corded circular saw on this job runs on-tool extraction into the H-class vacuum.
Why: Respirable crystalline silica (RCS) is the fine dust from cutting concrete or stone; breathing it causes silicosis.
Check No visible dust cloud leaves the cut.
Keep other people out of the dust or fume area.
Cones and tape at the edge of the work zone, work upwind where you can.
Why: Isolation protects everyone, not just the person holding the tool.
Check Nobody without the right PPE is inside the zone.
Put the PPE on that the SDS and the task call for.
Warning: PPE is the last line of defence, never the only control.
P2 respirator for dust, chemical-rated gloves and glasses for liquids.
If: the PPE is damaged, get a replacement; never patch it.
Check P2 seals on a clean-shaven face: cover it, breathe in, it pulls onto your face with no edge leak.
Place the spill kit within reach before you decant or pour any chemical.
Booms, pads, bags and a scoop, kept near the chemical store.
Why: A spill spreads in seconds; walking to fetch the kit is time you do not have.
Check The kit is at the task, not in the shed.
Contain a spill with booms first, then soak it up with pads.
Warning: Nothing but clean water goes into stormwater; it runs straight to creeks and the sea.
Ring the spill from the downhill side before it reaches a drain.
If: the spill is bigger than the kit can hold, stop, keep people clear and call the supervisor.
Check The spill stops spreading and no liquid reaches the stormwater grate.
Quick check
1. You're cutting a concrete path with a demo saw outside. What's the right set-up?
- A. Water or on-tool dust extraction, plus a P2 mask
- B. Cut dry and stand upwind
- C. Hose the dust down afterwards
- D. A P2 mask on its own
Show the answer
A. Dust must be controlled at the blade with water or extraction — a mask is the last line of defence, never the only control.
Performance criteria: 2.1, 2.2
Learning content on this page was drafted with AI assistance by VET Creator and must be reviewed by a qualified trainer before use with students.
Element 2 — Identify hazardous materials and other hazards on work sites
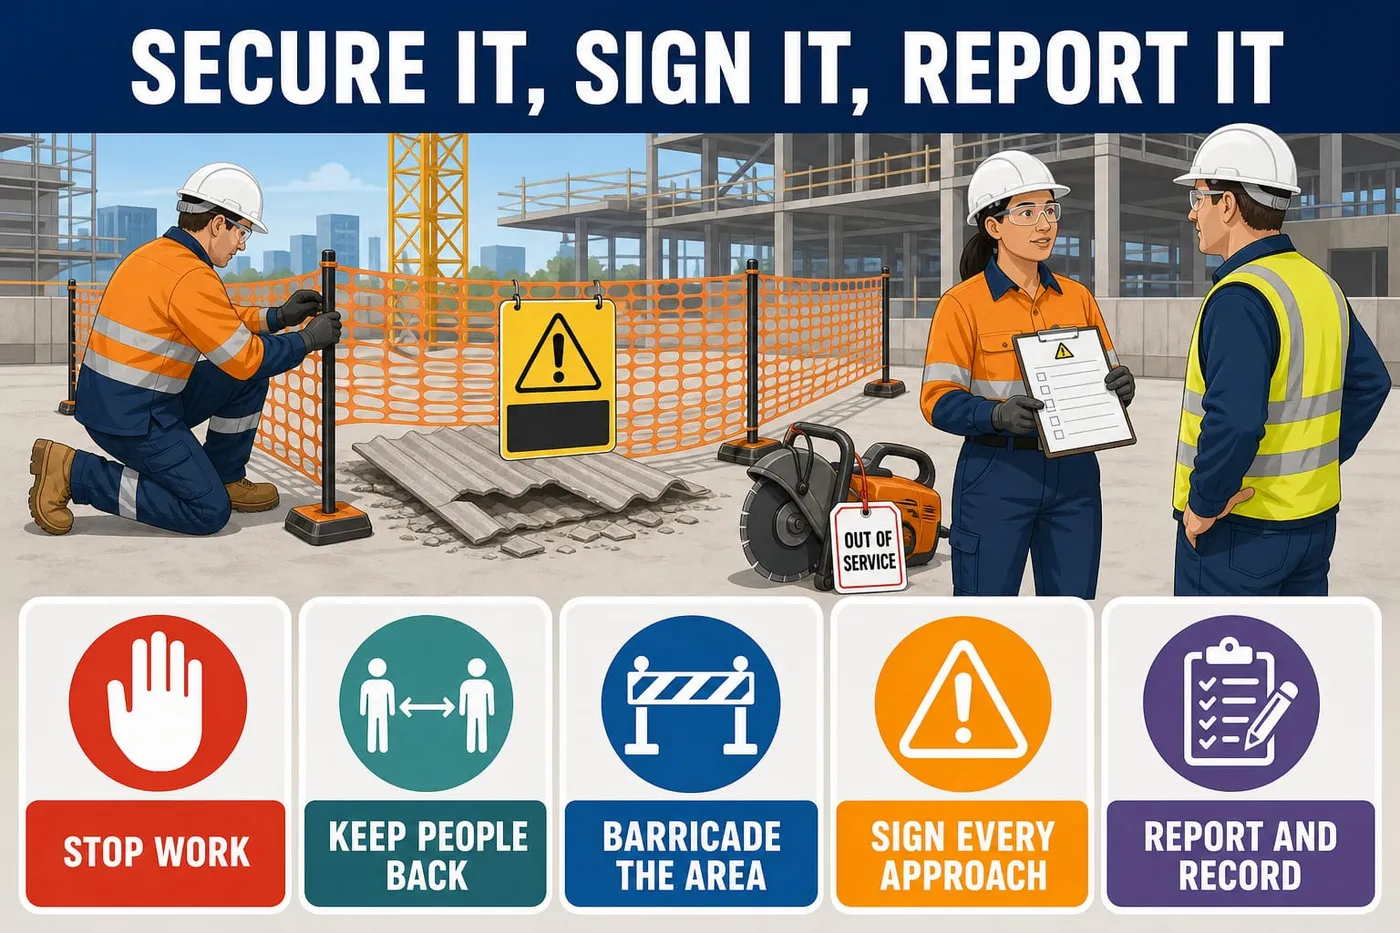
Secure and sign it the moment you find it
Done right when
- No further disturbance of the material.
- Nobody walks within reach of it.
- The barrier closes every side a person could approach from.
- A sign is readable from every direction a person can walk in from.
- The tag is legible and nobody can use the item without seeing it.
Stop work in that spot as soon as you find a hazardous material.
Warning: Never cut, drill, sand, break or dry-sweep material you suspect is asbestos.
Put the tool down; do not take one more cut.
Check No further disturbance of the material.
Keep people back from the material.
Stand between the material and the walkway until the barricade is up.
Check Nobody walks within reach of it.
Barricade the area with the right barrier for the risk.
Mesh fence panels for an area people must not enter; hazard tape only where a warning is enough.
Why: Tape warns but does not stop anyone, so it is a weaker control than a fence.
Check The barrier closes every side a person could approach from.
Fix the correct sign to each approach side of the barricade.
"Caution — Asbestos" for suspect ACM, "Danger — Do Not Enter" for an exclusion zone.
Check A sign is readable from every direction a person can walk in from.
Attach an out-of-service tag to any tool or plant involved.
Write the date, your name and the reason on the tag.
Check The tag is legible and nobody can use the item without seeing it.
Report it to Sam Rivera, the site supervisor, or another designated person straight away.
Tell them in person or by radio; do not wait for the end of the shift.
If: the supervisor is not contactable, tell the leading hand Jess Tan.
Check The supervisor repeats back the location and what you found.
Fill in a Hazard Report form at the time, not later.
Warning: Fix a wrong entry with one line through it, the correct words beside it, and your initials — never rub out.
Date, time, exact location, what it is, who could be harmed, what you did immediately, who you told.
Check Every field is completed and the form is handed over the same shift.
Keep working to the interim control until the supervisor says it is fixed.
The barricade and signs stay up.
Check The barricade is still standing and signed at the end of the shift.
Activity: Find it, secure it, report it — staged hazard hunt in the yard
Practical, about 45 minutes
Use with the page: Secure and sign it the moment you find it. Your teacher has staged six hazardous materials in the yard, all props. You work in pairs. The thing being practised is speed. You secure what you find before you go and tell anyone. The next person walking past does not know it is there.
- Put on your full site PPE before entering the yard area.
- Walk the area with your partner and find the six staged hazardous materials.
- Barricade or tape off each one immediately with the kit at the gate, before you move on.
- Place the correct sign on each one from the sign box: "Danger — Do Not Enter", "Caution — Asbestos" or "Authorised Personnel Only".
- Fill in one Hazard Report form for the material you judge most dangerous. Write the location and what the material is. Write who could be harmed and what you did straight away.
- Report it verbally to your teacher, who is playing the supervisor on this job, and hand the form over.
Performance criteria: 1.1, 1.2, 1.4, 2.2, 2.3, 2.4, 3.3, 4.3
Learning content on this page was drafted with AI assistance by VET Creator and must be reviewed by a qualified trainer before use with students.
Element 2 — Identify hazardous materials and other hazards on work sites
Other site hazards to identify in the same walk
Done right when
- The plans for 42 Bridge Road are printed and on site.
- You can point to every line over your work area and say where the zone edge is.
- Everyone is outside 10 m and nobody is approaching.
- You can state the depth and whether the edge is barricaded.
- Every penetration is covered and fixed down, or barricaded and signed.
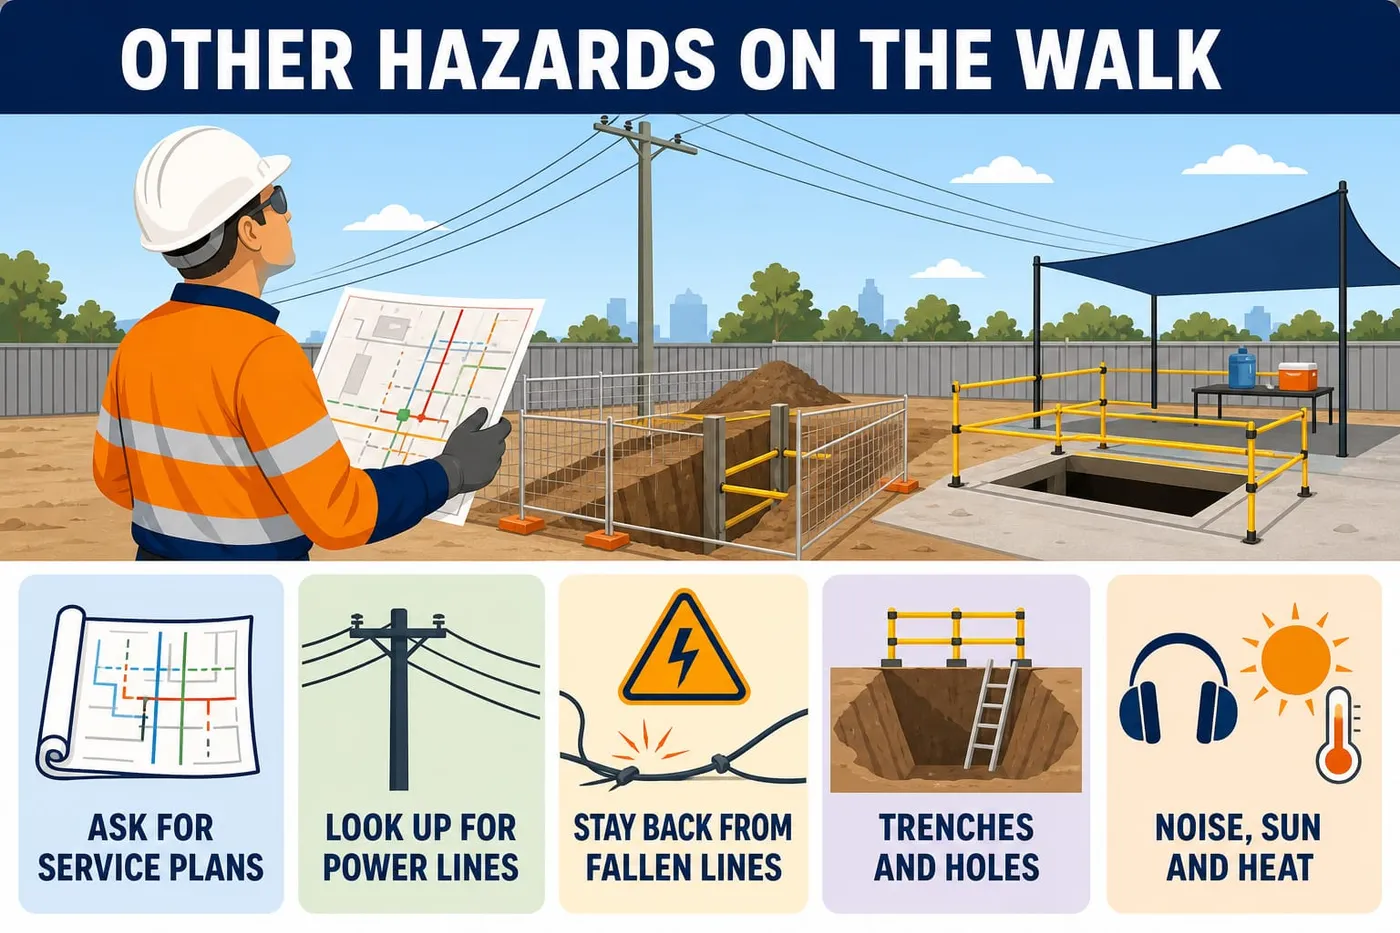
Request underground and overhead service plans from Before You Dig Australia.
Warning: Plans are a guide only — services can sit away from where they are drawn.
The free service at byda.com.au, before anything goes into the ground.
If: a service is marked near your work, do not dig until the supervisor says how it will be avoided.
Check The plans for 42 Bridge Road are printed and on site.
Look up for overhead power lines before any staff, picket or plant goes up.
Warning: Never measure a line's height with a tape or staff; judge it from a safe distance and ask TasNetworks.
In Tasmania the No Go Zone is at least 3 m from overhead lines for people, tools and plant.
If: you cannot stay outside the zone, stop; only TasNetworks' written authorisation allows entry.
Check You can point to every line over your work area and say where the zone edge is.
Stay at least 10 m from any fallen power line and anything it touches.
Warning: Never touch a person who is in contact with an electrical source.
Assume it is live, even if it is not arcing.
If: Report it to TasNetworks on 132 004; call 000 if someone is hurt or there is a fire.
Check Everyone is outside 10 m and nobody is approaching.
Identify any trench, pit or shaft in your work area.
Warning: Never enter a confined space — it needs a permit and training you do not have.
A trench or shaft deeper than 1.5 m, or any enclosed space like a tank or pit, is a serious hazard.
If: a trench or pit is open and unbarricaded, barricade it and report it.
Check You can state the depth and whether the edge is barricaded.
Identify falls and open penetrations in floors and the ramp.
Warning: Never step onto a cover that is not fixed down and marked.
A missing deck board, an open service hole, an unguarded edge.
Check Every penetration is covered and fixed down, or barricaded and signed.
Check the noise level in the work area.
If you have to raise your voice to be heard a metre away, the noise needs controlling.
Why: Noise damage builds up and never comes back.
Check Hearing protection is on before the saw starts.
Check the sun and heat exposure for outside work.
Hat brim or flap, long sleeves, broad-spectrum SPF 50+ sunscreen, water and shade for breaks.
Check Sunscreen applied and reapplied through the shift as the label directs.
Activity: Hazardous materials quick quiz
Written questions, about 25 minutes
Use with the page: Secure and sign it the moment you find it. Eight questions to check what has stuck. Answer each one on your own first, then compare with your partner before you open the answer.
- Work through the questions on your own and write your answer down before you open each card.
- Compare your answers with your partner and talk through any you disagreed on.
1. You are stripping ceiling linings in the 1974 classroom block. You pull down a grey sheet you cannot identify and it is not in the asbestos register. What do you do?
- A. Keep working — if it is not in the register it is not asbestos
- B. Stop, leave it alone, keep people away, barricade and sign it, and tell Sam Rivera straight away
- C. Wet it down and keep pulling linings so the dust stays low
- D. Snap a corner off and take it to the office to show someone
2. You need to cut 20 concrete pavers for the slab patch. What is the best way to control the silica dust?
- A. Wear a P2 respirator and cut as normal
- B. Cut outside so the wind takes the dust away
- C. Order pavers pre-cut to size, or cut with water suppression or on-tool dust extraction, and wear a P2 as well
- D. Hold your breath while cutting and step away between cuts
3. Kofi hands you a drink bottle half full of a clear liquid and says it is turps for cleaning brushes. What is the problem?
- A. Nothing, as long as you do not drink it
- B. Turps should be used outdoors only
- C. The bottle is not labelled with the product name and hazard information, so anyone could mistake it for a drink
- D. It should be in a metal container
4. Which statement about asbestos in Australian buildings is correct?
- A. Only buildings before 1950 contain it
- B. Using and installing asbestos was banned from 31 December 2003. A building built or renovated before 2004 may contain it. One built before 1990 very likely does
- C. It was banned in 1985 so anything after that is safe
- D. Only commercial buildings ever contained it
5. You tip a 10 litre drum of concrete cleaner over near the service road. What is your first move?
- A. Hose it towards the stormwater drain to dilute it
- B. Stop the spill spreading with the spill kit booms, keep people back, and tell the supervisor
- C. Leave it to dry out in the sun
- D. Sweep it up with a broom and put it in the general waste bin
6. Which of these is friable asbestos?
- A. A sheet of asbestos cement cladding screwed to a wall
- B. Crumbly pipe lagging that falls apart in your hand
- C. Vinyl floor tiles glued down to a slab
- D. An intact asbestos cement eaves lining
7. What is the rule for engineered stone benchtops in Australia now?
- A. All work with engineered stone is banned, including touching one already fitted
- B. Making, supplying, cutting, processing and installing it has been banned since 1 July 2024. Repair or removal of stone already installed is still allowed. That work must be notified and controlled
- C. It is only banned in Tasmania
- D. There is no ban, you just need a P2 respirator
8. Before a star picket goes into the ground at the edge of the school yard, what must happen first?
9. You see a power line down across the service road after a storm. What do you do?
Performance criteria: 1.1
Learning content on this page was drafted with AI assistance by VET Creator and must be reviewed by a qualified trainer before use with students.
Element 2 — Identify hazardous materials and other hazards on work sites
Check your understanding
Check your understanding
1. If a material isn't listed in the site asbestos register, it's safe to assume it has no asbestos in it.
- A. True
- B. False
Show the answer
B. A register can be incomplete — if it's silent about a material you find, presume it's asbestos, leave it alone and tell Sam Rivera.
2. You find a 5 litre drum of clear liquid in the shed with no label. What do you do?
- A. Tip a bit out and test it on scrap
- B. Use it, it's probably just thinners
- C. Smell it to work out what it is
- D. Leave it, don't use it, tell the supervisor
Show the answer
D. You can't read an SDS for a product you can't name — unlabelled means don't use it and report it to the supervisor.
Performance criteria: 2.1, 2.2, 2.3, 2.4
Learning content on this page was drafted with AI assistance by VET Creator and must be reviewed by a qualified trainer before use with students.
Element 3 — Plan and prepare for safe work practices
Plan and prepare for safe work practices
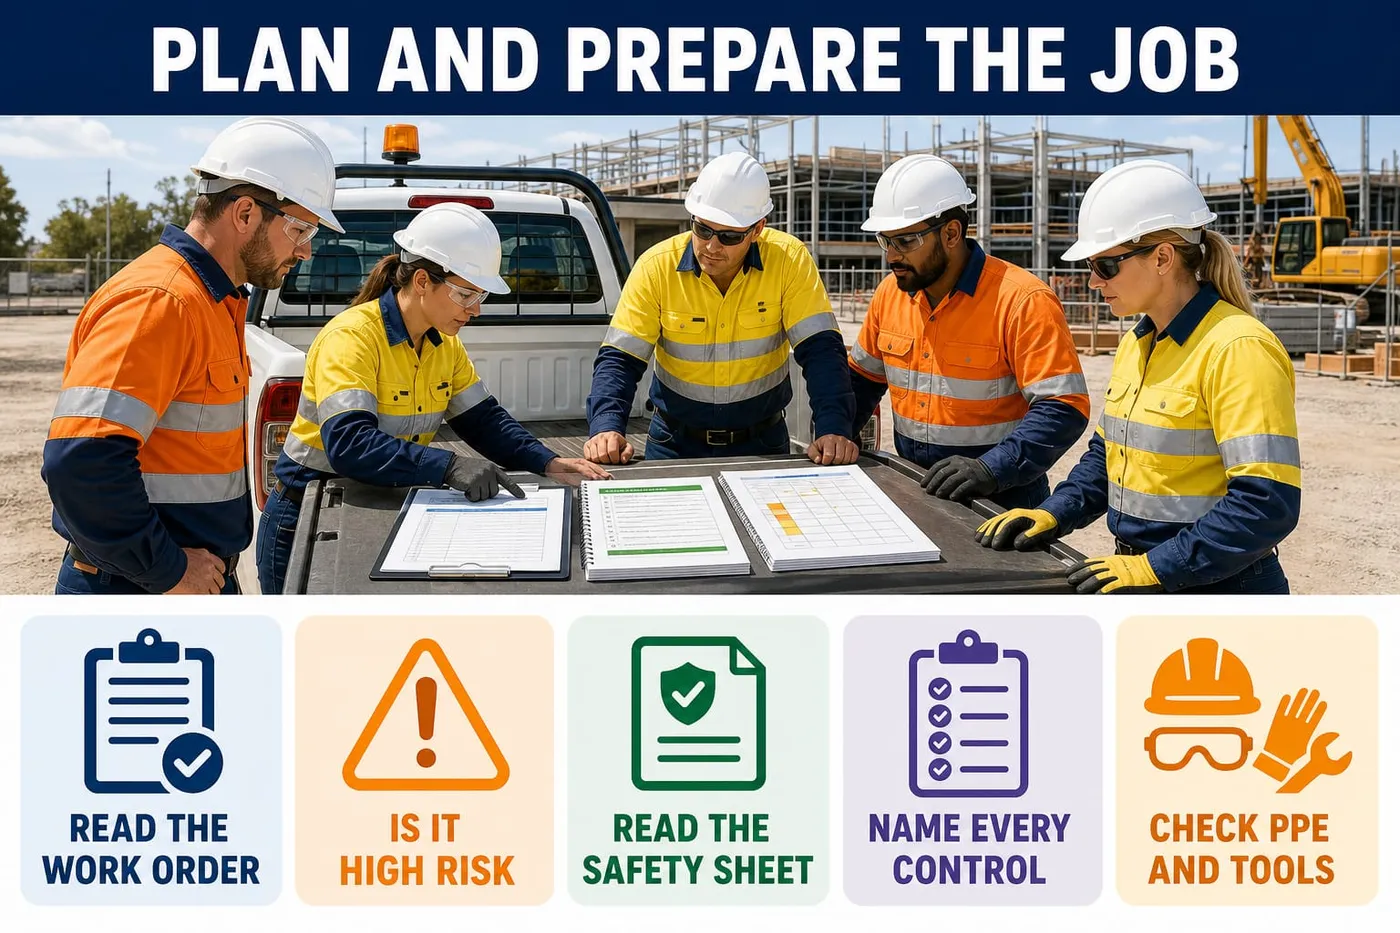
When this element is done properly, the task is ready to start before anyone picks up a tool. The work order has been read. The job safety analysis (JSA) or safe work method statement (SWMS) is signed. The right personal protective equipment (PPE) is on and fitted. Checked tools are laid out, and the area is fenced and signed.
Most injuries on site are set up before anyone picks up a tool. The planning you do in the first twenty minutes decides whether the job is safe.
On our example job at Riverbend Primary School, Glenorchy, you work under direction in a crew of four. You read the work order, ask questions at the 7:00 pre-start meeting, and work out whether the task is high risk construction work. Then you choose and fit your PPE. PPE means personal protective equipment, the gear worn on the body. You also pick and check your tools. Last, you fence and sign the area.
Know this. A SWMS (safe work method statement) is required by law before high risk construction work starts. If no trigger applies, the site still manages the risk its own way, usually with a JSA (job safety analysis). If you are not sure, ask the supervisor — in class, your teacher plays the supervisor.
Key points
- Read the work order first; if it is unclear, wrong or unsafe, ask the supervisor before you start.
- Run the task against every high risk construction work type — there are 18 — and get the SWMS if any one applies.
- Read the safety data sheet (SDS) before the lid comes off: hazards, first aid, handling, then PPE.
- Write every control on the JSA with its tier named, and never put PPE down as the only control.
- Check and fit each piece of PPE before each use; damaged PPE is replaced, not patched.
- Check the test tag date, lead and guard on any plug-in tool; faulty gear is tagged out and reported.
- Fence and sign the exclusion zone before work starts, with a sign on every side people can approach from.
- Sign on to the SWMS or JSA, then stop work and tell the supervisor if the job, site or crew changes.
What you need
- Work order and daily Pre-start Record for the Riverbend Primary School refurbishment
- JSA pad and the SWMS folder with sign-on sheets
- Safety data sheet (SDS) folder from the site office (concrete patch compound and timber sealer sheets)
- Safety helmet with chin strap, clear close-fitting safety glasses, outdoor-marked tinted glasses
- Hi-vis long-sleeve shirt, long trousers, lace-up safety boots, riggers gloves
- Class 5 earmuffs and foam earplugs, P2 disposable respirators, SPF 50+ sunscreen, hard hat brim/flap
- Cordless circular saw and drill with charger, 10 m extension lead, portable RCD board
- Temporary mesh fence panels 2.4 m with feet and clamps, witches hats, red and white hazard tape
- 2 m star pickets with safety caps and a picket driver
- A-frame stands and laminated signs: Danger — Do Not Enter, Authorised Personnel Only, Hearing Protection Must Be Worn, Plant Operating — Keep Clear
- Tape measure, clipboard, pen, and out-of-service tags
Performance criteria: 3.1, 3.2, 3.3, 3.4
Learning content on this page was drafted with AI assistance by VET Creator and must be reviewed by a qualified trainer before use with students.
Element 3 — Plan and prepare for safe work practices
Read the work order and plan the job
Done right when
- You can say the task, the location and the finish time without looking again.
- Every hazard you saw is written on your notepad or the JSA.
- Breaks are shown on the clock, not hidden inside the allowance.
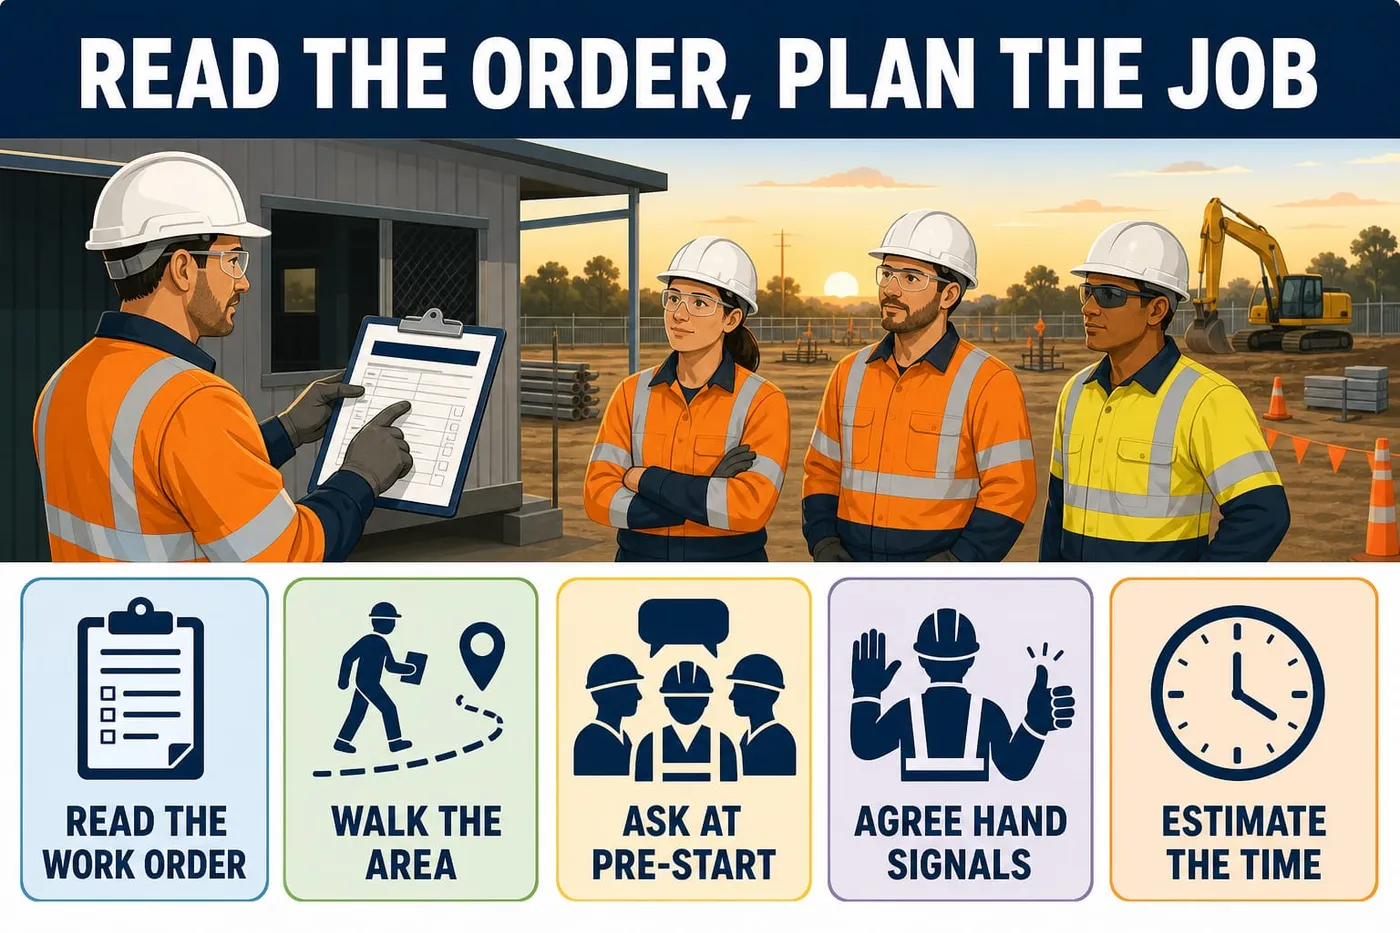
Read the work order for your task.
A work order is the written instruction saying what, where, by when and to what standard.
If: anything on it is unclear, wrong or unsafe, ask the supervisor before you start.
Check You can say the task, the location and the finish time without looking again.
Walk the work area before you touch anything.
Look up, down and around for plant, leads, openings, chemicals and suspect linings.
Check Every hazard you saw is written on your notepad or the JSA.
Ask your questions at the 7:00 pre-start meeting.
Pre-start is the start-of-shift meeting where tasks, hazards and who does what are agreed.
Why: Organising the task with the crew stops two people working into each other.
Agree the crew's hand signals at the pre-start.
Warning: Signals to a crane or plant moving a load are given only by a licensed dogger or rigger.
This crew uses flat hand up for stop, arm swept in for come forward, thumb up for all clear, both arms crossed for emergency.
Write the time estimate for the task on the pre-start record.
Add the step times, then add the 15% allowance once to the total only.
Check Breaks are shown on the clock, not hidden inside the allowance.
Activity: Worked example: time estimate for the ramp decking repair
Written, about 20 minutes
Use with the page: Read the work order and plan the job. A work order gives you a finish time, so you need to know if the job fits the shift. You add the step times, add one allowance for set-up and moving, then put the breaks on the clock. The 15% allowance is the figure this job's supervisor set.
- List the productive time for each step: set out and measure 25 min, strip damaged decking 60 min, and cut new boards 45 min. Then fix boards 50 min and seal cut ends 20 min.
- Add them up: 25 + 60 + 45 + 50 + 20 = 200 min productive time.
- Work out the allowance once, on the total only: 200 × 0.15 = 30 min, covering set-up, moving between areas and waiting for plant.
- Add it on: 200 + 30 = 230 min, which is 3 hours 50 minutes.
- Put it on the clock from 7:15, after the pre-start. 7:15 + 230 min = 11:05. Add the 9:30 to 9:45 smoko separately: 11:05 + 15 min = finish 11:20.
- Check it: 7:15 to 11:20 is 245 min, less the 15 min break = 230 min, which matches the total above.
Performance criteria: 3.2
Learning content on this page was drafted with AI assistance by VET Creator and must be reviewed by a qualified trainer before use with students.
Element 3 — Plan and prepare for safe work practices
Check whether it is high risk construction work
Done right when
- You have checked the whole list, not stopped at the first one.
- One row per job step, in the order the work is done.
- PPE is never the only control where a higher tier is reasonably practicable.
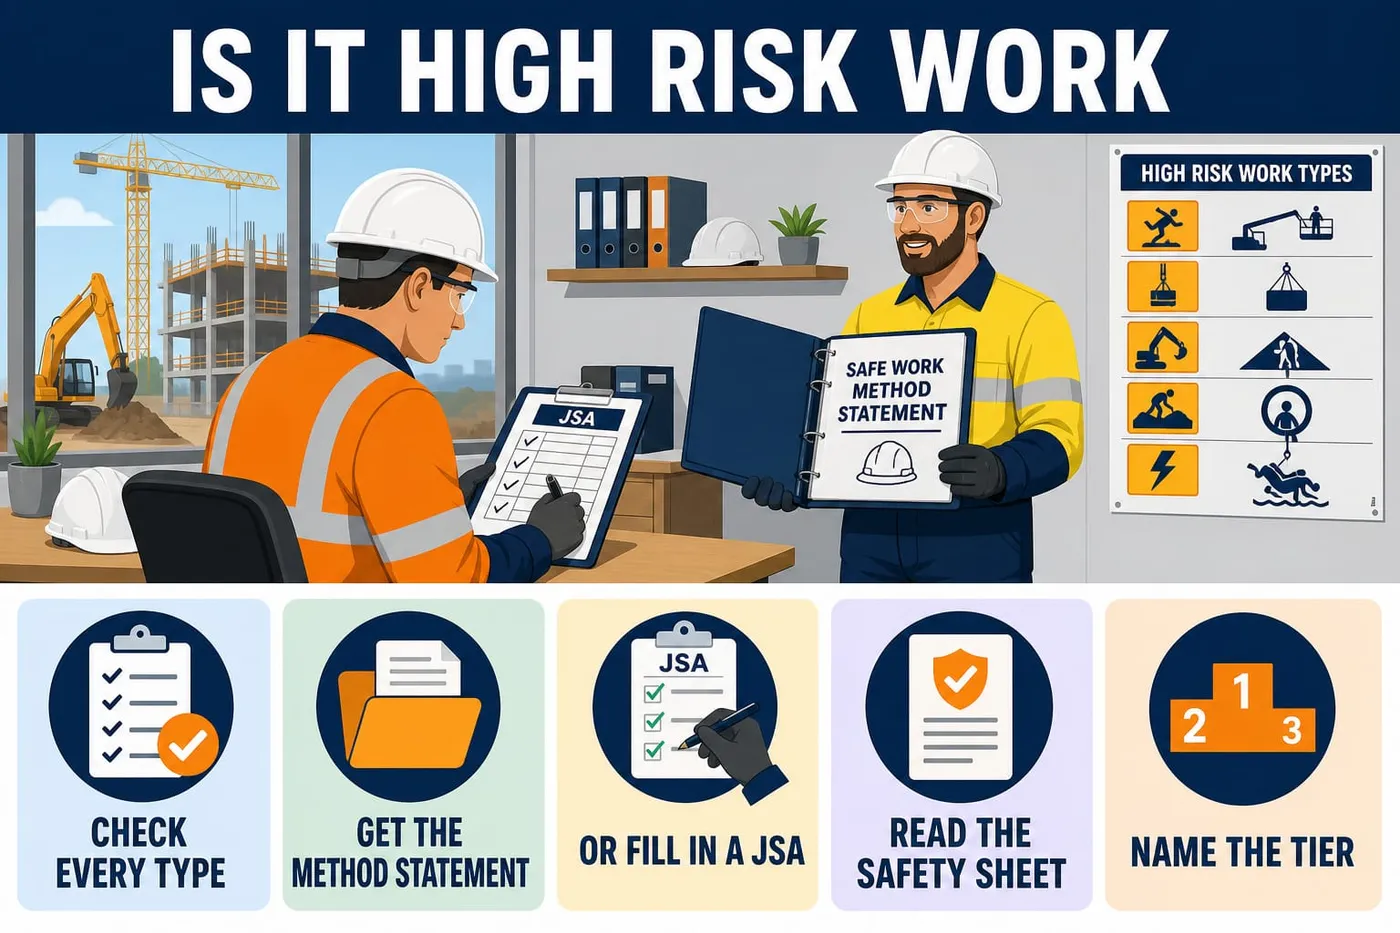
Run the task against every high risk construction work type.
Common ones here: a fall over 2 m, a trench deeper than 1.5 m, or a road in use. Also watch for any movement of powered mobile plant, energised electrical work and disturbing asbestos. There are 18 types in all.
If: you are unsure whether a type applies, ask the supervisor.
Check You have checked the whole list, not stopped at the first one.
Collect the SWMS from the SWMS folder when a type applies.
Warning: High risk construction work must not start before the SWMS is prepared.
A SWMS lists the job steps, hazards, risks, controls, who is responsible and how controls are checked.
Fill in a JSA on the JSA pad when no type applies.
A JSA is the site's own hazard and control sheet; using it is the site's process, not a legal requirement.
Check One row per job step, in the order the work is done.
Read the safety data sheet for every chemical in the task.
Read section 2 hazards, section 4 first aid, section 7 handling and storage, section 8 PPE.
If: the sheet is more than 5 years old, ask the supervisor for the current one.
Write each control on the sheet with its tier in brackets.
Example: "mesh fence panels around the penetration (isolation)".
Check PPE is never the only control where a higher tier is reasonably practicable.
Activity: Fill in a JSA for the Classroom 3 strip-out
Practical, about 50 minutes
Use with the page: Check whether it is high risk construction work. You are stripping wall and ceiling linings in Classroom 3 of the 1974 block, under direction. In small teams you run the high risk check, then fill in a JSA for the task and have the supervisor (your teacher) sign it. You hand in the completed JSA sheet. Header to copy: Site: Riverbend Primary School refurbishment, 42 Bridge Road, Glenorchy TAS. Principal contractor: Derwent Build Pty Ltd. Task: internal strip-out, Classroom 3. Date: (today). Supervisor: Sam Rivera. Prepared by: (your name).
- Run the task against the high risk construction work types out loud in your team and write down any trigger you find.
- Decide, and write one sentence: 'A SWMS is / is not required by law because...' — if you are unsure, ask the supervisor.
- Fill in the header on the JSA sheet using the details above.
- Write one row per job step, in work order. Use these columns: Step, Hazard, Risk rating before controls, Control measure with the tier in brackets, Who is responsible, and How it is monitored.
- Copy this sample row to get started: 'Remove ceiling linings | Suspect asbestos in 1974 lining | High | Stop and check the Asbestos Register before any lining is touched (elimination); keep others out behind hazard tape (isolation) | Kofi Mensah | Supervisor checks before each shift'.
- Add a second rating column after your controls, showing the risk left over. Get the supervisor to sign the sheet before you hand it in.
Quick check
1. The safety data sheet in the folder is dated 8 years ago. What do you do?
- A. Use it, the product hasn't changed
- B. Work from the label on the drum
- C. Cross out the date and keep going
- D. Ask the supervisor for the current sheet
Show the answer
D. A safety data sheet is reviewed at least every 5 years. An older one may have the wrong first aid or PPE. Ask the supervisor for the current one.
Performance criteria: 1.3, 3.4
Learning content on this page was drafted with AI assistance by VET Creator and must be reviewed by a qualified trainer before use with students.
Element 3 — Plan and prepare for safe work practices
Fit and check your PPE
Done right when
- Every item on the list is in your hands before you start.
- It does not rock or slide when you nod.
- Your own voice sounds muffled and nothing sits under the cushion.
- No air leaks at the edges; a clean-shaven face is needed to seal.
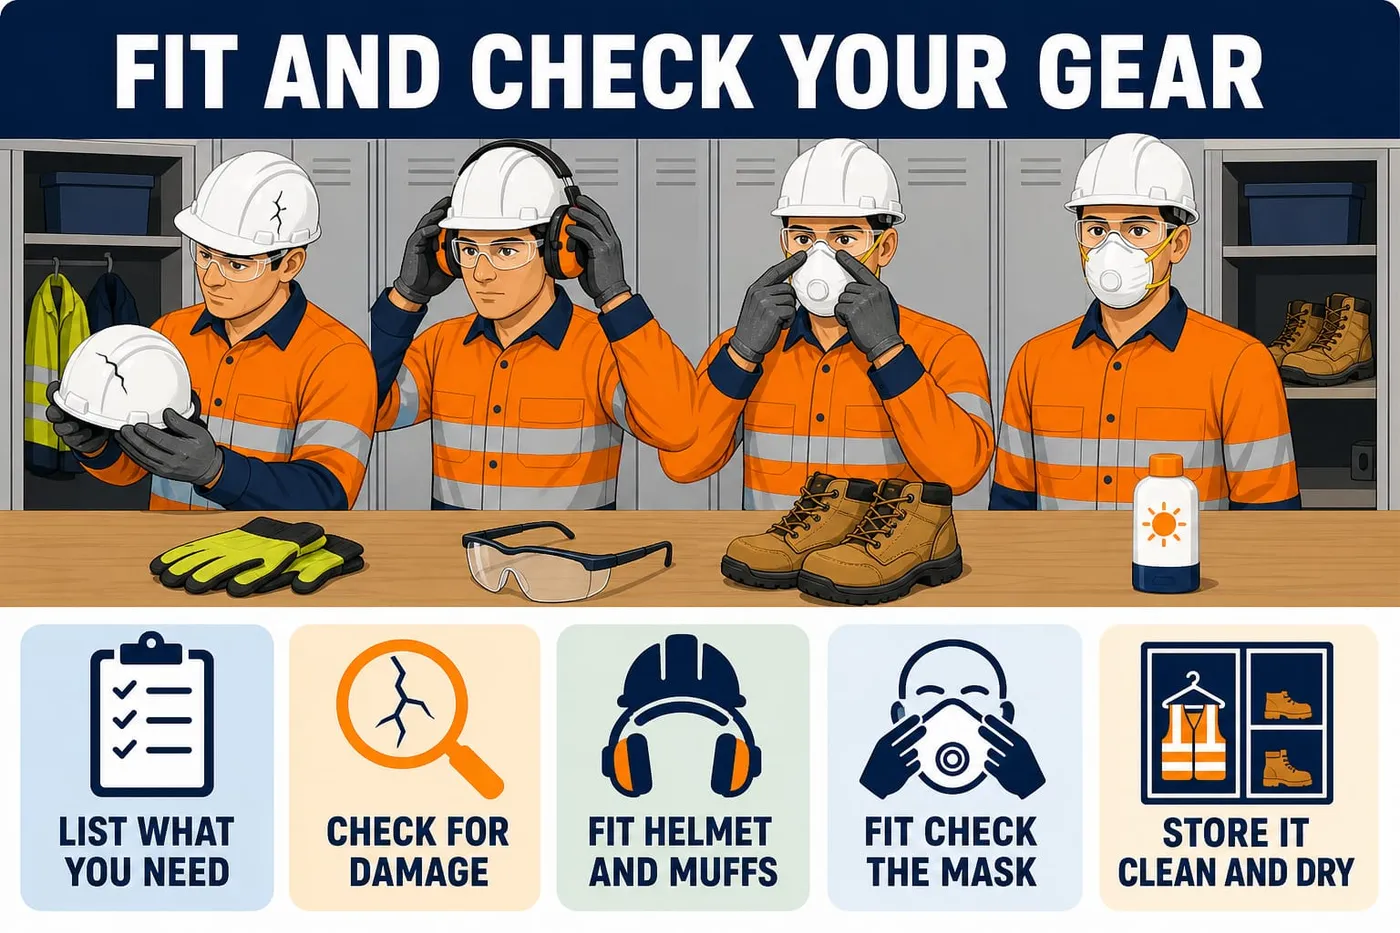
List the PPE the SWMS, JSA and SDS call for.
Match it to the area: tinted outdoor-marked glasses and a brim outside, P2 and earmuffs for cutting.
Check Every item on the list is in your hands before you start.
Inspect each item for damage.
Warning: Damaged PPE is replaced through the site's issue process, never taped or patched.
Cracks in the helmet, scratches on the glasses, split earmuff cushions, torn hi-vis.
If: an item fails the check, swap it before work starts.
Fit the helmet level on your head.
Adjust the harness, brim forward, chin strap done up where there is wind or a fall risk.
Check It does not rock or slide when you nod.
Fit your hearing protection for noisy work.
Roll the plug, pull the ear up and back, hold 20 seconds; earmuff cushions seal on bare skin.
Check Your own voice sounds muffled and nothing sits under the cushion.
Fit check the P2 respirator.
Both straps on, cover the mask, breathe in; it should pull onto your face.
Check No air leaks at the edges; a clean-shaven face is needed to seal.
Apply SPF 50+ sunscreen for outside work.
Reapply through the shift as the label directs, and fit the hard hat brim or flap.
Why: Ultraviolet light burns skin and causes skin cancer, even on a cool Hobart day.
Store your PPE clean and dry at the end of the shift.
Wipe it, keep it out of the sun, put it in your kit bag or locker, not the ute tray.
Activity: PPE fit check and storage round-robin in the yard
Practical, about 45 minutes
Use with the page: Fit and check your PPE. PPE only works if it is undamaged, fitted right and put away clean. In this round-robin you check, fit and store each item you would wear on the Riverbend job. A partner then checks your fit. Work in pairs, in three teams. The teams rotate every 15 minutes. One team is with the teacher on fit checks. One team inspects the PPE box for damaged items. One team writes the PPE list for an outdoor ramp repair.
- Collect a helmet, clear glasses, earmuffs, earplugs, a P2 respirator, gloves and a hi-vis shirt.
- Inspect each item and put anything cracked, torn or dirty on the 'replace' tray.
- Fit the helmet so it sits level and does not rock when you nod; do up the chin strap.
- Roll an earplug, pull your ear up and back, insert it and hold 20 seconds; your own voice should sound muffled.
- Put the P2 on with both straps, cover it with your hands and breathe in; feel it pull onto your face with no edge leak.
- Wipe your glasses and earmuffs. Store them in your kit bag, out of the sun. Then list on paper the PPE you would add for outdoor work.
Performance criteria: 3.1
Learning content on this page was drafted with AI assistance by VET Creator and must be reviewed by a qualified trainer before use with students.
Element 3 — Plan and prepare for safe work practices
Select and check tools, equipment and materials
Done right when
- Each tool matches a step written on the JSA or SWMS.
- The lead runs off the ground, out of water and clear of traffic.
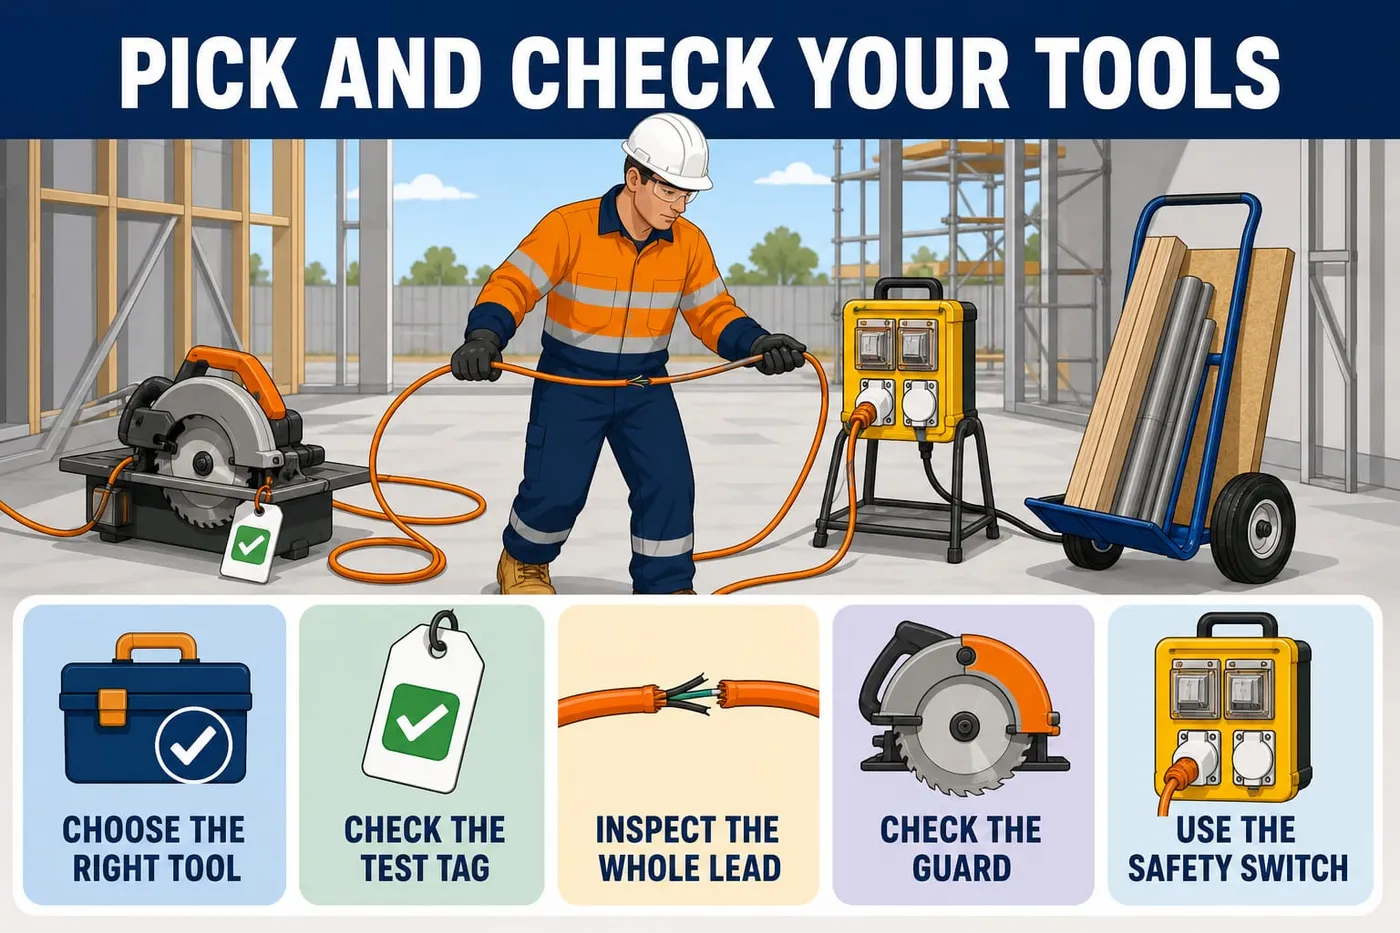
Choose tools that suit the task.
Dust-extracted saw for cutting, pinch bar for linings, trolley for carrying sheets.
Check Each tool matches a step written on the JSA or SWMS.
Read the test tag on every plug-in tool, lead and charger.
Warning: Battery tools have no tag of their own; the plug-in charger is the item that is tested and tagged.
The tag must be there, legible and dated within the last 3 months.
If: the tag is missing or out of date, do not use it — tag it out and report it.
Inspect every lead along its full length.
Look for cuts, kinks, taped repairs, exposed wires and a cracked plug.
If: a lead fails, tag it out of service and tell the supervisor straight away.
Check the guard is fitted and moves freely.
Warning: A guard is never removed, tied back or wedged open.
Let the spring-loaded guard snap shut on its own.
Plug the lead into the portable RCD board.
An RCD is the safety switch that cuts power fast if current leaks; press its test button.
Check The lead runs off the ground, out of water and clear of traffic.
Move materials with the two-wheel trolley.
Plan the lift, clear the path, get a team lift for long boards, turn with your feet.
Why: Changing the task beats relying on lifting posture alone.
Quick check
1. A cordless drill needs its own test tag before you can use it on site.
- A. True
- B. False
Show the answer
B. Battery tools have no test tag of their own. You check them by looking them over. The plug-in charger is the item that is tested and tagged every 3 months.
Performance criteria: 3.2, 4.2
Learning content on this page was drafted with AI assistance by VET Creator and must be reviewed by a qualified trainer before use with students.
Element 3 — Plan and prepare for safe work practices
Set up barricades and signage
Done right when
- Zone size in metres is written on the JSA.
- Every side is covered by whole panels with no gap.
- No gap wide enough for a person to step through.
- Each sign is at eye level, facing the approach, and readable from outside the zone.
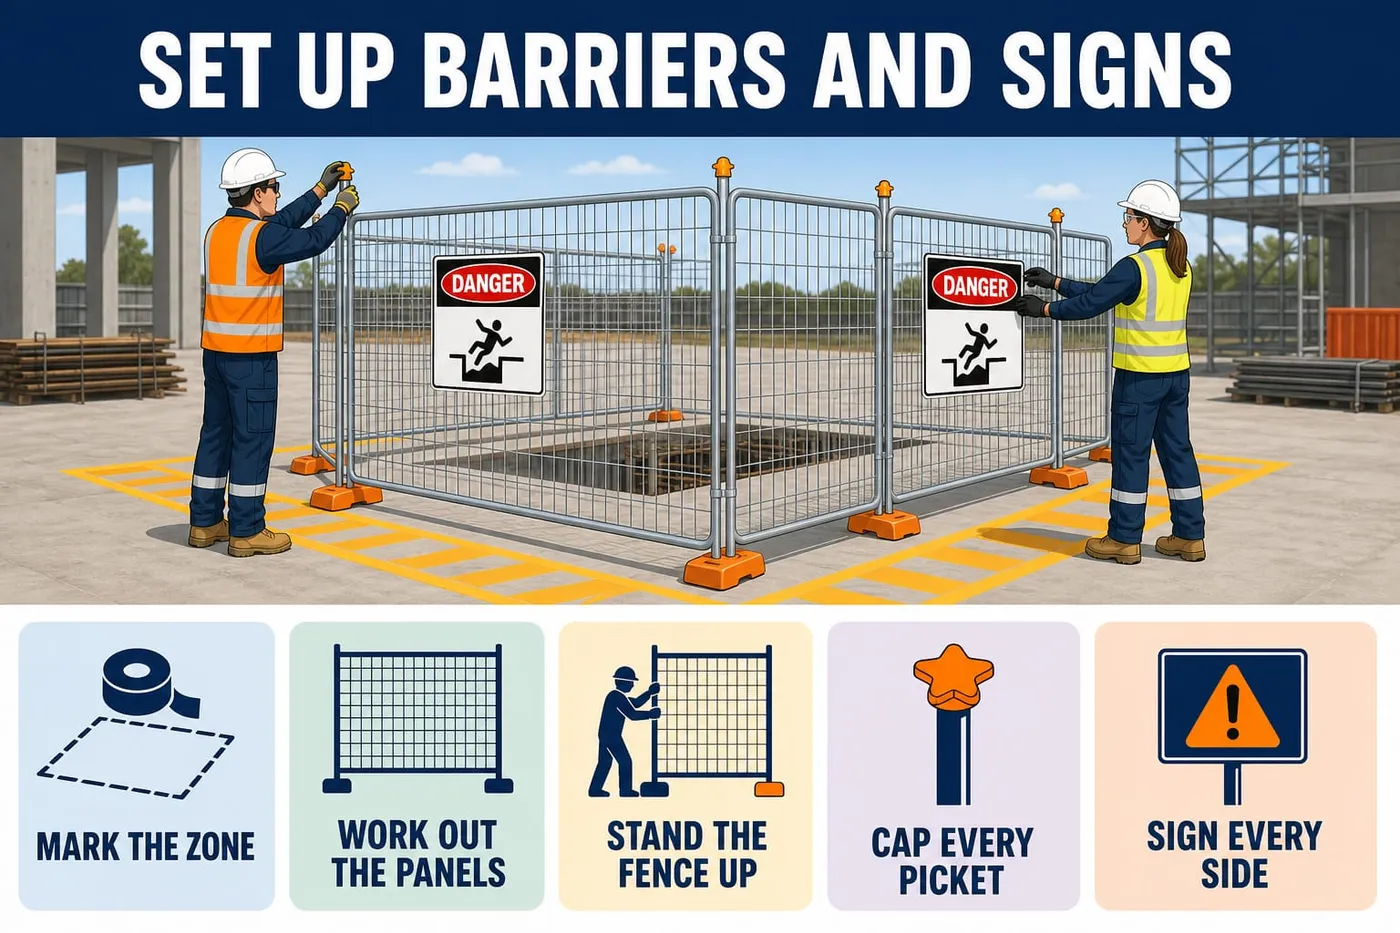
Mark out the exclusion zone on the ground.
Measure far enough back that nobody can reach or fall into the hazard.
Check Zone size in metres is written on the JSA.
Work out the number of panels, one side at a time.
Work out each side on its own: side length divided by the 2.4 m panel length, rounded up. A panel cannot bend round a corner, so never divide the whole perimeter.
Check Every side is covered by whole panels with no gap.
Erect the mesh fence panels around the zone.
Feet both sides, clamps at every join, panels pushed tight.
Check No gap wide enough for a person to step through.
Use hazard tape and witches hats only for short-term warning.
Tape warns; it does not stop anyone, so it is a weaker control than a fence.
If: the hazard could cause a serious injury, use fencing instead of tape.
Fit a safety cap on each star picket as it is driven.
Warning: An uncapped picket can impale someone who falls onto it; cap it before you move on.
Two hands on the picket driver, hands off the picket head.
If: services may run under the ground, stop and ask the supervisor before driving anything in.
Fix a sign on every side people can approach from.
Red circle with a slash means do not; blue disc means you must; yellow triangle warns; green shows exits and safety gear.
Check Each sign is at eye level, facing the approach, and readable from outside the zone.
Leave one controlled entry point for authorised workers.
Sign it "Authorised Personnel Only" and keep it closed when nobody is passing.
Activity: Worked example: barricade panels and signs for the slab patch zone
Written, about 20 minutes
Use with the page: Set up barricades and signage. Before you fence an area you work out how many panels you need, so you are not short one at the far corner. Follow each line of working, then do the check at the end. The figures are from this job's drawings as an example.
- Write down the zone size from the drawing. The slab patch exclusion zone is 7.2 m long by 3.6 m wide. These figures come from this job's drawings and are used here as an example.
- Work out the perimeter as a guide only: 2 × (7.2 + 3.6) = 2 × 10.8 = 21.6 m.
- Work out each side separately, because a mesh panel cannot be cut or bent at a corner. Panel length is 2.4 m.
- Long sides: 7.2 ÷ 2.4 = 3 panels each, so 3 + 3 = 6 panels for the two long sides, fitting exactly.
- Short sides: 3.6 ÷ 2.4 = 1.5 panels. That is not a whole panel, so round up to 2 panels each side. Overlap the extra 1.2 m. You could also set the fence line out wider than the zone, so it closes on whole panels.
- Add the sides: 6 + 2 + 2 = 10 panels.
- Work out the fittings for a closed ring: the panels join end to end at 10 joints, so 10 feet and 10 clamps.
- Decide the access point. Use one panel on the path side as the swing gate, rather than leaving a gap. The panel count then does not change.
- Count the sides people can walk up to: the service road side, the car park side and the path side. That is 3 sides, so you need 3 'Danger — Do Not Enter' signs. Add 1 'Plant Operating — Keep Clear' sign on the road side.
- Check your answer side by side, not on the total. Each long side is 3 panels × 2.4 m = 7.2 m, which is exact. Each short side is 2 panels × 2.4 m = 4.8 m, covering the 3.6 m with 1.2 m of overlap. Every side is covered with no gap, and the ring closes.
- Write the final figures on the JSA: 10 panels, 10 feet, 10 clamps, 4 signs, one gate panel on the path side.
Performance criteria: 2.3, 3.3
Learning content on this page was drafted with AI assistance by VET Creator and must be reviewed by a qualified trainer before use with students.
Element 3 — Plan and prepare for safe work practices
Sign on and start work
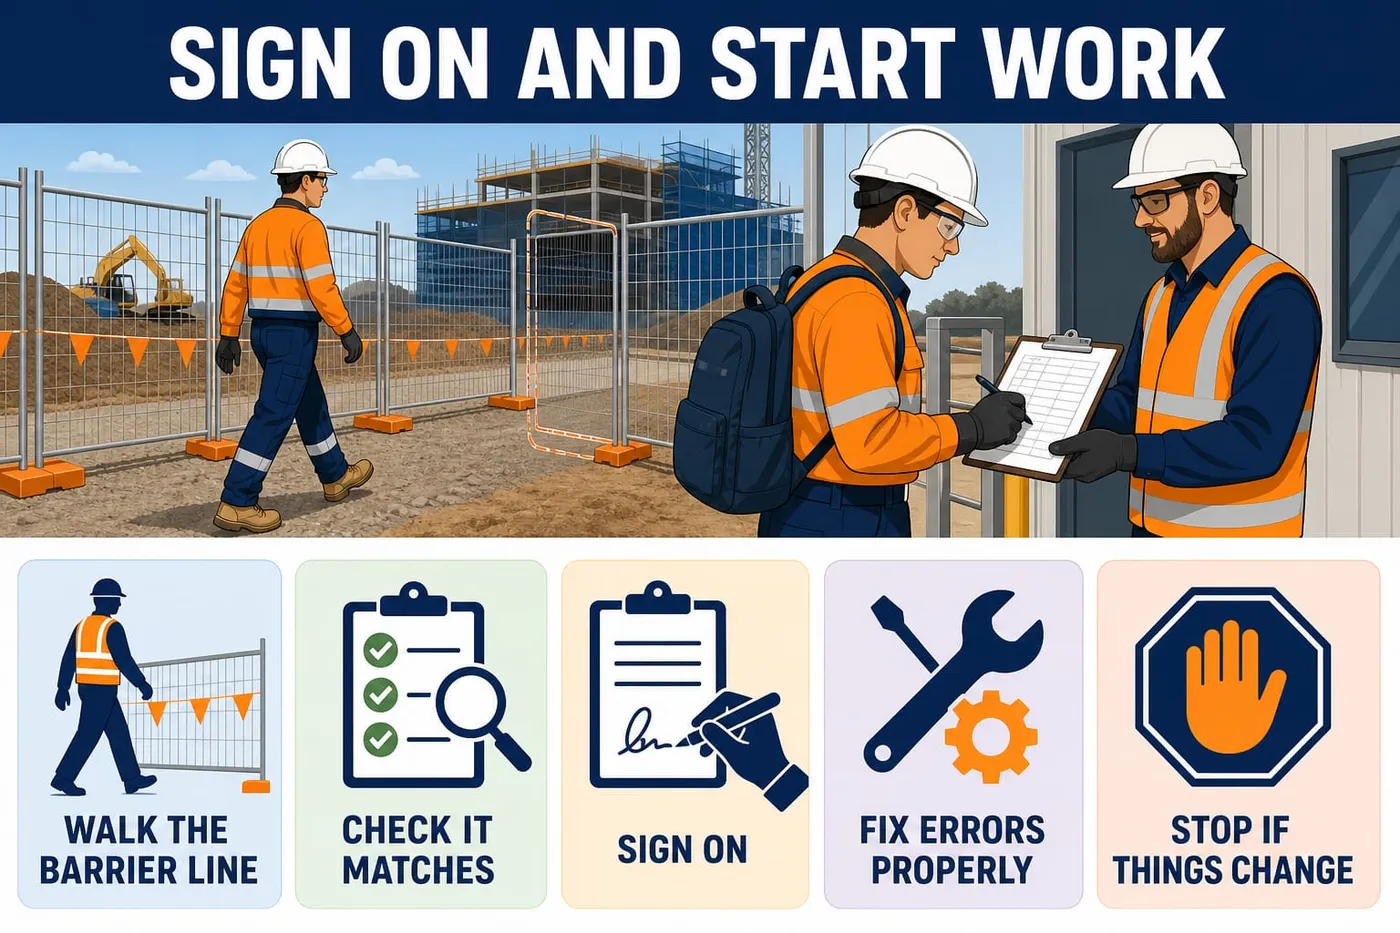
Done right when
- Fence closes right around, signs face outward, entry point marked.
- Your name, the date and your signature are on the sheet before work starts.
Walk the barricade line and look for gaps.
Check Fence closes right around, signs face outward, entry point marked.
Confirm with the leading hand that the set-up matches the JSA or SWMS.
Read the controls off the sheet and point to each one on the ground.
If: a control on the sheet is missing on the ground, do not start — tell the supervisor.
Sign the sign-on sheet for the SWMS or JSA.
Signing means you have read it, understood it and will work to it.
Check Your name, the date and your signature are on the sheet before work starts.
Correct any wrong entry on the paperwork properly.
Warning: Never rub out, white out or write over an entry.
One line through it so it stays readable, correct words beside it, your initials and the date.
Stop work if the job, the site or the crew changes.
New workers, new plant, weather or a changed sequence all count.
If: anything changes, stop, tell the supervisor and have the sheet reviewed and re-signed.
Activity: Quick quiz: planning paperwork, PPE, tools and signs
Written questions, about 25 minutes
Use with the page: Sign on and start work. Eight questions on what you have just learnt about planning a task safely. Open each card, answer it in your head or on paper, then check the answer.
- Work through the eight questions one at a time without looking back at the page.
- Mark your own answers and bring any you got wrong to the class discussion.
1. You are about to patch the concrete slab next to the service road. A 5 tonne excavator is working 8 m away and the road is still open to school deliveries. Do you need a safe work method statement?
- A. No, because you are not digging
- B. Yes — there is movement of powered mobile plant and a traffic corridor in use
- C. No, a JSA always replaces a SWMS
- D. Only if the excavator comes within 2 m
2. Your mate hands you a 10 m extension lead with a test tag dated 11 months ago. What do you do?
- A. Use it, the tag is still attached
- B. Use it on the RCD board only
- C. Tag it out of service and tell the supervisor
- D. Write a new date on the tag
3. Which control for timber dust when cutting decking is the best one to write first on the JSA?
- A. P2 respirator for everyone
- B. A toolbox talk on dust
- C. On-tool dust extraction fitted to the saw
- D. A sign saying 'Dust hazard'
4. A blue disc with a white ear muff symbol is fixed on the saw bench area. What does the shape and colour tell you?
- A. It is a warning to be careful
- B. It is something you must do — wear hearing protection
- C. It is something you must not do
- D. It shows where fire equipment is
5. You have driven four star pickets to support hazard tape around a trip hazard. What must you do straight away?
- A. Tie the tape as tight as you can
- B. Fit a safety cap on every picket
- C. Paint the picket tops white
- D. Photograph them for the JSA
6. The exclusion zone around a penetration is 6.0 m by 4.0 m and your mesh panels are 2.4 m long. How many panels do you order?
- A. 8
- B. 9
- C. 10
- D. 12
7. You pick up a tin of timber sealer you have not used before. In what order do you read the safety data sheet?
- A. Storage, then price, then first aid
- B. Hazards, first aid, handling and storage, then exposure controls and PPE
- C. Only the PPE section
- D. Whatever section the label points to
8. Halfway through the strip-out the supervisor adds two new workers and changes the sequence. What do you do about the signed JSA?
- A. Keep going, you already signed it
- B. Cross out the old rows in pencil
- C. Stop work, tell the supervisor and have the JSA reviewed and re-signed
- D. Let the new workers sign the old sheet in the smoko shed
Performance criteria: 3.4
Learning content on this page was drafted with AI assistance by VET Creator and must be reviewed by a qualified trainer before use with students.
Element 3 — Plan and prepare for safe work practices
Check your understanding
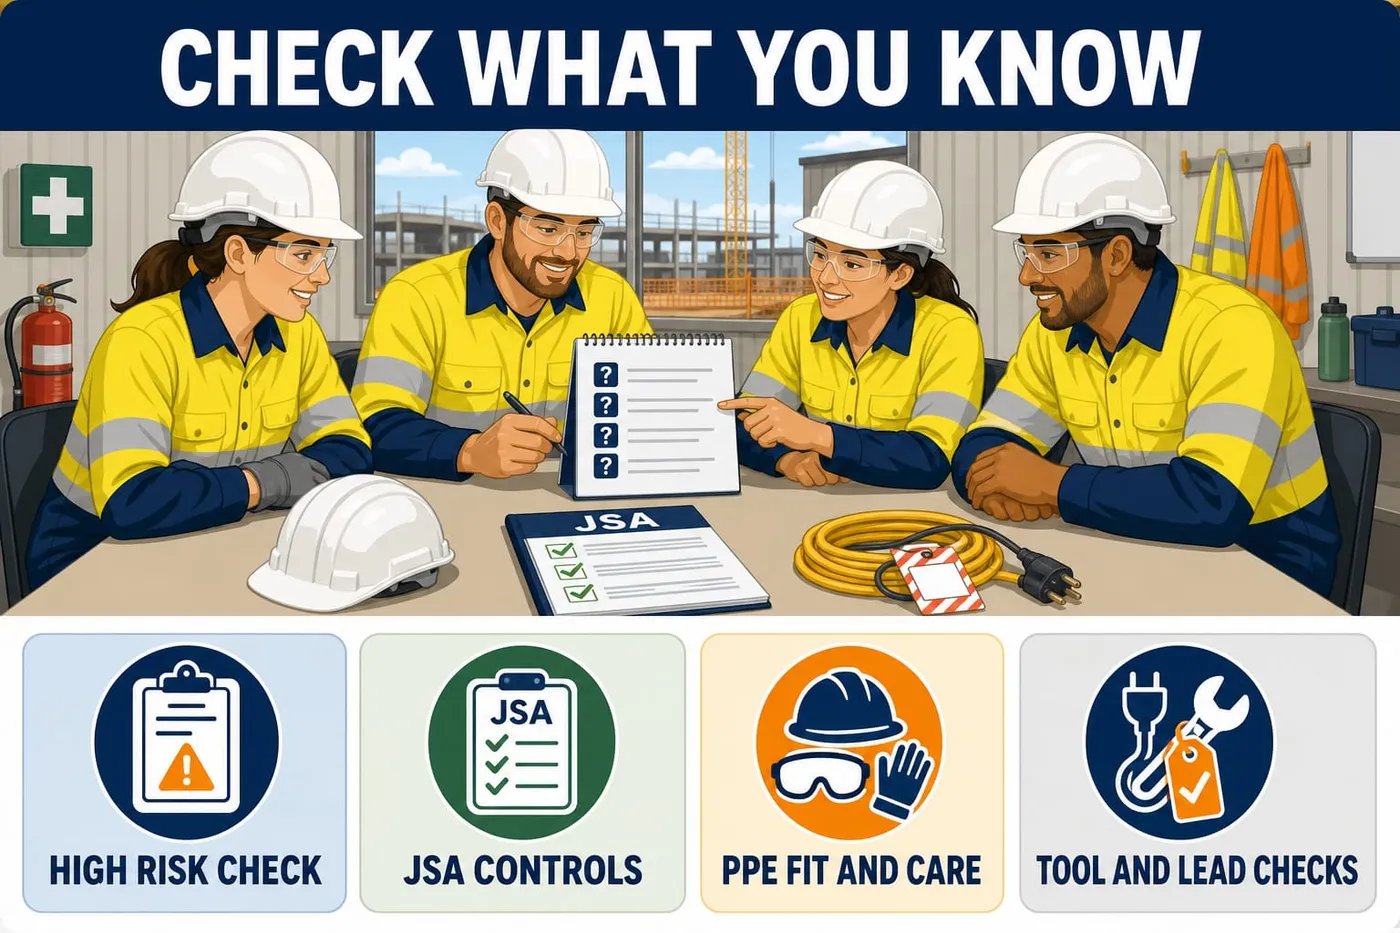
Check your understanding
1. High risk construction work must not start until the SWMS is written.
- A. True
- B. False
Show the answer
A. True. The safe work method statement has to be prepared before that work starts. You read it and sign on before you pick up a tool.
2. The drop saw's guard has been wedged open by the last user. What now?
- A. Leave it, the cut is quicker
- B. Hold the guard down by hand
- C. Tag it out and tell the supervisor
- D. Pull the wedge and keep cutting
Show the answer
C. A guard is never removed, tied back or wedged open. The saw is faulty gear now. Tag it out of service and report it before anyone else uses it.
Performance criteria: 3.1, 3.2, 3.3, 3.4
Learning content on this page was drafted with AI assistance by VET Creator and must be reviewed by a qualified trainer before use with students.
Element 4 — Apply safe work practices
Apply safe work practices
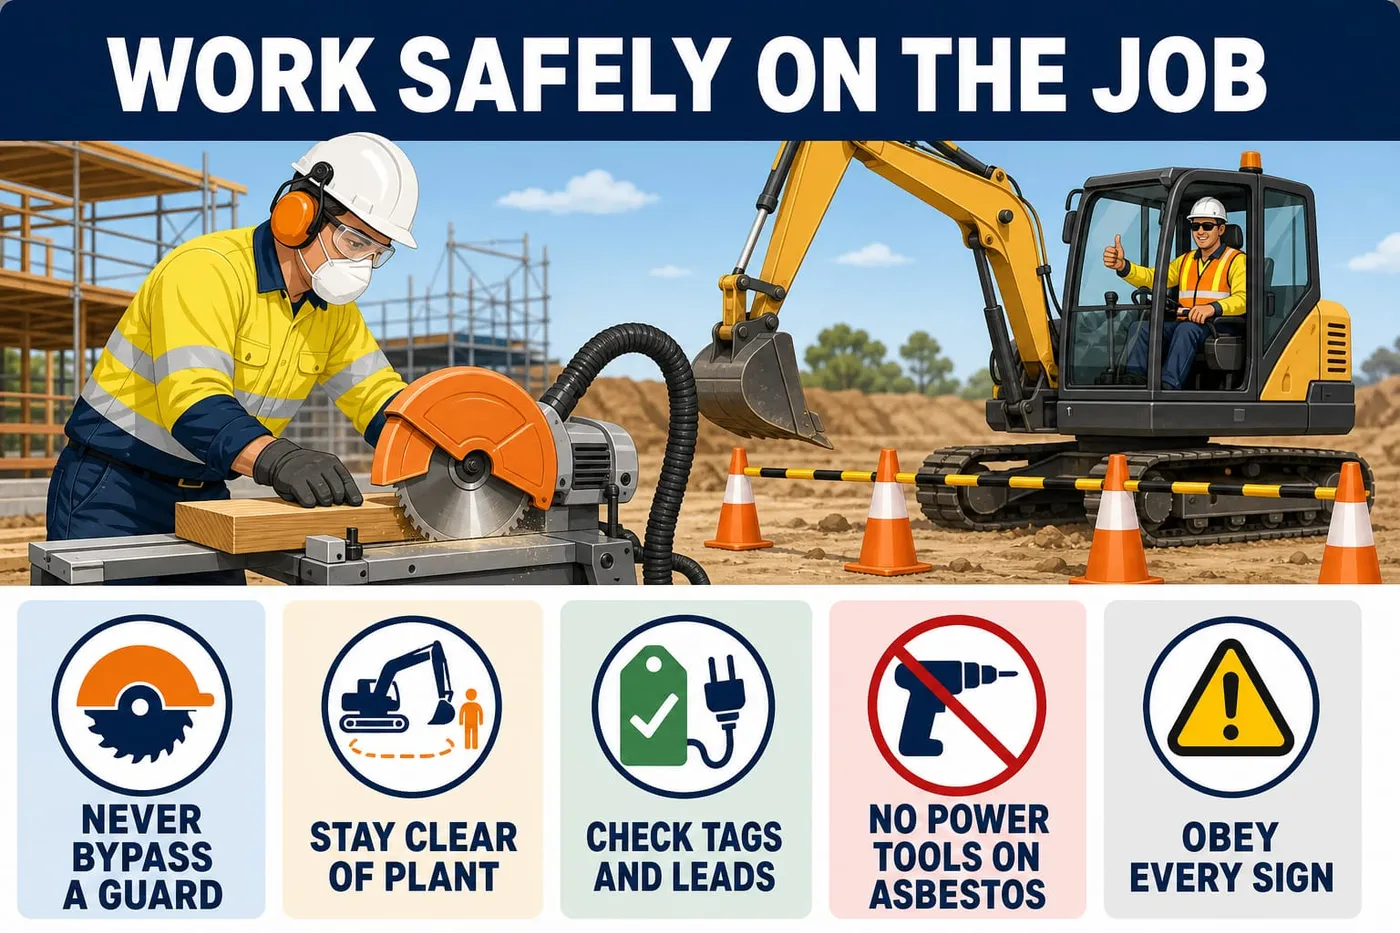
When this element is done properly, the work area looks safe. Guards are fitted on the tools. Leads are off the ground and run through a safety switch. An exclusion zone is set around the excavator. Every sign is obeyed. Offcuts are cleared as they are made. Bins are sorted to the site waste plan. Tools are cleaned and back in storage.
Planning is done. Now you do the work. Element 4 is about the hours between pick-up and pack-up, where most people get hurt. On the Riverbend Primary School refurbishment at 42 Bridge Road, Glenorchy, that means real risks. A 5 tonne excavator works near you. Power tools are in your hands. Kids and teachers walk past the fence. The building went up in 1974, so asbestos is presumed until it is cleared.
Working safely is not one big action. It is a lot of small ones, done every time. Keep the guard down and the lead off the ground. Get eye contact with the operator before you step out. Obey the sign and pick up the offcut. A guard that someone tied back took four fingers off an apprentice in under a second.
Know this: your duty of care covers you, your workmates and the public. You report hazards, incidents and injuries as they happen, not at knock-off. You never use power tools, abrasive discs, high-pressure water, compressed air or a dry broom where asbestos has been identified.
Key points
- Never remove, tie back or bypass a guard; if a guard is missing or stuck, tag the tool out and tell the supervisor.
- Stay out of the excavator's exclusion zone until the operator sees you, stops swinging and gives the thumbs up.
- Check the tag date on any plug-in tool or lead. Run it through an RCD safety switch. Keep leads off the ground and out of water.
- In an area with identified or presumed asbestos: no power tools, no abrasive discs, no high-pressure water, no compressed air, no dry sweeping.
- Obey every sign in your work area. A red circle with a slash means do not. A blue disc means you must. A yellow triangle means be careful.
- Report a hazard, near miss or injury to Sam Rivera the supervisor the same shift, and fill in the form at the time.
- Clear offcuts, leads and spills as you go — housekeeping stops trips, slips and fires before they start.
- Sort waste by the Site Waste Management Plan signage; treated timber offcuts and sawdust go in the lidded bin and are never burned.
What you need
- 185 mm corded circular saw with its guard fitted and on-tool dust extraction
- Cordless circular saw and cordless drill with charged batteries
- 10 m extension lead on a portable RCD (residual current device) board — a safety switch that cuts power fast
- Out-of-service tags and a marker pen
- Wear a safety helmet with a chin strap and clear close-fitting safety glasses; use a tinted outdoor-marked pair outside. Wear a hi-vis long-sleeve shirt, long trousers and lace-up safety boots. You also need: riggers gloves, Class 5 earmuffs or earplugs, P2 respirators and SPF 50+ sunscreen.
- Set out witches hats (450 mm), red and white hazard tape and A-frame stands. The laminated signs are: "Danger — Do Not Enter", "Plant Operating — Keep Clear" and "Hearing Protection Must Be Worn".
- Two-wheel materials trolley, broom, dustpan, shovel and a H-class vacuum
- Use the Site Waste Management Plan with the labelled bins. The bins are: untreated timber, cardboard, plastics, scrap metal and general waste. A lidded bin takes treated timber offcuts and sawdust.
- Hazard Report form, Incident/Injury Report form and the JSA (job safety analysis) pad
- Site WHS Management Plan and the Asbestos Register (site office)
Performance criteria: 4.1, 4.2, 4.3, 4.4, 4.5, 4.6
Learning content on this page was drafted with AI assistance by VET Creator and must be reviewed by a qualified trainer before use with students.
Element 4 — Apply safe work practices
Start the task safely
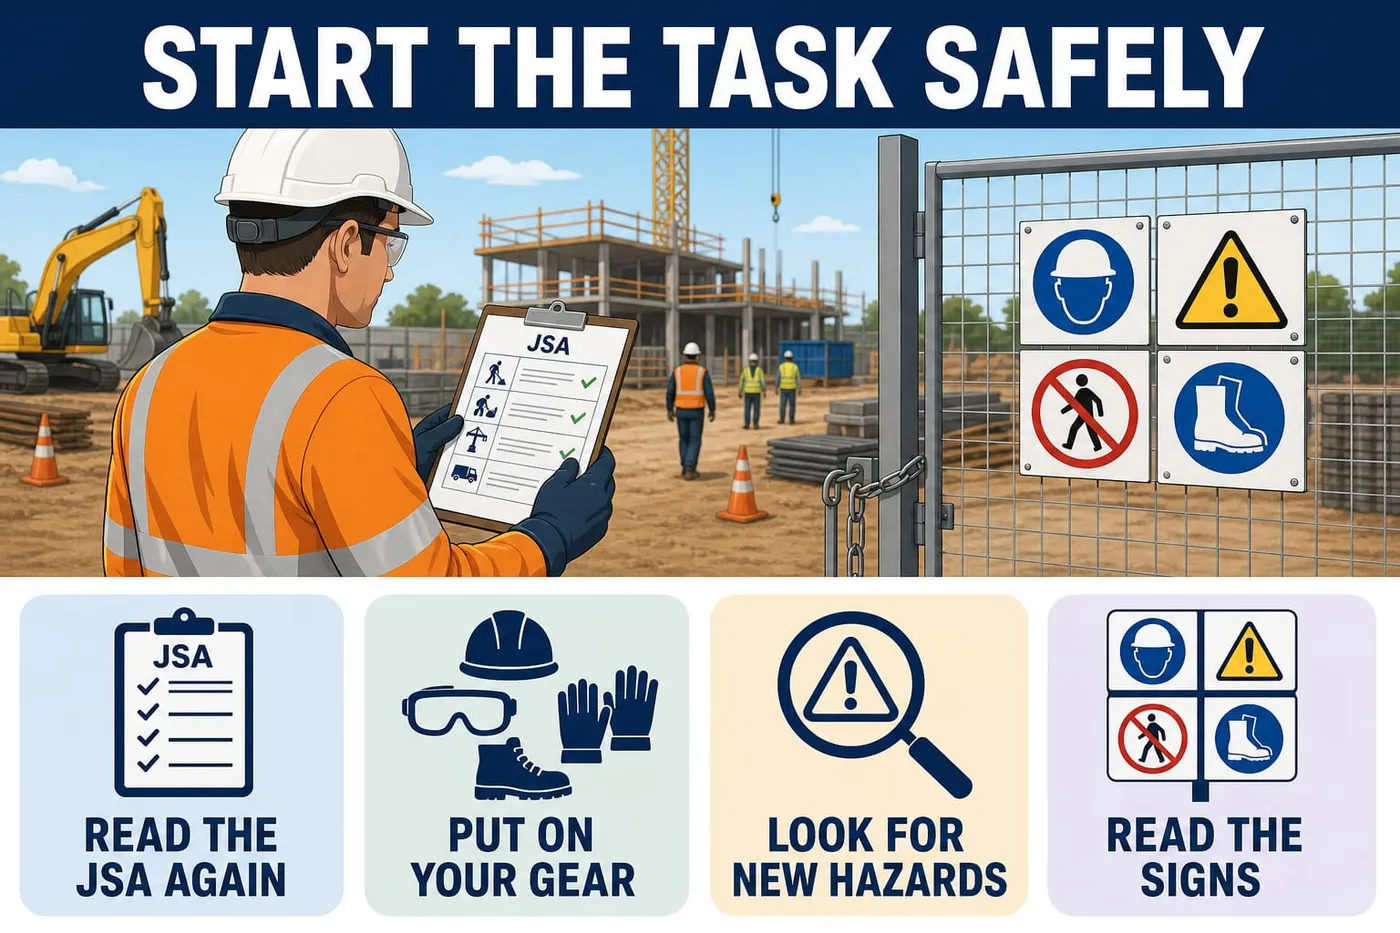
Done right when
- You can say the first three job steps and the control for each.
- Every item listed on the JSA is on and fitted, not carried.
- Each new hazard is named out loud to your workmate.
- You state what each sign requires of you before entering.
Read the JSA or SWMS for your task again before you pick up a tool.
Look for anything that changed since the pre-start meeting.
If: the job or the site has changed, stop and tell the supervisor before starting.
Check You can say the first three job steps and the control for each.
Put on the PPE the JSA names for this task.
Warning: Damaged PPE is replaced, never patched or taped.
Helmet level and not rocking, glasses close-fitting, earmuff cushions on bare skin.
Check Every item listed on the JSA is on and fitted, not carried.
Walk your work area and look for new hazards before you start.
Leads on the ground, open penetrations, parked plant, people walking through.
If: you find a hazard you cannot control, report it to the supervisor and do not start.
Check Each new hazard is named out loud to your workmate.
Read every safety sign on the way into your work area.
Judge it by shape and colour first: red slash do not, blue disc must, yellow triangle careful.
If: a sign is missing or unreadable, tell the supervisor before you go in.
Check You state what each sign requires of you before entering.
Performance criteria: 1.1, 3.1, 3.4, 4.1, 4.5
Learning content on this page was drafted with AI assistance by VET Creator and must be reviewed by a qualified trainer before use with students.
Element 4 — Apply safe work practices
Set up the tools and the work area
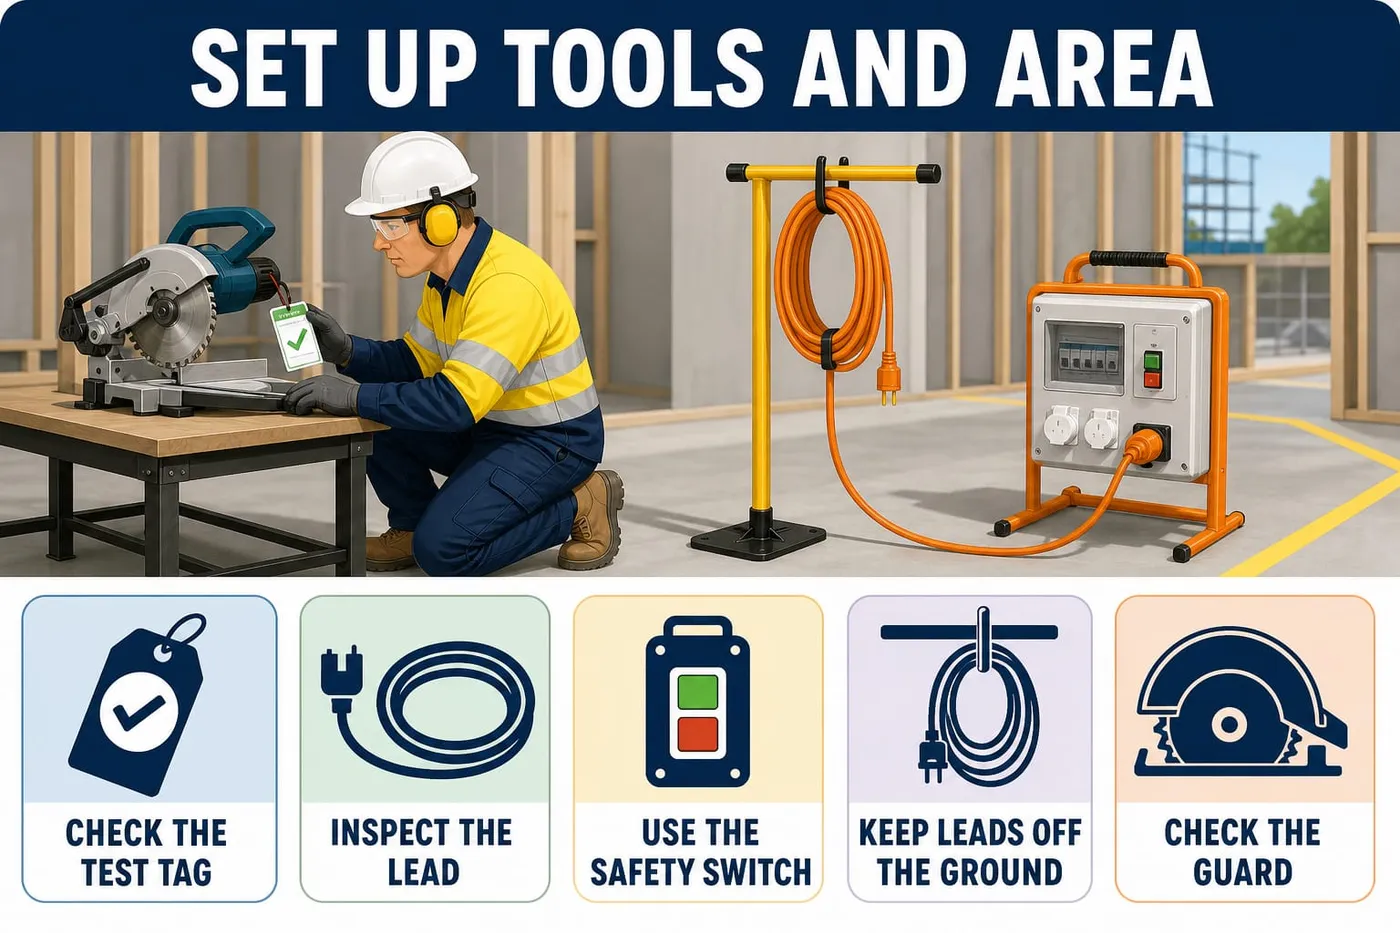
Done right when
- Tag date is read aloud and is in date.
- No damage found along the full length and at both plugs.
- The RCD test button trips and resets.
- Nobody has to step over the lead to reach the work.
- Guard returns fully over the blade with no sticking.
Check the test tag on every plug-in tool, lead and charger.
The tag must be present, readable and dated within the last 3 months.
If: the tag is missing or expired, tag the item out of service and report it.
Check Tag date is read aloud and is in date.
Inspect the lead end to end for cuts, kinks, taped repairs and exposed wires.
If: the lead is damaged, tag it out and get a replacement from the supervisor.
Check No damage found along the full length and at both plugs.
Plug the lead into the portable RCD board.
Warning: Never run site power without an RCD, even for one quick cut.
The RCD safety switch cuts power fast if current leaks to earth.
Check The RCD test button trips and resets.
Hang or route the lead clear of walkways, water and traffic.
Why: Leads on the ground are the most common trip and the most common damage.
Check Nobody has to step over the lead to reach the work.
Check the guard on the saw springs closed on its own.
Warning: Never tape, tie or hold a guard open; tag the tool out instead.
Lift the lower guard, let it go, and watch it snap back over the blade.
Check Guard returns fully over the blade with no sticking.
Fit the on-tool dust extraction hose before you cut.
Why: Extraction at the blade keeps timber and concrete dust out of your lungs.
If: the extraction will not fit or run, stop and ask the supervisor for another method.
Activity: Guard, lead and tag check station
Practical, about 45 minutes
Use with the page: Set up the tools and the work area. Before anything is switched on, a tradesperson checks the tool. In pairs you work through a bench of tools and leads, decide go or no-go, and tag out anything that fails. Two tools and one lead on the bench have deliberate faults.
- Put on safety glasses, boots and hi-vis before you approach the bench.
- Pick up the corded circular saw and check the lower guard springs shut on its own when you let it go.
- Read the test tag on the saw and the extension lead: it must be there, readable and dated within the last 3 months.
- Run the lead through your hands end to end and feel for cuts, kinks, taped repairs or exposed wires.
- Write an out-of-service tag for every item that failed, say what is wrong on it, and attach it.
- Tell your teacher, acting as supervisor Sam Rivera, which items you tagged out and why.
Quick check
1. True or false: one quick cut with a lead straight into site power is fine without an RCD.
- A. True
- B. False
Show the answer
B. False — every plug-in tool on site runs through an RCD safety switch, no matter how short the job.
Performance criteria: 4.1, 4.2
Learning content on this page was drafted with AI assistance by VET Creator and must be reviewed by a qualified trainer before use with students.
Element 4 — Apply safe work practices
Work safely around plant and people
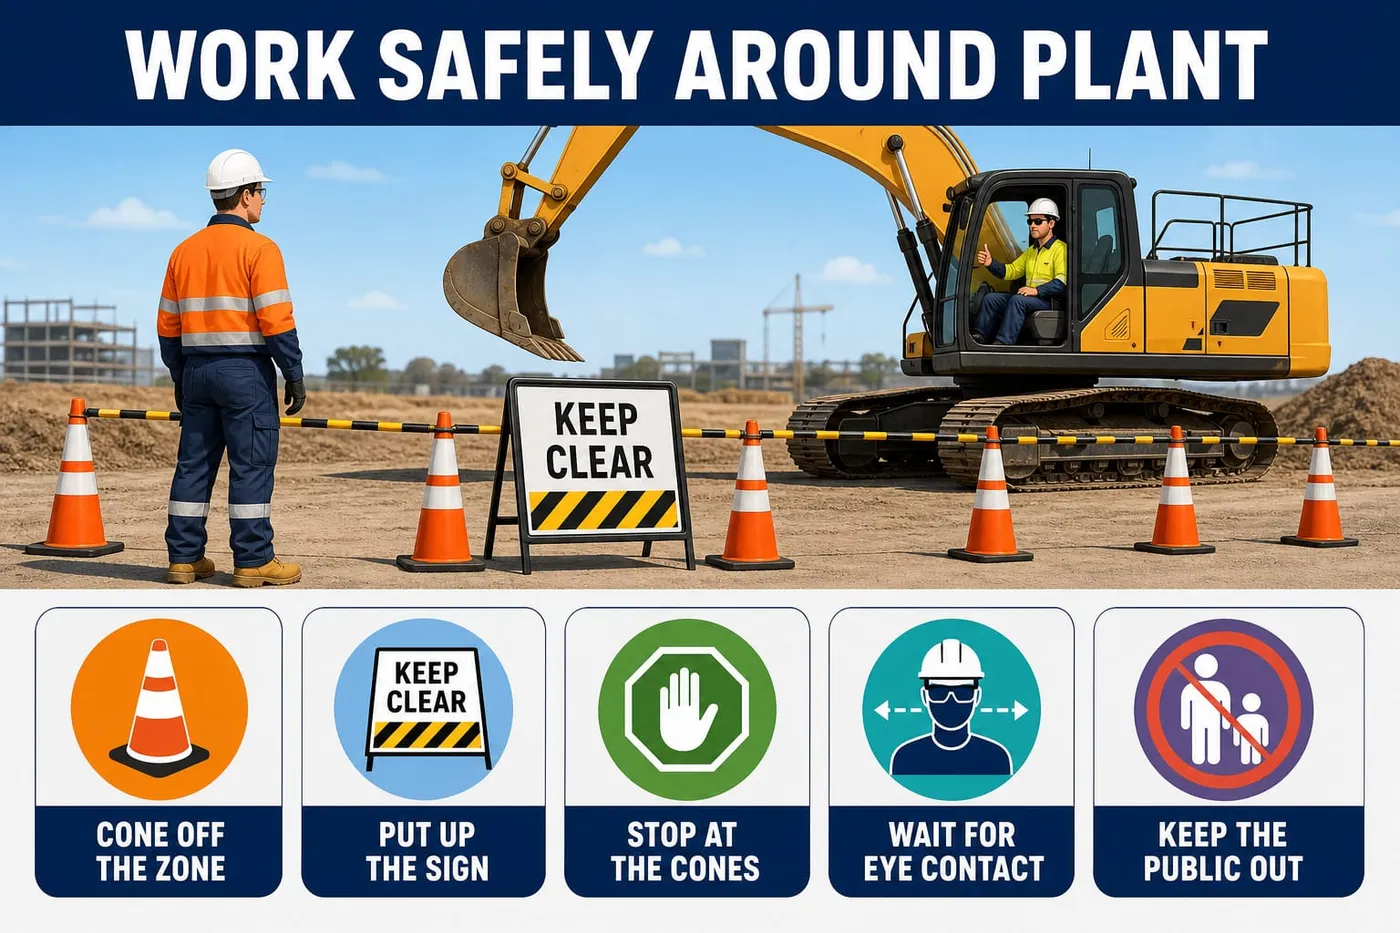
Done right when
- Cones are at least 3 m clear of the swing and travel path.
- Sign is visible from every approach path on foot.
- The machine is still and the operator's eyes are on you.
- No member of the public is inside the barricaded area at any time.
Set out witches hats to mark the exclusion zone around the excavator.
Warning: Plant movement anywhere on site makes the work high risk construction work; the SWMS applies.
Allow for the full swing of the machine, not just its body.
Check Cones are at least 3 m clear of the swing and travel path.
Hang a "Plant Operating — Keep Clear" sign where people approach.
Check Sign is visible from every approach path on foot.
Stop outside the cones when you need to enter the zone.
Warning: The operator has blind spots and cannot hear you over the engine.
Wait for the operator to stop moving and look at you.
Check The machine is still and the operator's eyes are on you.
Signal with the crew's agreed hand signals and wait for the thumb up.
Flat hand palm out means stop; thumb up means understood and all clear.
If: you get no response, stay out and signal again; never assume you were seen.
Keep the public outside your barricades at all times.
At a school, teachers, students and parents walk past the fence line.
If: someone walks in, stop work, ask them to leave and tell the supervisor.
Check No member of the public is inside the barricaded area at any time.
Activity: Working around moving plant in the yard
Practical, about 40 minutes
Use with the page: Work safely around plant and people. Powered mobile plant kills workers who walk behind it. In teams of three you set up an exclusion zone, use the crew's agreed hand signals, and only enter when the operator has seen you. The teacher or a nominated student drives the "plant" — a ride-on mower, ute or loaded trolley — at walking pace only.
- Set out witches hats to mark an exclusion zone at least 3 m clear of the plant's swing and travel path.
- Hang a "Plant Operating — Keep Clear" sign on an A-frame where anyone approaching will see it.
- Stand outside the cones and wait until the operator stops moving and looks at you.
- Raise a flat hand, palm out, to signal stop, and wait for the thumb up before you step inside.
- Walk your task inside the zone, keeping the operator in view the whole time.
- Swap roles so each person has been worker, spotter and operator once.
Quick check
1. True or false: plant moving anywhere on the site makes the work high risk construction work.
- A. True
- B. False
Show the answer
A. True — movement of powered mobile plant is one of the 18 types. The SWMS applies even if the excavator is not next to you.
Performance criteria: 3.3, 4.1, 4.5
Learning content on this page was drafted with AI assistance by VET Creator and must be reviewed by a qualified trainer before use with students.
Element 4 — Apply safe work practices
Do the work
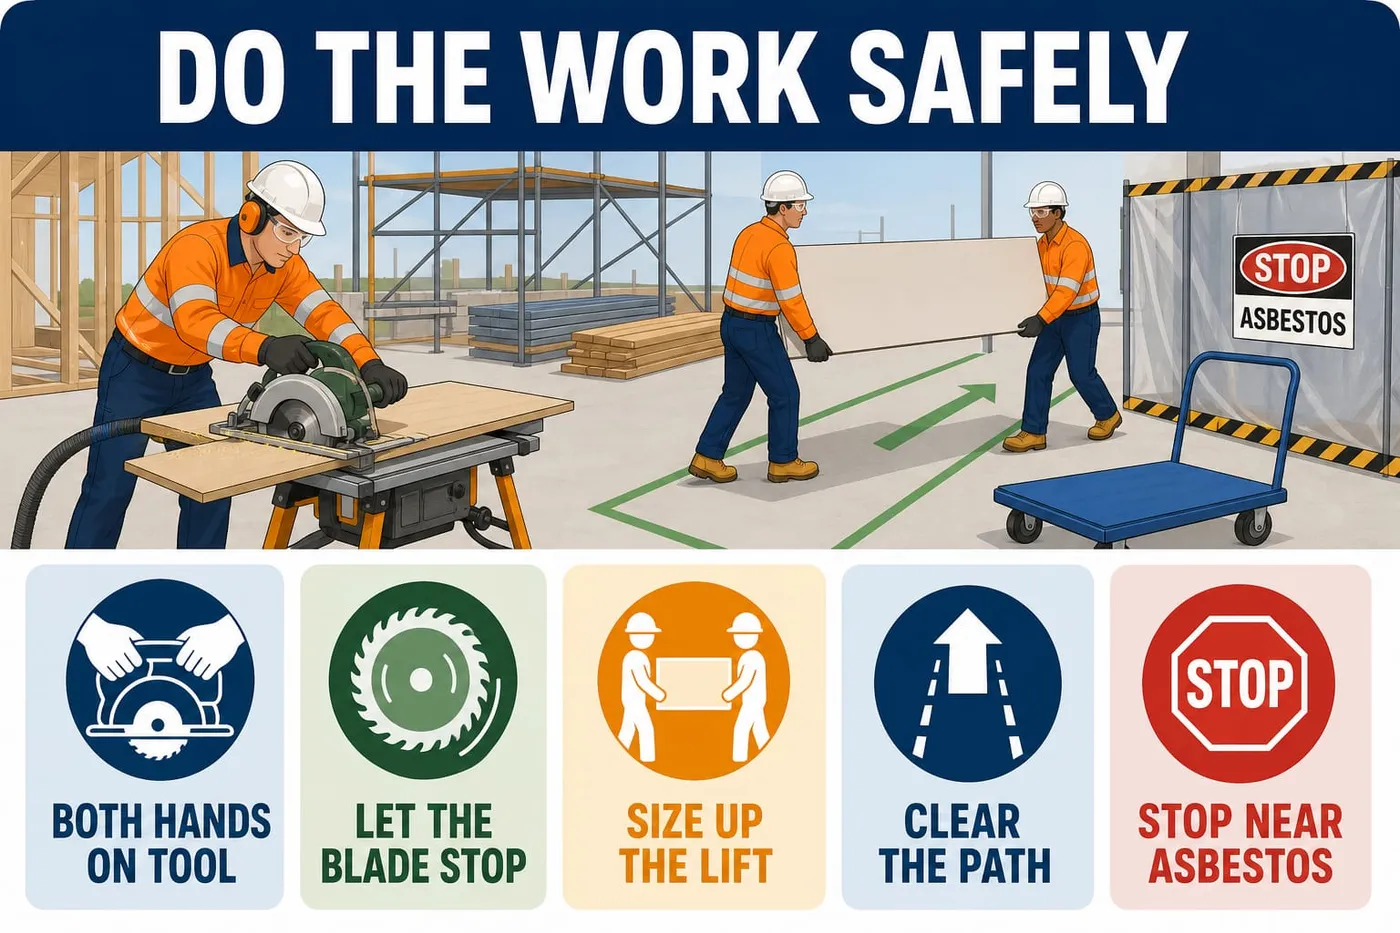
Done right when
- Both hands on the tool for every cut, offcut supported.
- A mechanical aid or a second person is used for anything heavy or awkward.
- The route is free of leads, offcuts and open penetrations end to end.
- Form is complete with date, time, exact location, what happened and what you did.
Hold the tool with both hands and keep your body clear of the blade line.
Check Both hands on the tool for every cut, offcut supported.
Let the blade stop before you put the tool down.
Warning: A coasting blade will cut a lead, a bench or your leg.
If: the guard does not close as the tool stops, stop using it and tag it out.
Assess the load before any lift: weight, size, grip, distance and how often.
Change the task first — trolley, team lift, smaller loads, no twisting.
Why: Posture advice alone is an administrative control and does not control the hazard.
Check A mechanical aid or a second person is used for anything heavy or awkward.
Clear the path and set down the destination before you move the load.
Check The route is free of leads, offcuts and open penetrations end to end.
Stop work in any area where asbestos has been identified or is presumed.
Warning: No power tools, abrasive discs, high-pressure water, compressed air or dry sweeping on asbestos material.
If: you are unsure a material is asbestos, treat it as asbestos and tell the supervisor.
Report any hazard, near miss or injury to the supervisor when it happens.
Warning: Fix a wrong entry with one line through it, the correction beside it and your initials — never rub out.
Fill in the Hazard Report or Incident/Injury Report at the time, not at knock-off.
Check Form is complete with date, time, exact location, what happened and what you did.
Performance criteria: 1.1, 1.3, 4.1, 4.3, 4.4
Learning content on this page was drafted with AI assistance by VET Creator and must be reviewed by a qualified trainer before use with students.
Element 4 — Apply safe work practices
Keep the area clear and sort the waste
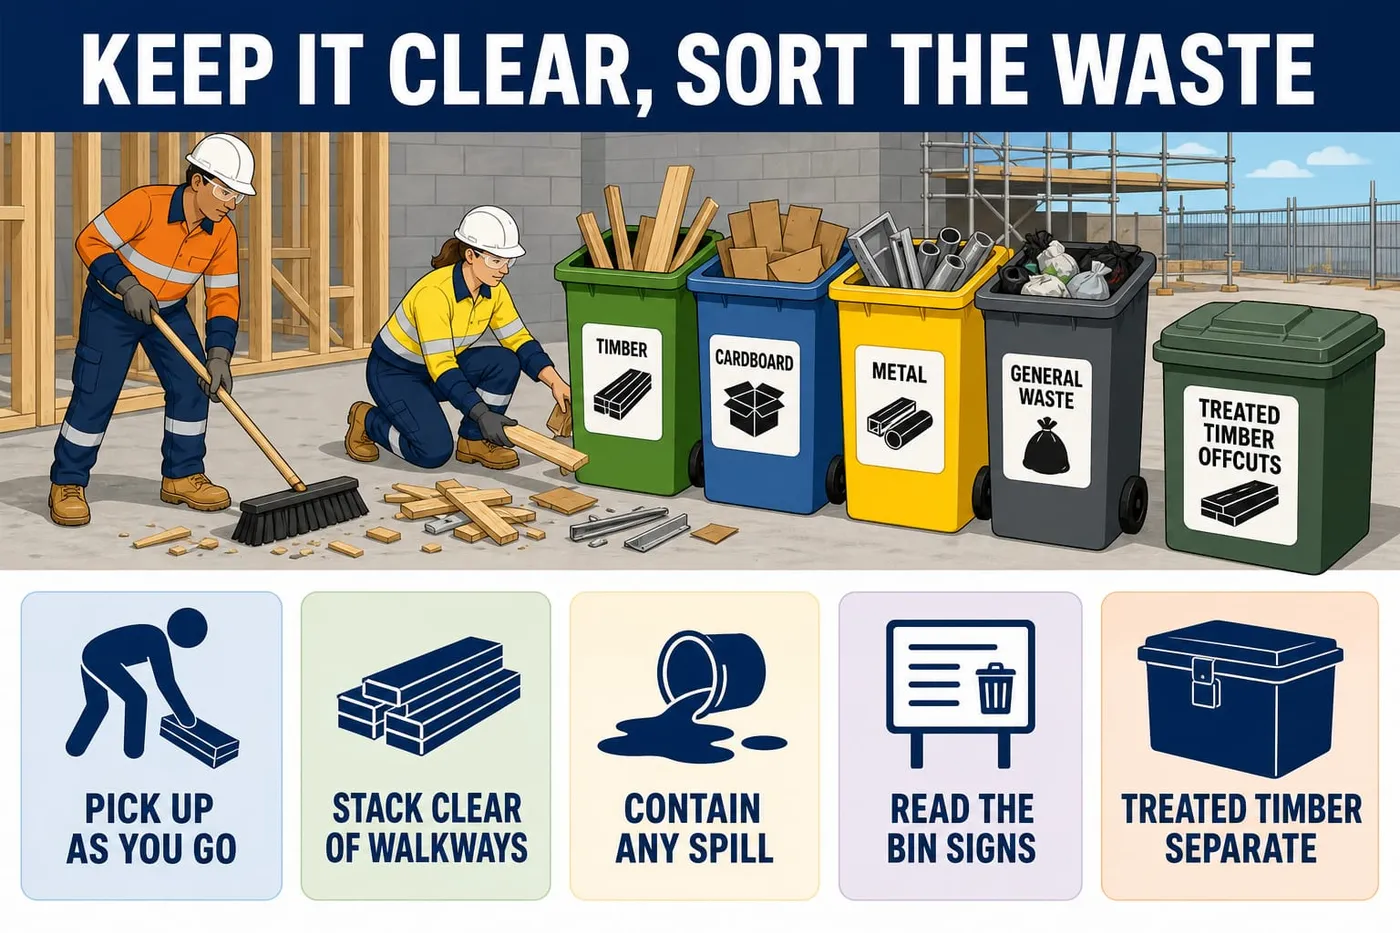
Done right when
- No loose offcut stays on the floor longer than the cut that made it.
- Stacks are stable and no exit or evacuation route is blocked.
- Each item is in the bin its signage names.
- No visible dust cloud leaves the site boundary.
Pick up offcuts and scrap as you make them.
Why: Housekeeping stops trips, slips, punctures and fires before they start.
Check No loose offcut stays on the floor longer than the cut that made it.
Stack materials flat and clear of walkways and exits.
Check Stacks are stable and no exit or evacuation route is blocked.
Contain any spill with the spill kit straight away.
Warning: Nothing but clean water goes into a stormwater drain; it runs to the creek.
If: the spill is bigger than the kit can hold, stop, keep people clear and call the supervisor.
Read the Site Waste Management Plan and the bin signage before sorting.
Why: The EPA and the council set the rules behind the plan; the site puts them into bins.
Sort waste into the bins the signage shows.
Untreated timber, cardboard, plastics and scrap metal are separated from general waste.
Check Each item is in the bin its signage names.
Put treated timber offcuts and sawdust in the lidded, labelled bin.
Warning: Treated timber is never burned, mulched or put in green waste.
If: timber has no readable end tag, treat it as treated timber.
Keep dust and noise down for the neighbours.
Dust extraction on, water suppression where allowed, loud work kept to the agreed hours.
Check No visible dust cloud leaves the site boundary.
Activity: Housekeeping blitz and bin sorting
Practical, about 40 minutes
Use with the page: Keep the area clear and sort the waste. A messy area is the cheapest hazard to fix and the one most often left. Your team clears a staged work area and sorts the waste by the Site Waste Management Plan signage. Items include pine offcuts, a green-stamped H4 treated timber offcut, cardboard, plastic strapping, scrap metal offcuts and a part-used sealer tin.
- Read the bin signage and the Site Waste Management Plan before you pick anything up.
- Coil the extension lead and hang it off the ground before you move anything else.
- Carry timber offcuts to the bins using the two-wheel trolley, not by stacking an armful.
- Check every timber offcut for an end tag or H-class stamp and put treated offcuts in the lidded bin.
- Sweep sawdust into the dustpan with the broom, and put treated sawdust in the lidded bin.
- Return the part-used sealer tin to the bunded chemical store and tell your teacher where you put it.
- Walk the area and point out to your teacher anything still left that could trip or cut someone.
Activity: Worked example: clean-up time for the ramp repair
Written, about 25 minutes
Use with the page: Keep the area clear and sort the waste. Clean-up is part of the job and part of the time estimate. You follow this worked example line by line in your workbook. Then you do the same for your own clean-up. That happens at the end of the next practical. Figures are the ones this job's supervisor set.
- Write the four clean-up steps and their productive minutes. They are: pick up offcuts 18, sweep and vacuum sawdust 24, sort waste to bins 20, and clean and return tools 18.
- Add the productive minutes: 18 + 24 + 20 + 18 = 80 minutes.
- Work out the allowance set by this job's supervisor: 15% of 80 = 80 × 0.15 = 12 minutes.
- Write what the allowance covers: set-up, walking between the ramp and the bins, and waiting for the trolley. It is applied once to the total only.
- Add it: 80 + 12 = 92 minutes, which is 1 hour 32 minutes.
- Work back from knock-off to get the latest start: 15:30 − 92 min = 13:58. So clean-up must start no later than 13:58. No scheduled break falls between 13:58 and 15:30.
- Put the planned start on the clock. Starting at 15:00 would finish at 16:32, which is past the 15:30 knock-off. Tell the supervisor at the pre-start that clean-up must start earlier.
- Check the total a different way: 80 × 1.15 = 92. That matches. So the 15% went on the total once, and not on each step as well.
- Check the clock against the total. From 13:58 to 15:30 is 92 minutes of clock time, with no break inside that window. So no break time has been counted twice or hidden in the allowance.
Performance criteria: 4.1, 4.6
Learning content on this page was drafted with AI assistance by VET Creator and must be reviewed by a qualified trainer before use with students.
Element 4 — Apply safe work practices
Clean up and hand back
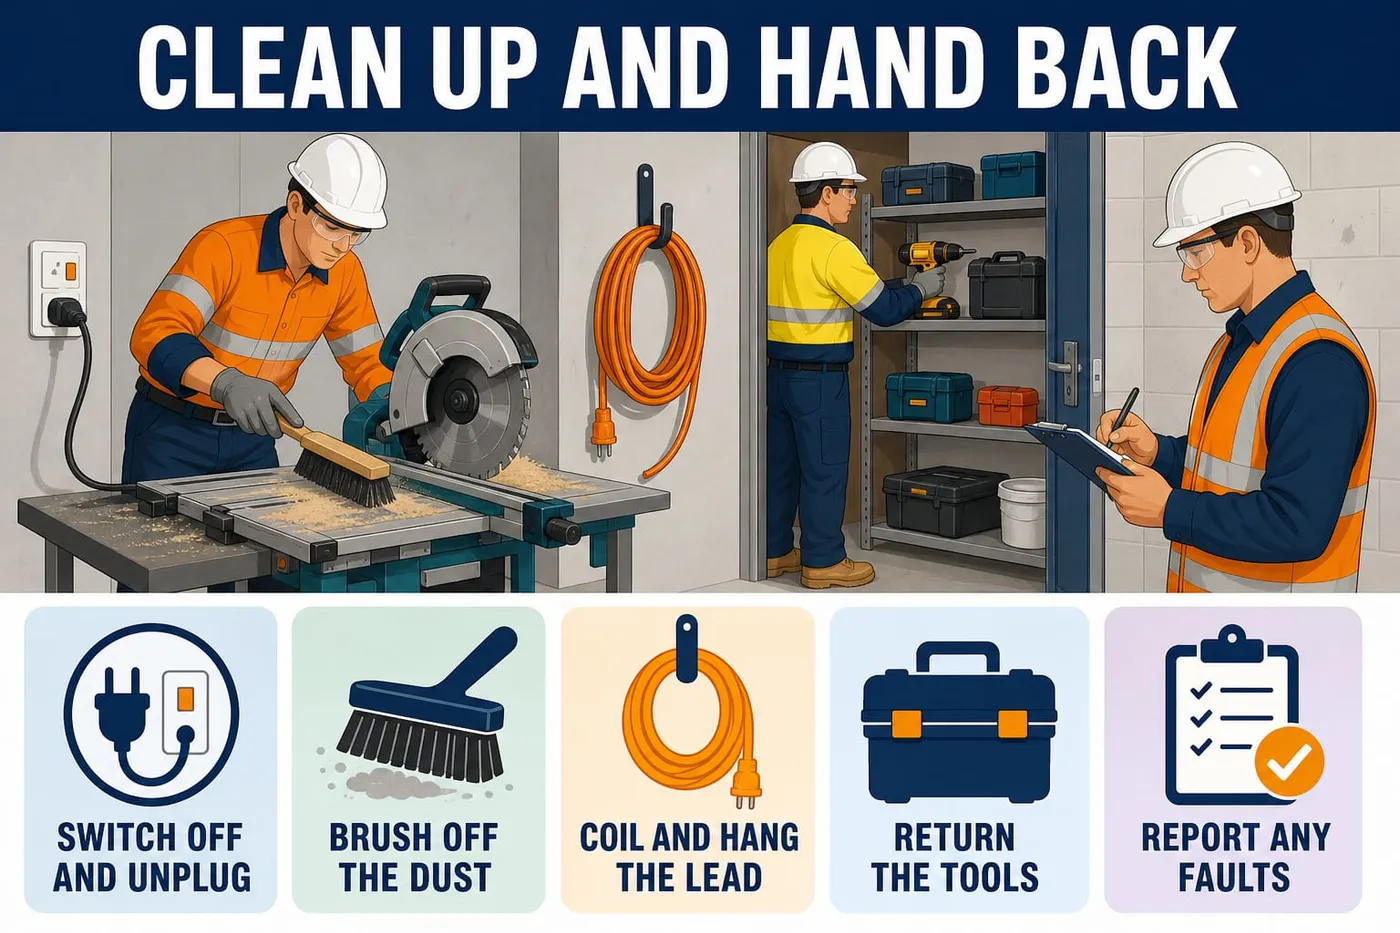
Done right when
- Nothing is live or on charge while you work on it.
- Lead is coiled without kinks and stored off the floor.
- Each tagged-out item is named to the supervisor before you leave.
- Floor clear, barricades and signs still in place, bins lidded.
Switch off and unplug every tool before cleaning it.
Check Nothing is live or on charge while you work on it.
Brush the dust off the tool body and vents.
Warning: Use the H-class vacuum, never compressed air, for fine dust.
Coil the extension lead and hang it off the ground.
Check Lead is coiled without kinks and stored off the floor.
Return every tool to its storage place.
Why: Tools and equipment are never waste; they are cleaned and put back.
Report any tool fault you found to the supervisor.
If: a fault is more than a flat battery or a dirty filter, leave it tagged for a competent person.
Check Each tagged-out item is named to the supervisor before you leave.
Walk the area once more and check nothing is left to hurt the next crew.
Check Floor clear, barricades and signs still in place, bins lidded.
Activity: Quick quiz: safe work practices on the job
Written questions, about 30 minutes
Use with the page: Do the work. Nine questions on the choices you make while the work is actually happening. Open each card, decide your answer, then check it.
- Answer each question on your own first.
- Compare your answers with the person next to you and talk about any you disagreed on.
1. You are ripping a length of pine. The lower guard on the corded circular saw keeps catching. A workmate suggests taping it open for the next few cuts. What do you do?
- A. Tape it open but work slowly and carefully
- B. Stop using the saw, tag it out of service and tell the supervisor
- C. Take the guard off completely so it cannot catch
- D. Keep cutting and hold the guard back with your thumb
2. You need to cross behind the 5 tonne excavator to get to the timber stack. What is the right move?
- A. Walk quickly behind it while it is swinging the other way
- B. Wave your arms and keep walking
- C. Stay outside the cones until the operator stops, sees you and gives a thumb up
- D. Yell out and assume the operator heard you
3. In Classroom 3 the asbestos register says the wall sheeting is asbestos-containing. Which of these may you use on it?
- A. A cordless circular saw with dust extraction
- B. An angle grinder with an abrasive disc
- C. Compressed air to blow the dust off
- D. None of these — do not work the material, keep clear and report
4. You trip on a 10 m extension lead running across the doorway you keep walking through. What is the best fix?
- A. Step over it more carefully from now on
- B. Tell everyone at the next toolbox talk
- C. Re-route the lead and hang it clear of the walkway
- D. Tape the lead to the floor with gaffer tape
5. A blue disc sign with a white earmuff symbol is fixed at the entry to the cut-off area. What does it mean?
- A. Hearing protection is available if you want it
- B. You must wear hearing protection in that area
- C. Loud noise may happen here sometimes
- D. Do not enter this area
6. Kofi grazes his forearm on a nail and you help him clean and dress it. When is this written up?
- A. Only if it gets infected later
- B. At the end of the week with the timesheets
- C. Before you leave site that day, in the Incident/Injury Report and register of injuries
- D. It is minor, so it does not need recording
7. You are stacking H4 treated timber offcuts after the ramp repair. Where do they go?
- A. In the untreated timber recycling bin
- B. On the burn pile at the end of the job
- C. In the green waste for mulching
- D. In the lidded, labelled bin for treated timber offcuts and sawdust
8. You spill about half a litre of sealer on the concrete near a stormwater grate. What do you do first?
- A. Hose it down the grate so it disappears
- B. Contain it with the spill kit and keep it out of the stormwater drain
- C. Sweep dry sand over it and leave it to dry
- D. Finish your cut first, then deal with it
9. You notice the "Danger — Do Not Enter" sign has blown off the barricade around the slab patch. What do you do?
- A. Leave it, everyone on the crew already knows
- B. Re-fix the sign so it is visible and tell the supervisor
- C. Take the barricade down as well since the sign is gone
- D. Put it back at the end of the day
Performance criteria: 4.3, 4.6
Learning content on this page was drafted with AI assistance by VET Creator and must be reviewed by a qualified trainer before use with students.
Element 4 — Apply safe work practices
Check your understanding
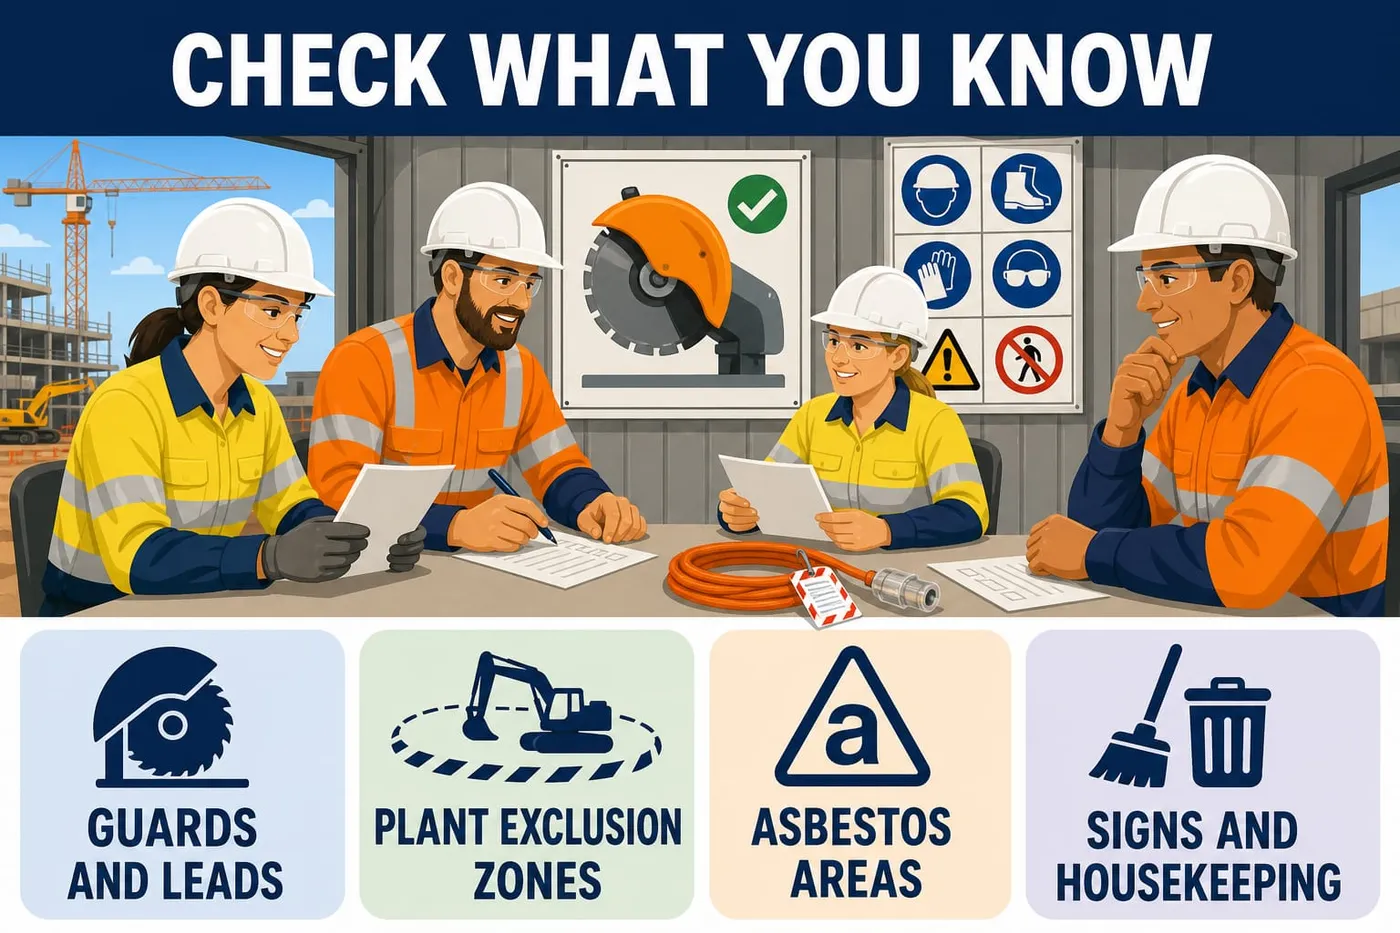
Check your understanding
1. The guard on the drop saw sticks half open. You have two cuts left. What do you do?
- A. Hold the guard open and finish
- B. Tape the guard back for the cuts
- C. Use it slowly and watch the blade
- D. Tag the saw out and tell the supervisor
Show the answer
D. A guard that will not close means the tool is out of service. Tag it out and report it. Never hold, tape or work around a guard.
2. Timber offcuts have no readable end tag on them. Where do they go?
- A. In the untreated timber recycling
- B. On the burn pile at the end
- C. In the lidded bin as treated timber
- D. In the green waste bin
Show the answer
C. If you cannot read the tag, treat it as treated timber — lidded bin, and never burned, mulched or put in green waste.
Performance criteria: 4.1, 4.2, 4.3, 4.4, 4.5, 4.6
Learning content on this page was drafted with AI assistance by VET Creator and must be reviewed by a qualified trainer before use with students.
Element 5 — Follow emergency procedures
Follow emergency procedures
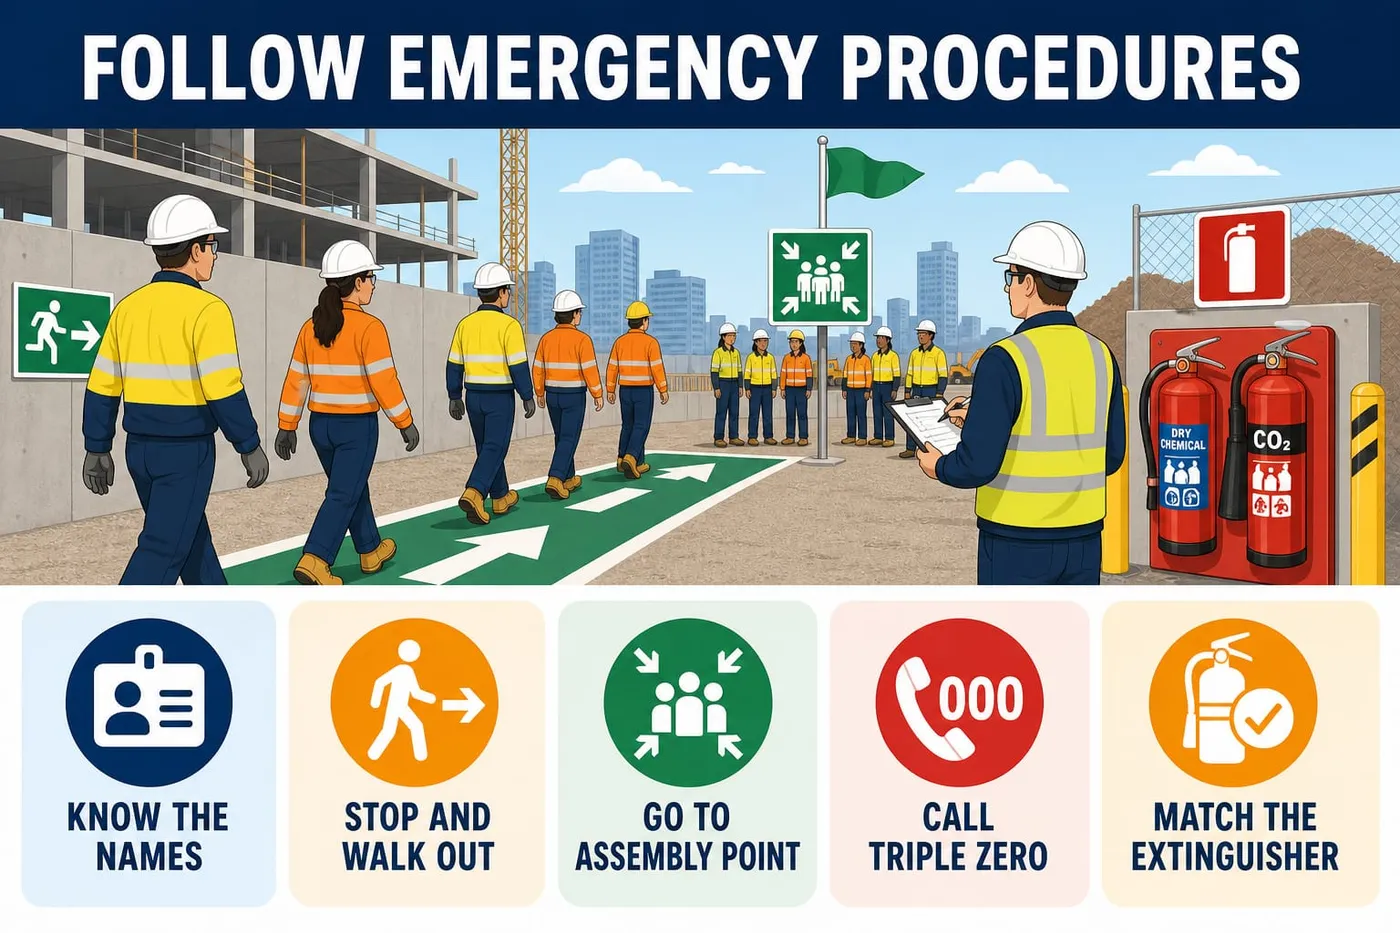
An emergency gives you no thinking time, so you act on what you already know. This element teaches you who is in charge on site. You learn the way out to the assembly point, and the right extinguisher for what is burning. It also covers first aid for a minor injury. Last, you record the treatment in the site Register of Injuries. That is the site book where every injury and first aid treatment is written down.
An emergency is anything that puts people in immediate danger: a fire, a gas leak, a collapse, a serious injury. On the Riverbend Primary School job the emergency plan is the site's written plan for all of that. It covers how to raise the alarm, how to get out, who calls 000, and where the first aid kit is. You read it at your induction. You practise it before you ever need it.
Know this for this site. Three long blasts on the air horn is the alarm. Stop work and make your gear safe. Walk out the north door and down the fence line to the flagpole. Jess Tan is the chief warden and counts heads. Kofi Mensah is the first aider and brings the kit.
As a Cert II worker you act inside your own training. You can cool a burn or dress a graze. Anything bigger, call 000 straight away and get the first aider.
Key points
- Learn the names at induction: chief warden Jess Tan, first aider Kofi Mensah, supervisor Sam Rivera.
- Three long air horn blasts means stop work, make gear safe, and walk out — never run, never go back for tools.
- Go to the assembly point at the flagpole, report to the warden for the headcount, and stay until the all-clear.
- Call 000 straight away for anyone badly hurt, any fire beyond the first few seconds, and send someone to meet the ambulance at the gate.
- Match the extinguisher to the fire: ABE dry chemical for most site fires, CO2 for electrical; never water or foam on electrical.
- Use PASS on an extinguisher: Pull the pin, Aim at the base, Squeeze, Sweep. Get out if the fire is not out in a few seconds.
- Check for danger before you touch an injured person: never touch someone in contact with electricity, stay 10 m from a fallen power line.
- Treat only within your training, then tell the supervisor and write the treatment in the Register of Injuries the same shift.
What you need
- Site emergency plan and site map for the Riverbend Primary School refurbishment (Derwent Build Pty Ltd)
- Air horn used as the site alarm (three long blasts)
- Assembly point sign at the flagpole in the staff car park, plus green emergency information signs and red fire equipment signs
- Training (empty or water-filled) 9 kg dry chemical ABE extinguisher, 2 kg CO2 extinguisher and a fire blanket
- Site first aid kit: disposable gloves, saline, non-stick dressings, adhesive dressings, triangular bandage, tweezers, eye wash bottle
- Running water tap or eye wash station
- Register of Injuries book and Incident/Injury Report form
- Hazard tape and two witches hats to mark off the practice scene
- PPE as issued on this job: helmet with chin strap, clear safety glasses, hi-vis long-sleeve shirt, long trousers, lace-up safety boots, riggers gloves
- Mobile phone (switched to flight mode for practice calls) and the site emergency contact card: 000 and TasNetworks 132 004
Performance criteria: 5.1, 5.2, 5.3, 5.4
Learning content on this page was drafted with AI assistance by VET Creator and must be reviewed by a qualified trainer before use with students.
Element 5 — Follow emergency procedures
Know the plan before work starts
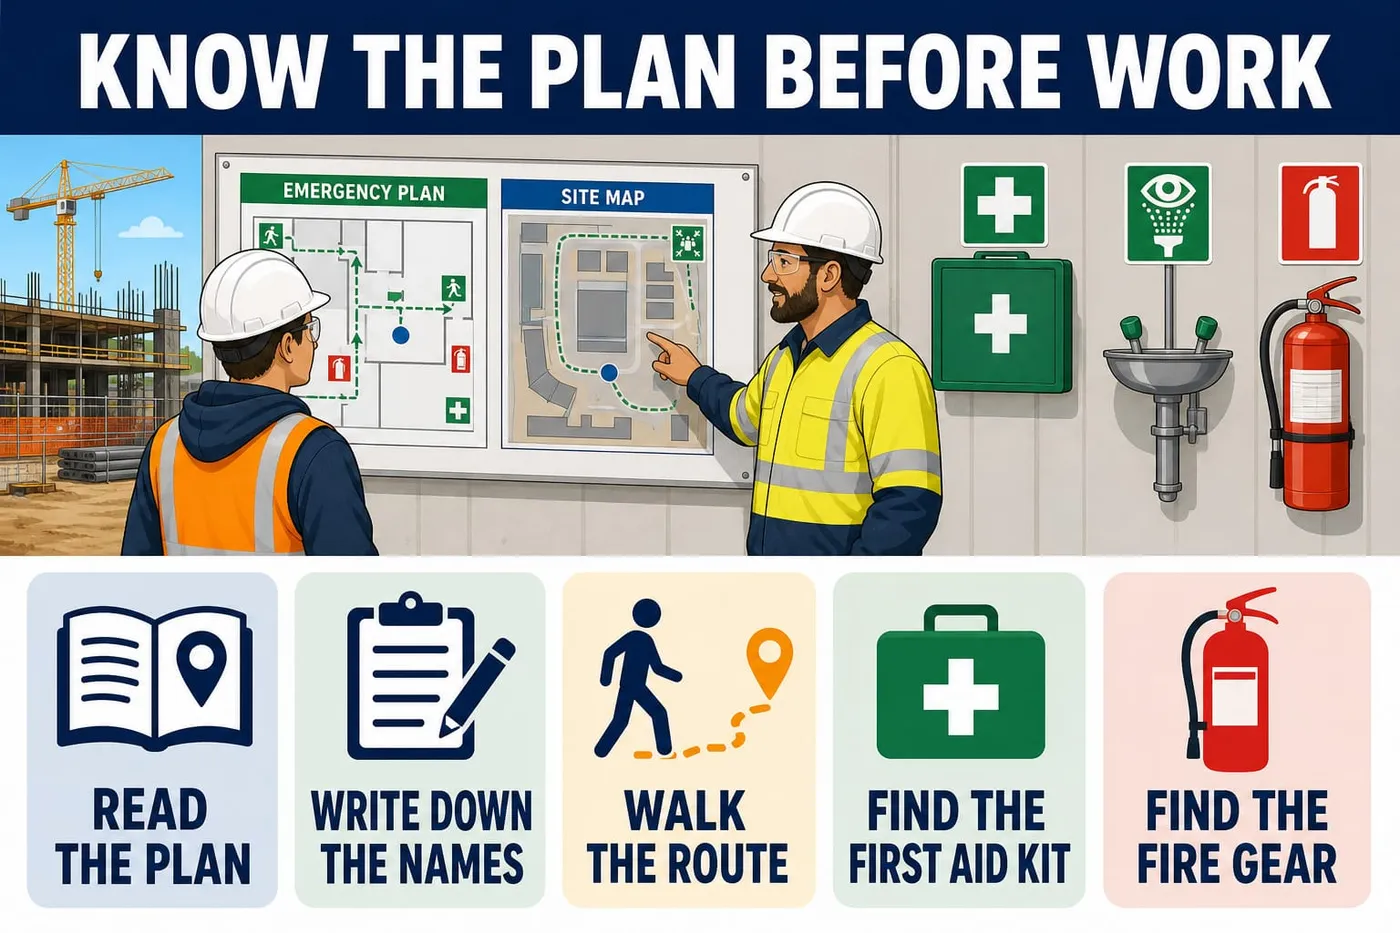
Done right when
- You can say the alarm signal and the assembly point without looking.
- All three names and roles written in your diary or on your card.
- You can point the warden out across the site.
- You walk it without being directed.
- You can lead someone to them in under a minute.
Read the site emergency plan at your induction.
Look for the alarm signal, the route, the assembly point and the contact numbers.
If: the plan is missing from the site office, ask the supervisor before you start work.
Check You can say the alarm signal and the assembly point without looking.
Write down the names of the designated personnel for this site.
Chief warden Jess Tan, first aider Kofi Mensah, supervisor Sam Rivera.
Why: In an emergency you need the right person by name, not a job title you have to go looking for.
Check All three names and roles written in your diary or on your card.
Find the chief warden's high-visibility helmet colour at the pre-start.
Wardens wear a marked vest or coloured helmet so you can spot them in a crowd.
Check You can point the warden out across the site.
Walk the evacuation route once before you start work.
Out the north door, along the fence line, to the flagpole in the staff car park.
If: the route is blocked by materials, tell the supervisor straight away.
Check You walk it without being directed.
Locate the first aid kit and the eye wash station.
Both are in and beside the site office.
Check You can lead someone to them in under a minute.
Locate each piece of fire equipment on the site plan.
Warning: Never stack materials or park plant in front of fire equipment or an exit.
9 kg ABE at the site office and at the fuel store, 2 kg CO2 at the switchboard, fire blanket in the lunch shed.
Check You can name what is at each location.
Performance criteria: 5.1, 5.3
Learning content on this page was drafted with AI assistance by VET Creator and must be reviewed by a qualified trainer before use with students.
Element 5 — Follow emergency procedures
When the alarm sounds — evacuate
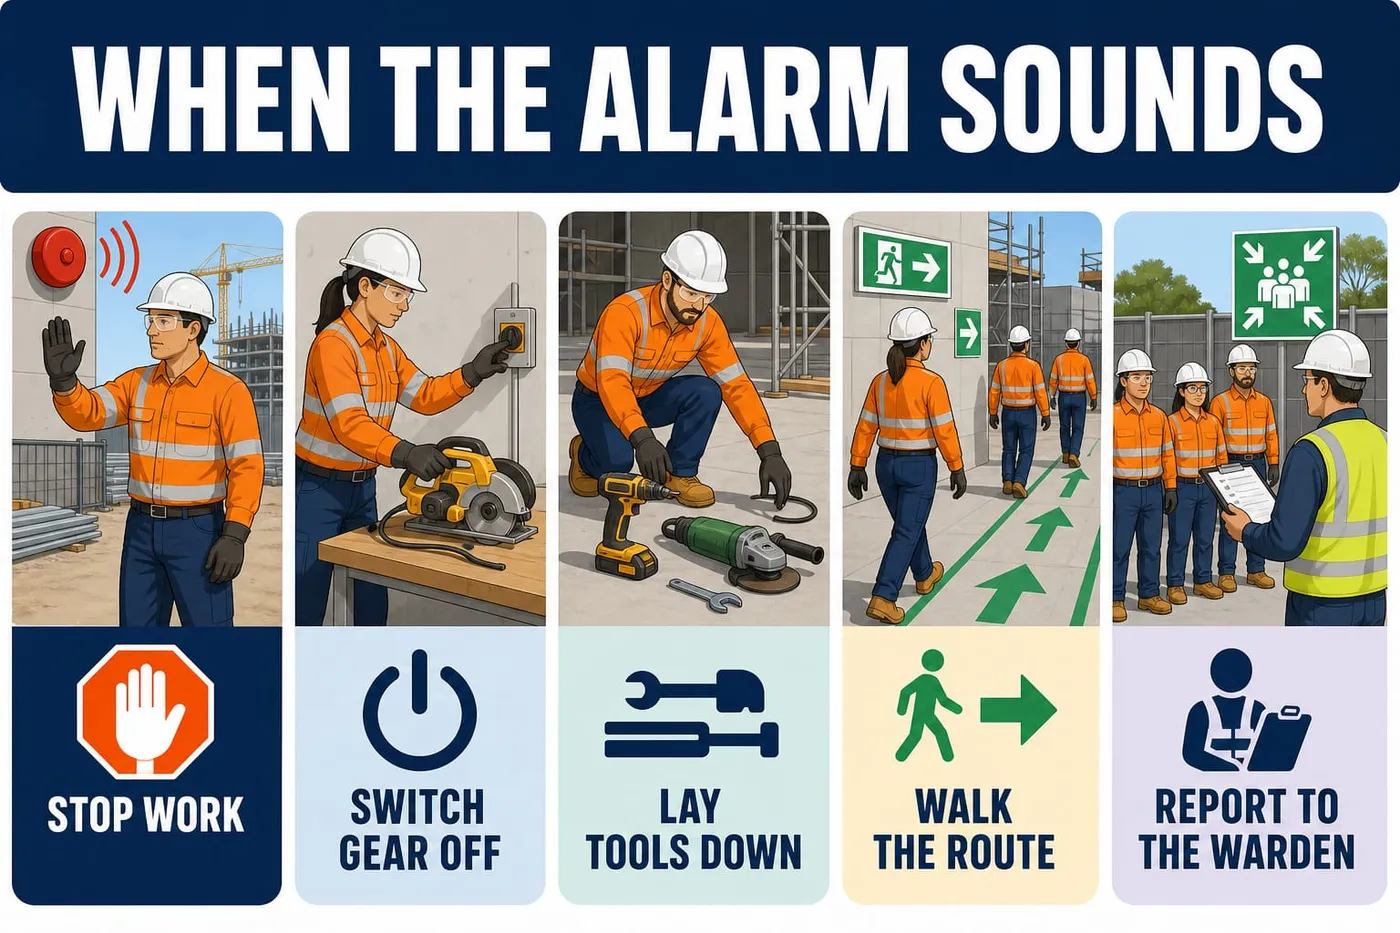
Done right when
- Tools stop within a few seconds of the alarm.
- Nothing is left running.
- No tool left standing, spinning or on the escape path.
- You walk, you do not run, and you do not go back.
- Nobody in your area is left behind.
Stop work the moment you hear three long air horn blasts.
Three long blasts is this site's alarm; a real site may use a siren or a whistle.
Check Tools stop within a few seconds of the alarm.
Switch off the plant or tool you are using.
Warning: Only do this if it is safe — if fire or smoke is between you and the switch, leave it and go.
Power off at the tool, then at the board if it is right beside you.
Check Nothing is left running.
Lay your tools down flat and clear of the walkway.
Check No tool left standing, spinning or on the escape path.
Leave by the marked evacuation route.
Warning: Never return for a phone, bag or tool — people die going back inside.
Out the north door and along the fence line.
Check You walk, you do not run, and you do not go back.
Help anyone who needs it to get out with you.
A new worker, a visitor or someone with a sore leg may not know the route.
Check Nobody in your area is left behind.
Report to the chief warden at the assembly point.
The flagpole in the staff car park.
Check Your name is marked off the headcount list.
Stay at the assembly point until the all-clear is given.
If: someone from your crew is missing, tell the warden immediately — do not go looking yourself.
Check You return to work only when the chief warden says so.
Activity: Walk the evacuation route and run the headcount
Practical, about 45 minutes
Use with the page: When the alarm sounds — evacuate. An evacuation only works if your feet already know the way. In teams of five you walk the route from the work area to the assembly point, time it, and practise reporting to the warden. Your teacher plays the supervisor and the chief warden.
- Read the site emergency plan page and point out on the map the north door, the fence line and the flagpole assembly point.
- Put on your helmet, glasses, hi-vis and boots, and set out a pretend work area in the yard with a trestle and two tools.
- Stop work the moment you hear three long blasts on the air horn, and lay your tools down flat where you stand.
- Walk the marked route to the assembly point at a steady pace without running, without talking over others and without going back.
- Line up at the assembly point and answer your name clearly for the warden's headcount.
- Write down how many seconds the walk took and one thing that slowed your team down, then swap roles and run it again.
Performance criteria: 5.3
Learning content on this page was drafted with AI assistance by VET Creator and must be reviewed by a qualified trainer before use with students.
Element 5 — Follow emergency procedures
When there is a fire
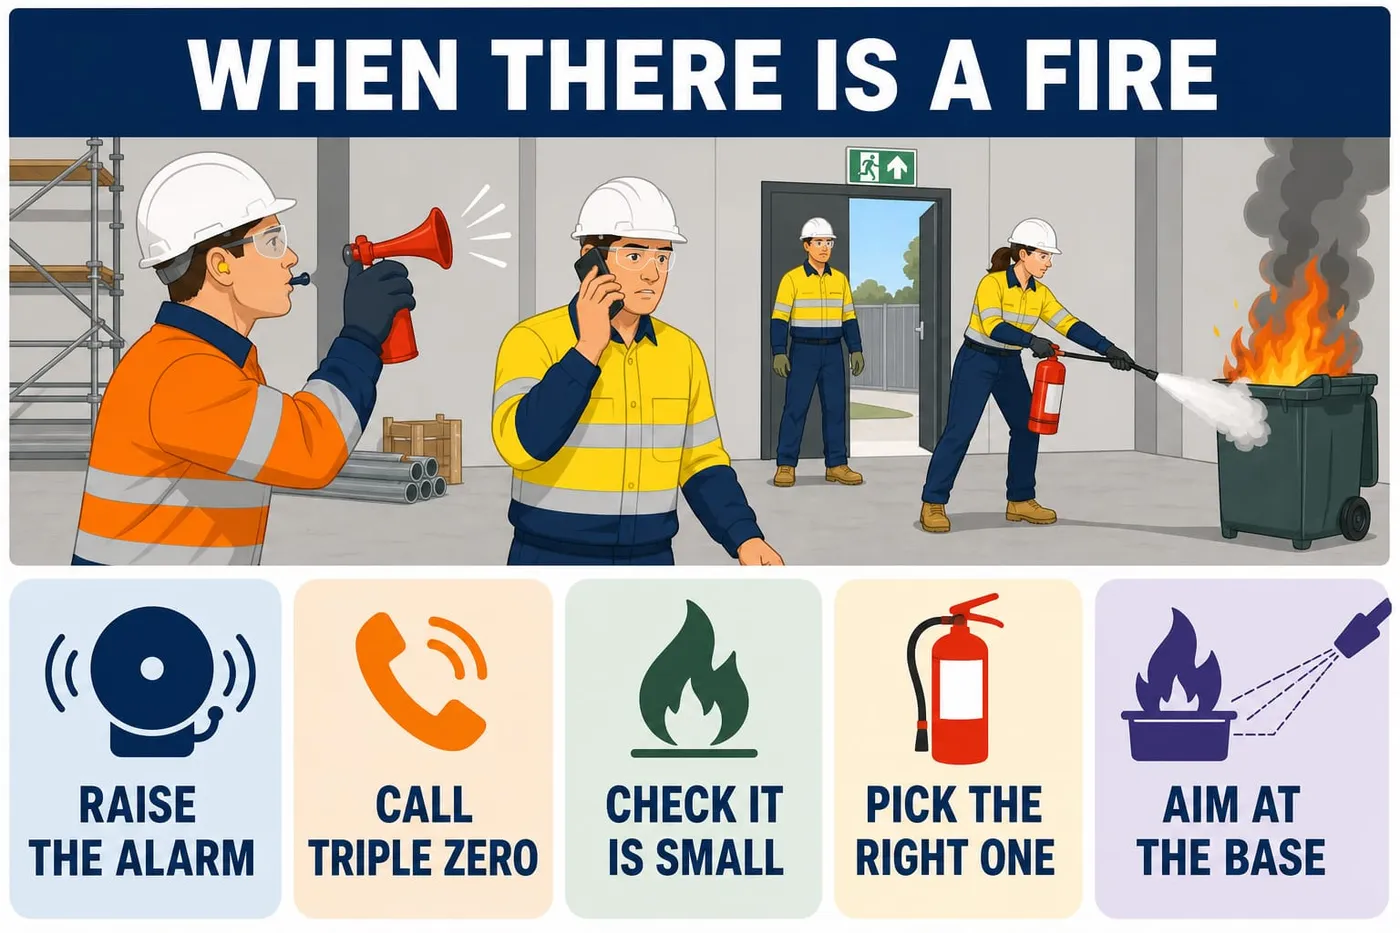
Done right when
- Other workers start moving before you turn to the fire.
- The call is made and someone is sent to meet the fire brigade at the gate.
- You can state why it is or is not within your scope.
- The band on the extinguisher matches the fire class.
- You can step straight out without turning around.
Raise the alarm before you do anything else.
Three long blasts on the air horn, and shout "fire" to anyone near you.
Why: Fire doubles in size fast; everyone needs the head start more than the fire needs you.
Check Other workers start moving before you turn to the fire.
Call 000 or send someone to call 000.
Give the site address: 42 Bridge Road, Glenorchy, Riverbend Primary School.
Check The call is made and someone is sent to meet the fire brigade at the gate.
Judge whether the fire is still small enough.
Smaller than what one 9 kg extinguisher can cover, no smoke filling the room, a clear exit behind you.
If: it is bigger than that, or you are unsure, walk away and evacuate.
Check You can state why it is or is not within your scope.
Pick the extinguisher that matches what is burning.
Warning: Never use water or foam on an electrical fire or on cooking oil.
ABE dry chemical (white band) for timber, liquids, gas and electrical; CO2 (black band) for electrical; fire blanket for a small pan or burning clothing.
Check The band on the extinguisher matches the fire class.
Stand back with your exit behind you.
About two to three strides back, upwind if you are outside.
Check You can step straight out without turning around.
Use PASS on the extinguisher.
Pull the pin, Aim at the base of the flames, Squeeze the handle, Sweep side to side.
Check The discharge hits the base of the fire, not the flame tips.
Get out if the fire is not out in the first few seconds.
Warning: An extinguisher gives you only seconds of discharge; do not let it run dry with you still inside.
Check You are at the assembly point, not still fighting it.
Activity: Match the extinguisher and practise PASS
Practical, about 40 minutes
Use with the page: When there is a fire. Picking the wrong extinguisher can make a fire worse — water on an electrical fire can electrocute you. You sort four fire scenarios to the right extinguisher, then practise the PASS actions with a training unit.
- Look at the bands and labels on three items: the ABE dry chemical extinguisher, the CO2 extinguisher and the fire blanket. Say aloud what each one is for.
- Sort four scenario cards to the right extinguisher or blanket. The cards are: timber offcuts alight, petrol tin alight, site switchboard smoking, and a fat pan alight in the lunch shed.
- Say out loud what you do before you touch any extinguisher: raise the alarm, call 000, keep your back to a clear exit.
- Pick up the training extinguisher, pull the pin, aim the horn at the base of the pretend fire, squeeze and sweep across the base.
- Walk out backwards to your exit and say "not out — leaving it to the brigade" when your teacher calls ten seconds.
- Tell your partner one fire on this job you would not attempt at all, and why.
Quick check
1. A CO2 extinguisher is the right choice for a fire in a live switchboard.
- A. True
- B. False
Show the answer
A. CO2 is for electrical fires because it leaves no residue and does not conduct — water or foam on live gear can electrocute you.
Performance criteria: 5.2
Learning content on this page was drafted with AI assistance by VET Creator and must be reviewed by a qualified trainer before use with students.
Element 5 — Follow emergency procedures
When someone is hurt
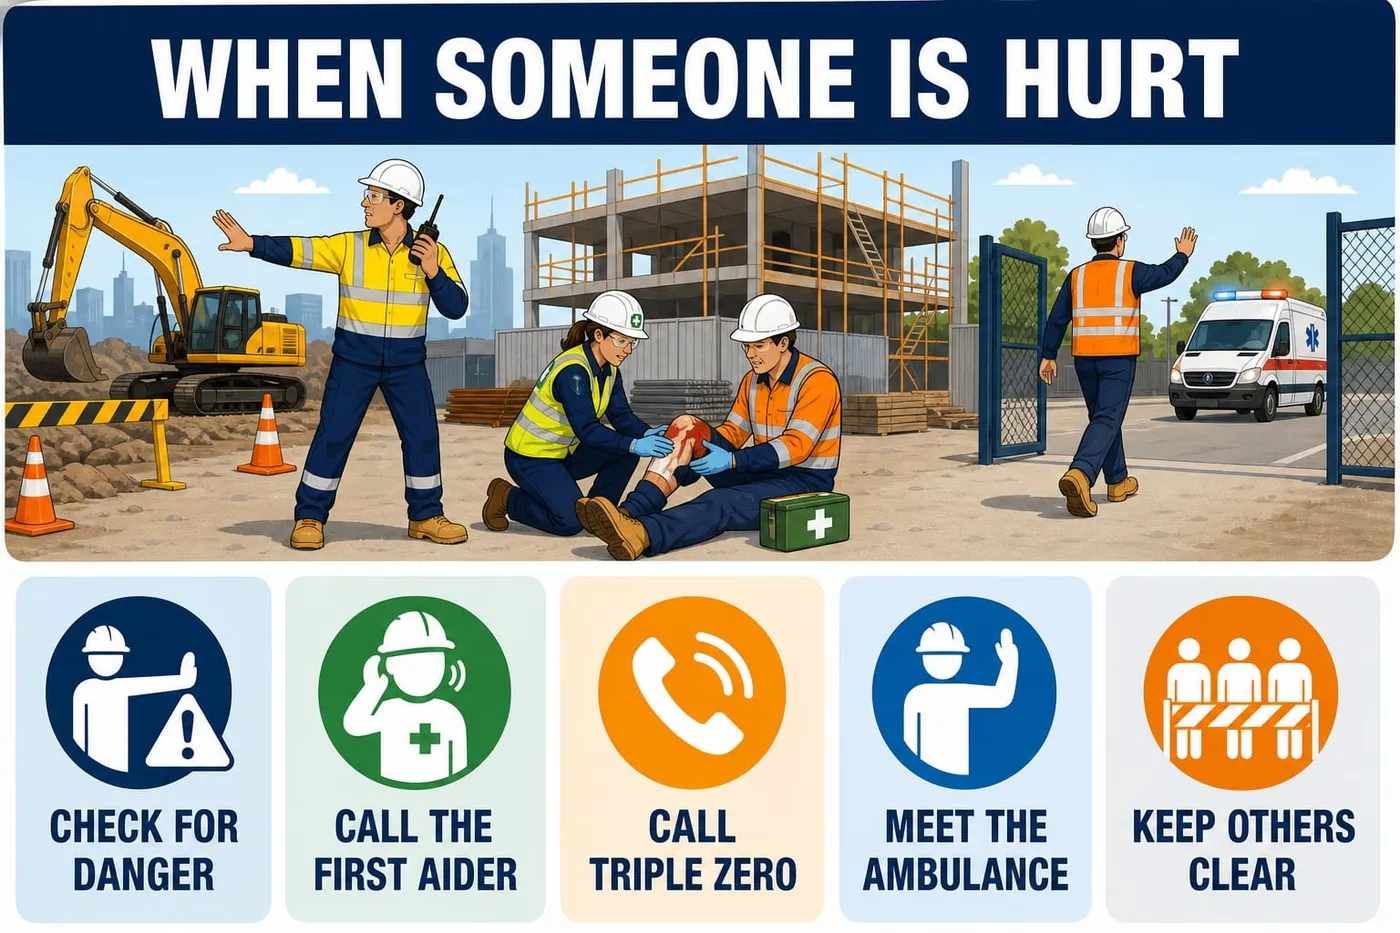
Done right when
- You can name the danger you checked for.
- The first aider is on the way with the kit.
- The call is made within the first minute.
- Only the first aider and helpers are inside the area.
- You do what you have been taught and nothing more.
Check the area for danger before you go near.
Warning: Never touch someone in contact with an electrical source, and stay at least 10 m from a fallen power line.
Live leads, moving plant, unstable material, smoke.
Check You can name the danger you checked for.
Call for the first aider by name.
Kofi Mensah is the first aider on this job.
Check The first aider is on the way with the kit.
Call 000 straight away for anyone badly hurt.
Unconscious, heavy bleeding, a bad fall, a big burn, trouble breathing, or you are not sure.
If: in doubt about how bad it is, call 000 anyway.
Check The call is made within the first minute.
Send someone to meet the ambulance at the site gate.
Why: A locked construction gate can cost the ambulance several minutes.
Keep other workers clear of the scene.
Hazard tape and two witches hats, or just stand people back.
Check Only the first aider and helpers are inside the area.
Give first aid only within your own training.
Warning: Do not move someone who may have a back, neck or leg injury unless they are in immediate danger.
Check You do what you have been taught and nothing more.
Leave the scene undisturbed for a serious incident.
The supervisor must report a serious injury to the regulator and the scene stays as it is.
If: you have to move something to make it safe, tell the supervisor exactly what you moved.
Activity: Treat a minor injury and fill in the Register of Injuries
Practical, about 50 minutes
Use with the page: When someone is hurt. Minor injuries are the ones you will actually deal with: grazes, splinters, small burns, grit in the eye. You treat a staged minor injury on a partner, then write it up the same shift. An example header for this job: Site: Riverbend Primary School refurbishment, 42 Bridge Road, Glenorchy TAS. Date: 14/05. Time: 10:20. Injured person: K. Mensah. Treated by: (your name).
- Put on disposable gloves before you touch anything, and check the scene for danger first.
- Treat the injury your teacher gives you. For a pretend burn, cool it under cool running water for 20 minutes. For a graze, press a clean pad on it and cover it.
- Flush a staged eye irritation at the eye wash station for 15 minutes. Hold the eye open. Let the water run from the nose side outward.
- Tell your teacher, playing the supervisor, what happened and what you did, in one or two plain sentences.
- Fill in the Register of Injuries line using the header above, the body part, what happened, the treatment given and the time.
- Fix any mistake with one line struck through so it is still readable, the right words beside it, and your initials and the date.
Quick check
1. At the assembly point you notice someone from your crew is not there. What do you do?
- A. Tell the warden straight away
- B. Ring their mobile and wait
- C. Check the smoko shed first
- D. Go back in and look for them
Show the answer
A. The warden has the headcount and can send trained people in — workers who go back looking are the ones who get hurt.
Performance criteria: 5.1, 5.2
Learning content on this page was drafted with AI assistance by VET Creator and must be reviewed by a qualified trainer before use with students.
Element 5 — Follow emergency procedures
First aid for minor injuries
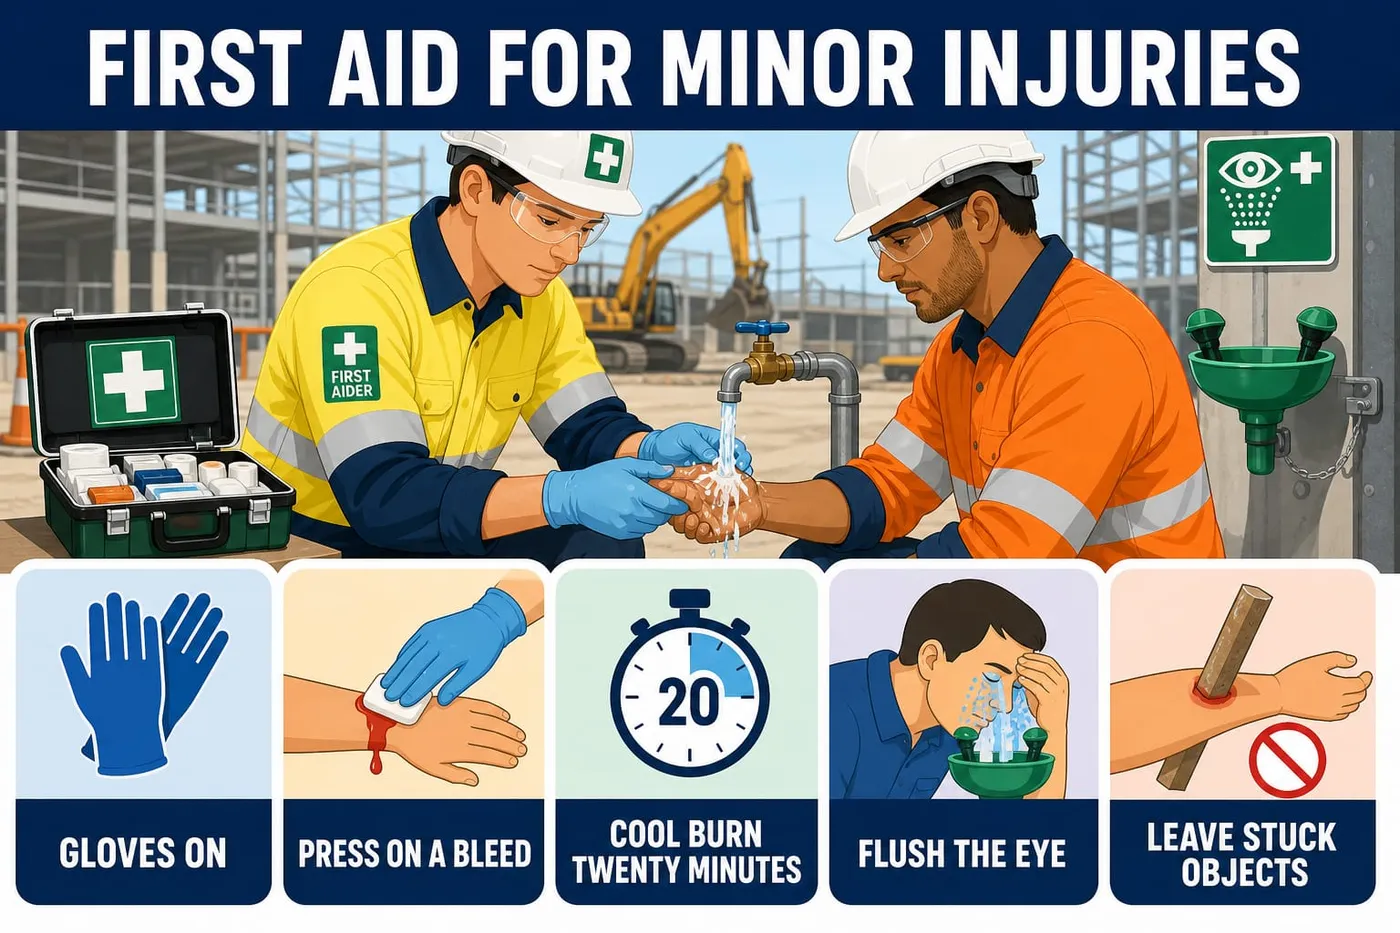
Done right when
- Gloves on before you touch any blood or wound.
- Bleeding slows or stops.
- Wound is clean and covered.
- The full 20 minutes is timed, then covered loosely with a clean non-stick dressing.
- The eye is flushed for the full time and feels clear.
Put on disposable gloves from the first aid kit.
Why: Treat all blood as infectious, even a mate's.
Check Gloves on before you touch any blood or wound.
Press a clean pad firmly on a bleeding cut.
Direct pressure, held, not dabbed.
If: blood soaks through two pads or spurts, call 000 — this is no longer minor.
Check Bleeding slows or stops.
Rinse a graze with clean running water.
Rinse grit out, dry around the edges, then cover with a dressing from the kit.
Check Wound is clean and covered.
Hold a minor burn under cool running water for 20 minutes.
Warning: No ice, butter or creams. Call 000 for chemical, electrical or large burns, or burns to the face, hands, feet, genitals or major joints.
Take rings and watches off early before swelling starts.
Check The full 20 minutes is timed, then covered loosely with a clean non-stick dressing.
Pull a clean splinter straight out with the kit tweezers.
Pull in the same direction it went in, then wash and cover.
If: it is deep, under a nail, or will not come, leave it and send the person to a doctor.
Flush a dusty or gritty eye at the eye wash station.
Warning: Never try to remove something stuck in the eye, and treat any chemical splash as a 000 call.
Hold the lid open and let the water run from the nose side outwards for 15 minutes.
Check The eye is flushed for the full time and feels clear.
Rest and support a strained back or shoulder.
Stop the task, sit the person down comfortably.
If: there is numbness, severe pain or they cannot move the limb, call 000.
Leave an embedded object exactly where it is.
Pad around it and keep it still.
Why: Pulling it out can cause heavy bleeding you cannot control.
Performance criteria: 5.4
Learning content on this page was drafted with AI assistance by VET Creator and must be reviewed by a qualified trainer before use with students.
Element 5 — Follow emergency procedures
After the emergency — report and record
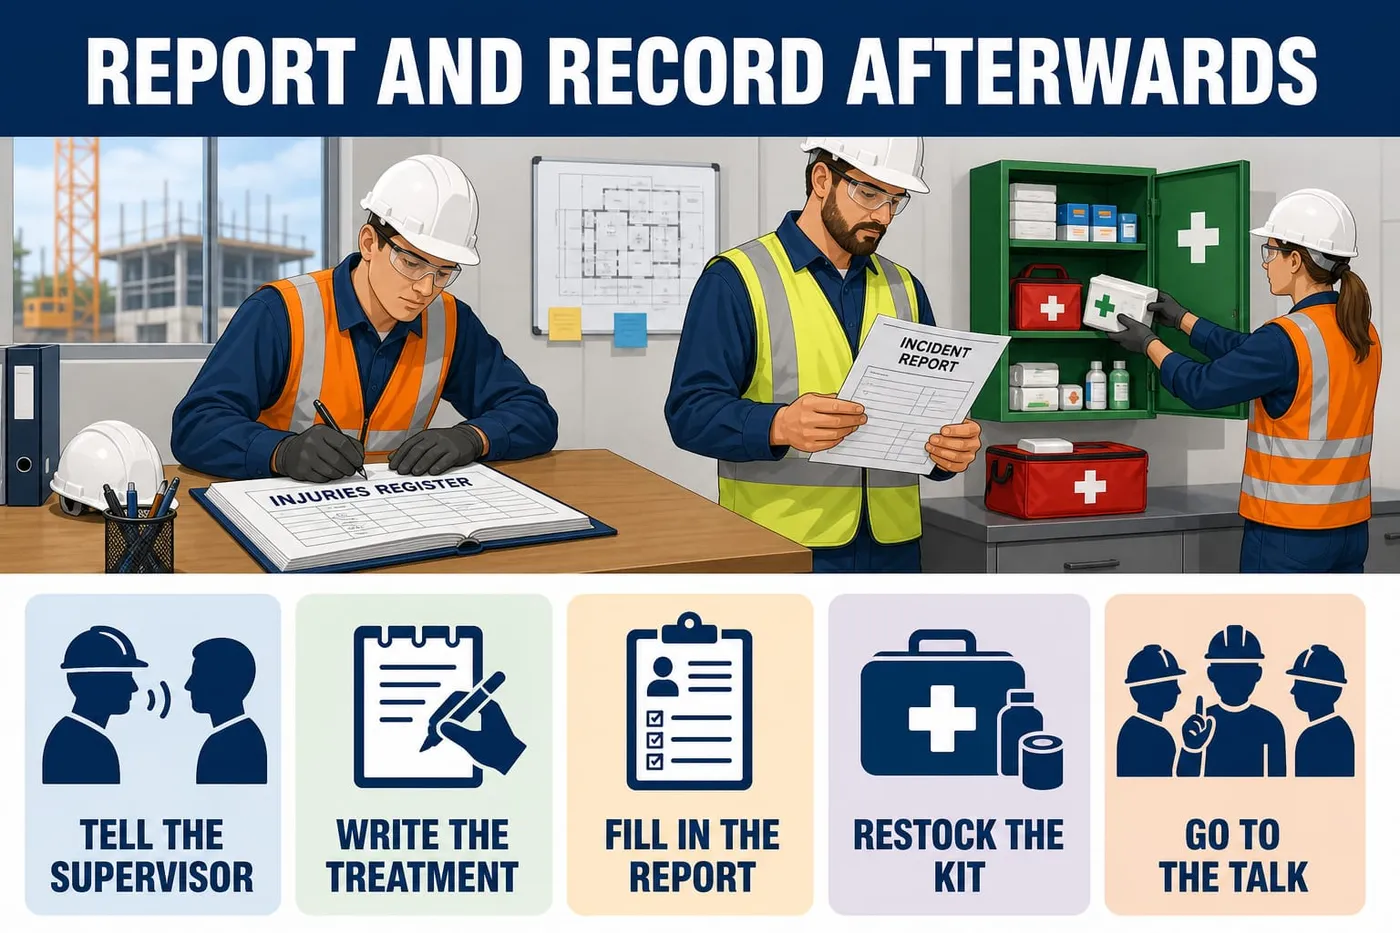
Done right when
- Reported as soon as possible, and before you leave site that day.
- Date, time, person, injury, treatment, who treated and who was told are all filled in.
- Form complete and signed by you.
- The kit is complete for the next person.
- An out-of-service tag is on it and the supervisor knows.
Tell the supervisor or other designated person what happened.
Plain sentences: who, what, where, when, what you did.
Check Reported as soon as possible, and before you leave site that day.
Write the treatment in the Register of Injuries.
Kept in the site office with the first aid kit.
Check Date, time, person, injury, treatment, who treated and who was told are all filled in.
Fill in the Incident/Injury Report form before you leave site.
Write it from what you saw, in the order it happened, not from memory a week later.
Check Form complete and signed by you.
Correct any mistake with a single strike-through.
Warning: Never rub out, white out or write over an entry on a safety record.
One line through it so it is still readable, the right words beside it, your initials and the date.
Restock what you used from the first aid kit.
Tell the first aider which dressings, gloves or saline you used.
Check The kit is complete for the next person.
Tag out and report any equipment involved in the incident.
If: the equipment is faulty, it stays out of use until a competent person clears it.
Check An out-of-service tag is on it and the supervisor knows.
Attend the toolbox talk about what happened.
Say what you saw — it may change how the crew does the job tomorrow.
Check You sign the toolbox record.
Activity: Worked example: writing up a minor burn in the Register of Injuries
Written, about 30 minutes
Use with the page: After the emergency — report and record. This is the whole record written out line by line for a real job, so you can copy the pattern. Kofi burned the back of his hand on a hot drill bit at 10:12 during the ramp repair. Copy each line into your workbook as it is read out.
- Write the header: Site — Riverbend Primary School refurbishment, 42 Bridge Road, Glenorchy TAS. Principal contractor — Derwent Build Pty Ltd.
- Write the entry number and date: Entry 14, Tuesday 14/05.
- Write the time of injury: 10:12. Write the time first aid started: 10:14.
- Write the injured person: K. Mensah, carpenter. Write the person treating: A. Student, under direction of the site first aider.
- Write the danger check: drill switched off and put down, no other hazard in the area, before anyone went to Kofi.
- Write where and how: external ramp, east side. Back of right hand touched a hot drill bit while changing bits.
- Write the injury: red mark about the size of a 10 cent coin on the back of the right hand, skin not broken.
- Write the first aid given: rings removed straight away, hand held under cool running water from 10:14 to 10:34 (20 minutes). No ice, butter or creams.
- Write the 000 call. The burn is to the hand. Australian guidance says to call 000 for burns to the face, hands, feet, genitals or major joints. So the first aider called 000 at 10:15 while cooling continued. Record the call time and who made it.
- Write the dressing: after the 20 minutes of cooling, covered loosely with a clean non-stick dressing.
- Write the outcome: Kofi stayed out of work and was handed over to the ambulance crew at 10:40. He was not returned to duties on site.
- Write who was told and when: reported to supervisor S. Rivera at 10:16 and again at handover; Incident/Injury Report form completed before leaving site.
- Check the entry against the clock. 10:34 minus 10:14 is 20 minutes of cooling, which matches the 20 minute rule. The 000 call at 10:15 came before cooling finished, so calling was not delayed. The times read in order from injury to handover, with no gaps.
- Check the entry is complete. These are all named: the injured person, the person treating, the first aider, the 000 call and the supervisor. The record is signed by the person treating and by the supervisor.
Activity: Emergency call and response quiz
Written questions, about 30 minutes
Use with the page: Know the plan before work starts. Eight quick questions on who you call, what you say and what you do. Answer each one on your own first, then check with your partner.
- Work through the questions one at a time and write your answer before you open the card.
- Mark your own answers and circle any you got wrong to ask about.
1. A workmate falls off a 1.8 m trestle on the ramp job and cannot move his arm. He is very pale. What do you do first?
- A. Help him up and walk him to the site office
- B. Check the area is safe, then call 000 straight away and call for the first aider
- C. Finish making your tool safe, then find the supervisor
- D. Wait to see if he feels better in a few minutes
2. The air horn sounds three long blasts while you are using a corded circular saw. What is your first action?
- A. Run for the gate
- B. Finish the cut you are on
- C. Switch the saw off, put it down and leave by the north door
- D. Pack the saw into its case and take it with you
3. Who gives the all-clear to go back onto site after an evacuation?
- A. Anyone who cannot see smoke
- B. The chief warden, Jess Tan
- C. The first worker back at the gate
- D. The school principal
4. A small fire starts in the site switchboard. Which extinguisher do you reach for?
- A. The water extinguisher
- B. The 2 kg CO2 at the switchboard
- C. A bucket of sand
- D. The foam unit from the ute
5. What does PASS stand for when you use an extinguisher?
6. You see a power line down across the service road after a storm. What do you do?
- A. Move it off the road with a dry timber offcut
- B. Stay at least 10 m away, keep others back, and report it to TasNetworks on 132 004
- C. Drive around it and keep working
- D. Touch it with the back of your hand to see if it is live
7. You put a dressing on Kofi's grazed forearm. When do you report the treatment?
- A. At the end of the week
- B. Only if it gets infected
- C. As soon as possible, and record it in the Register of Injuries the same shift
- D. You do not report first aid, only injuries that need an ambulance
8. You call 000 for an injured workmate. What should you be ready to tell them?
- A. Only the street name
- B. The name of your employer
- C. The site address, what has happened, how many people are hurt and their condition
- D. The job number on your work order
9. You spill a hot drink on your forearm at smoko. What is the correct first aid?
- A. Rub butter on it
- B. Hold ice on it for 5 minutes
- C. Cool it under cool running water for 20 minutes, then cover loosely
- D. Cover it straight away with a tight bandage
10. A fire has been burning for about a minute in a stack of timber pallets and is now taller than you. What do you do?
- A. Attack it with the 9 kg ABE extinguisher
- B. Get out, get everyone out, and leave it to the fire brigade
- C. Push the pallets apart to break up the fire
- D. Hose it with the site water hose
Performance criteria: 1.4, 4.3, 5.4
Learning content on this page was drafted with AI assistance by VET Creator and must be reviewed by a qualified trainer before use with students.
Element 5 — Follow emergency procedures
Check your understanding
Check your understanding
1. If a mate is stuck holding a live cable, it is okay to pull them off quickly.
- A. False
- B. True
Show the answer
A. The current will go straight through you too — isolate the power if it is safe, keep everyone back, and call 000.
2. A workmate splashes hot bitumen on their forearm. What do you do first?
- A. Wrap it in a dry rag
- B. Smear on burn cream
- C. Put ice on the burn
- D. Cool it under running water
Show the answer
D. Cool running water for 20 minutes is the Australian first aid standard — ice, creams and butter all make the damage worse.
Performance criteria: 5.1, 5.2, 5.3, 5.4
Learning content on this page was drafted with AI assistance by VET Creator and must be reviewed by a qualified trainer before use with students.