Element 1 — Plan and prepare
Plan and prepare
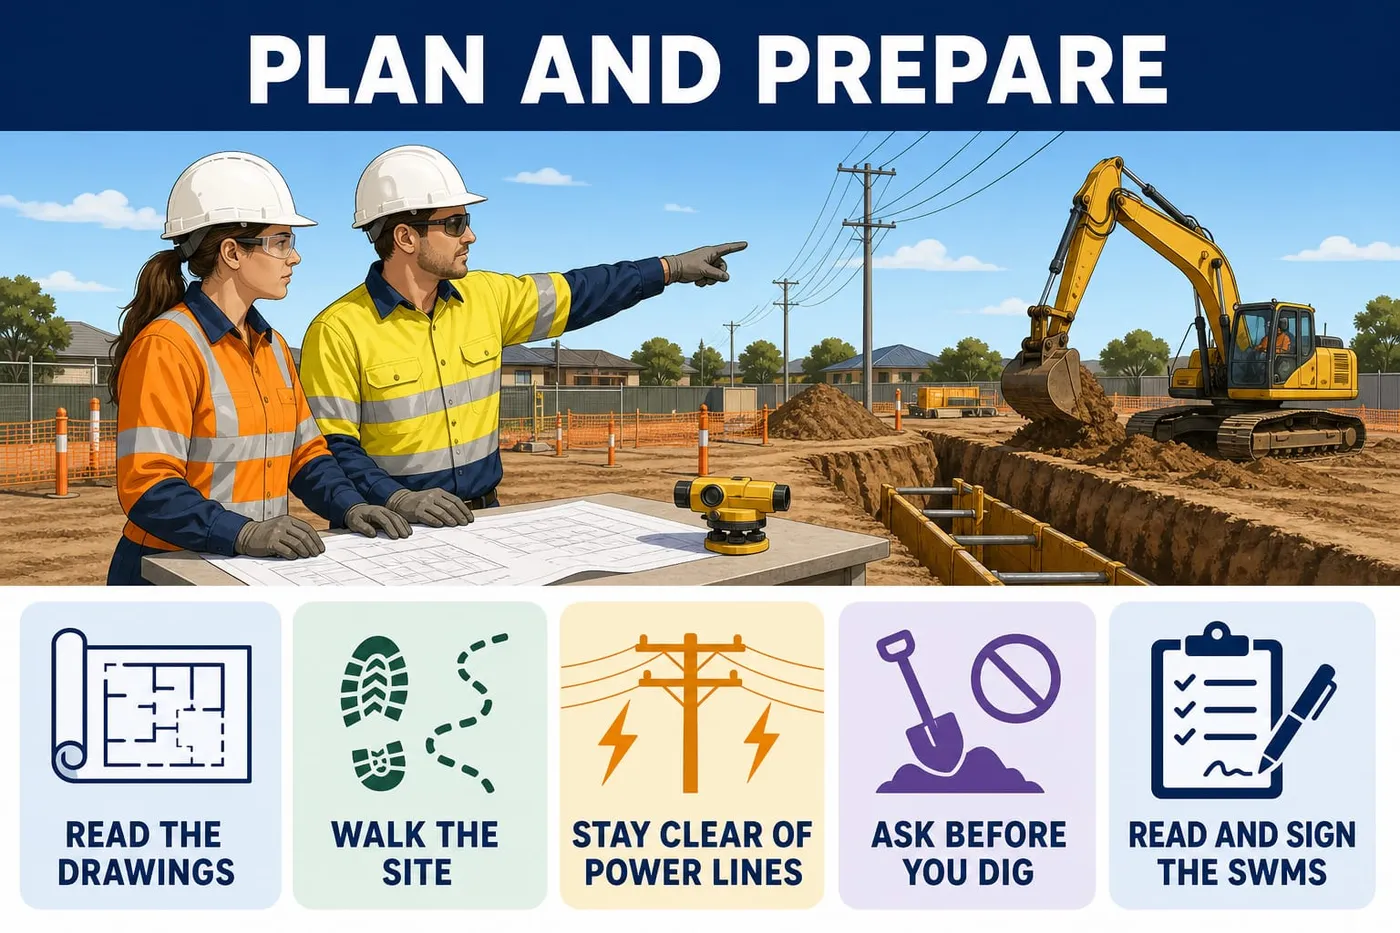
Do this element well and you arrive at the job ready to work. The drawings are read and the levels confirmed. The site is walked and its hazards reported. The paperwork is signed, the kit is checked, and the crew knows who does what.
Levelling means measuring and moving heights around a site. Points finish at the same height, or a set height apart. Get a level wrong on paper and the slab, drain or sign goes in wrong. That costs days.
On Lot 42 Kingston Rise you work out which heights the job wants and where the datum is. The datum is the one point everything is measured from. Here it is TBM1, a brass plug in the kerb at the site entry. TBM1 means temporary bench mark. It is given an assumed RL of 100.000 m. RL means reduced level, the height above the site datum.
Planning starts with the paperwork. You read the site plan at 1:200, the slab plan at 1:100 and the specification. You read the legend, which is the key to the drawing's symbols. Then you confirm the figures with Priya your leading hand and Mick the site supervisor. In class your teacher plays the supervisor.
Next you walk the site and report hazards. Then you check the safety paperwork, choose and check tools, and agree roles and signals.
Key points
- Get the drawings and specification first, read the legend and scale, and confirm every level with your supervisor.
- Walk the whole work area before you start: look up for power lines, down for trenches, around for moving plant.
- Keep people, staves and tripods at least 3 m clear of overhead power lines, and never measure that distance with a tape.
- Get Before You Dig Australia (BYDA) plans before any peg, picket or post goes into the ground.
- Moving plant or a trench over 1.5 m makes it high risk construction work, so read the SWMS and sign on before you start.
- Choose controls by the hierarchy of control: eliminate first, PPE last, never PPE first.
- Fix only the faults the manual lets you fix, then re-check; anything else gets tagged out and reported to the supervisor.
- Agree roles and hand signals at the pre-start and have each one repeated back before the crew splits up.
What you need
- Site plan at 1:200 and slab plan at 1:100 for Lot 42 Kingston Rise
- Job specification and the site safety plan
- SWMS (safe work method statement) for work around moving plant
- Blank site JSA (job safety analysis) form and the site hazard report form
- Safety data sheet (SDS) for the marking paint
- Blank pre-use and post-use equipment check sheet
- Company Level Record Sheet (Point / BS / IS / FS / HPC / RL / Distance / Remarks)
- Automatic level with 24x telescope, circular bubble and three footscrews, in its case
- Aluminium tripod with pointed feet, 5/8" thread and wing nuts
- 5 m telescopic aluminium E-pattern staff with staff bubble
- Self-levelling rotating laser (Class 2 label), clamp-on detector, target card, laser warning signs and charger
- 15 m clear 12 mm hose water level, 1200 mm spirit level and 3.6 m aluminium straight edge
- 8 m pocket tape, 30 m open-reel fibreglass tape, 1 m folding rule, 300 g plumb bob
- Marking kit. Take a lumber crayon and a carpenter's pencil. Take a chalk line and marking paint. Take 75 mm clouts. Take 50 x 50 x 450 mm hardwood pegs. Take star pickets with safety caps.
- Scale rule, clipboard, pen and highlighter
- PPE: hard hat, safety glasses, hi-vis vest or shirt, safety boots, gloves, hearing protection, broad spectrum SPF 50+ sunscreen
- Two-way radios set to channel 4
Performance criteria: 1.1, 1.2, 1.3, 1.4, 1.5
Learning content on this page was drafted with AI assistance by VET Creator and must be reviewed by a qualified trainer before use with students.
Element 1 — Plan and prepare
Get and confirm the job requirements

Done right when
- All three documents in hand and dated today's revision.
- You can name what each symbol on your work area means.
- Scale written at the top of your planning sheet.
- TBM1 highlighted and its RL copied onto your planning sheet.
- Each level written in metres with its point name.
Collect the site plan, slab plan and specification from the site office.
Check each sheet is the current revision shown in the title block.
If: a sheet is superseded, do not use it; get the current one from Mick.
Check All three documents in hand and dated today's revision.
Read the legend on each drawing.
The legend is the key that explains the symbols and abbreviations.
Why: A misread symbol puts a level on the wrong point.
Check You can name what each symbol on your work area means.
Write down the scale of each drawing.
Site plan 1:200, slab plan 1:100 - say it out loud before you pick up the scale rule.
Check Scale written at the top of your planning sheet.
Highlight the datum and its RL on the site plan.
TBM1 is the brass plug in the kerb at the site entry, RL 100.000 m.
Check TBM1 highlighted and its RL copied onto your planning sheet.
List every required height from the drawings.
FFL, FSL, pier pad levels and the drain invert levels, each to three decimals.
If: a level is missing from the drawings, mark it unknown and ask the supervisor.
Check Each level written in metres with its point name.
Scale any dimension the drawings do not state.
Warning: Never scale a dimension that is already written on the drawing; the written figure wins.
Measured mm on paper x the scale number gives mm on site.
If: the scaled figure will be used for set-out, have Mick confirm it before marking.
Confirm your list of levels with Priya and Mick at the pre-start.
Read each figure back and write their answer beside it.
Check Every figure on the list ticked and initialled by the person who confirmed it.
Number your tasks in the order you will do them.
Group by location so the instrument moves as little as possible.
Check A numbered task list covering Projects A, B and C.
Estimate the time for the day's levelling.
Add the productive task times, then add one 15% allowance for set-up, moving and waiting.
Why: An honest estimate lets the crew book the concreter and the plant.
Check Total minutes written down with the allowance shown as a separate line.
Activity: Read the Lot 42 drawings and confirm the job at the pre-start
Practical, about 50 minutes
Use with the page: Get and confirm the job requirements. You are starting on Lot 42 Kingston Rise. Before you touch a tripod you pull the levels out of the drawings and check them with the people who know the job. This is where mistakes are cheapest to fix.
- Lay out the 1:200 site plan, the 1:100 slab plan and the specification on a clean bench.
- Point out the legend, the scale and the north point on each drawing to your trainer.
- Highlight and list on paper the TBM1 location and its RL 100.000.
- Highlight and list the finished floor level (FFL) of the house.
- Highlight and list the finished surface level (FSL) of the car park.
- Highlight and list the upstream and downstream invert levels of the stormwater line.
- Write down any level you cannot find on the drawings, and the page you looked on.
- Ask Priya and Mick in the pre-start to confirm each figure on your list, and write their answer beside it.
- Write your task order for the day, numbered 1 to 6, with Project A first.
Activity: Worked example: scaling the sign position and estimating the job time
Written, about 30 minutes
Use with the page: Get and confirm the job requirements. Two small sums come up in planning: pulling a missing dimension off a drawing, and working out how long the levelling will take. Follow each line of working, then write both results on your planning sheet.
- Write the rule: use a written dimension wherever one exists; only scale where there is none.
- Measure the distance on the 1:200 site plan from the kerb at TBM1 to the car park sign position: 43 mm on paper.
- Multiply by the scale number: 43 mm x 200 = 8600 mm.
- Convert to metres: 8600 / 1000 = 8.600 m.
- Write 'SCALED from 1:200 site plan - confirm with supervisor' beside the figure on your planning sheet.
- List the productive task times for Project A: pre-use checks and two peg test 25 min. Shoot and book 14 points 45 min. Re-shoot 6 check points from the second set-up 20 min. Mark and label 6 pegs 20 min.
- Add them up: 25 + 45 + 20 + 20 = 110 minutes.
- Work out one allowance of 15% to cover set-up, moving the instrument between set-ups and waiting on other trades: 110 x 0.15 = 16.5 minutes.
- Add the allowance once: 110 + 16.5 = 126.5, rounded up to 127 minutes, which is 2 hours 7 minutes.
- Put it on the clock from the end of the pre-start. 7:15 am + 2 h 7 min = 9:22 am. That is a 9:22 am finish, before smoko at 9:30. Breaks are shown on the clock, not inside the allowance.
- Check the allowance was applied once only, and that no task time already included set-up or moving.
Quick check
1. A dimension is written on the drawing, but your scale rule gives a different figure — use the scaled figure.
- A. True
- B. False
Show the answer
B. The written figure always wins; drawings stretch and print off-scale, so never scale a dimension that is already written on.
Performance criteria: 1.1, 2.1
Learning content on this page was drafted with AI assistance by VET Creator and must be reviewed by a qualified trainer before use with students.
Element 1 — Plan and prepare
Inspect the site and report hazards
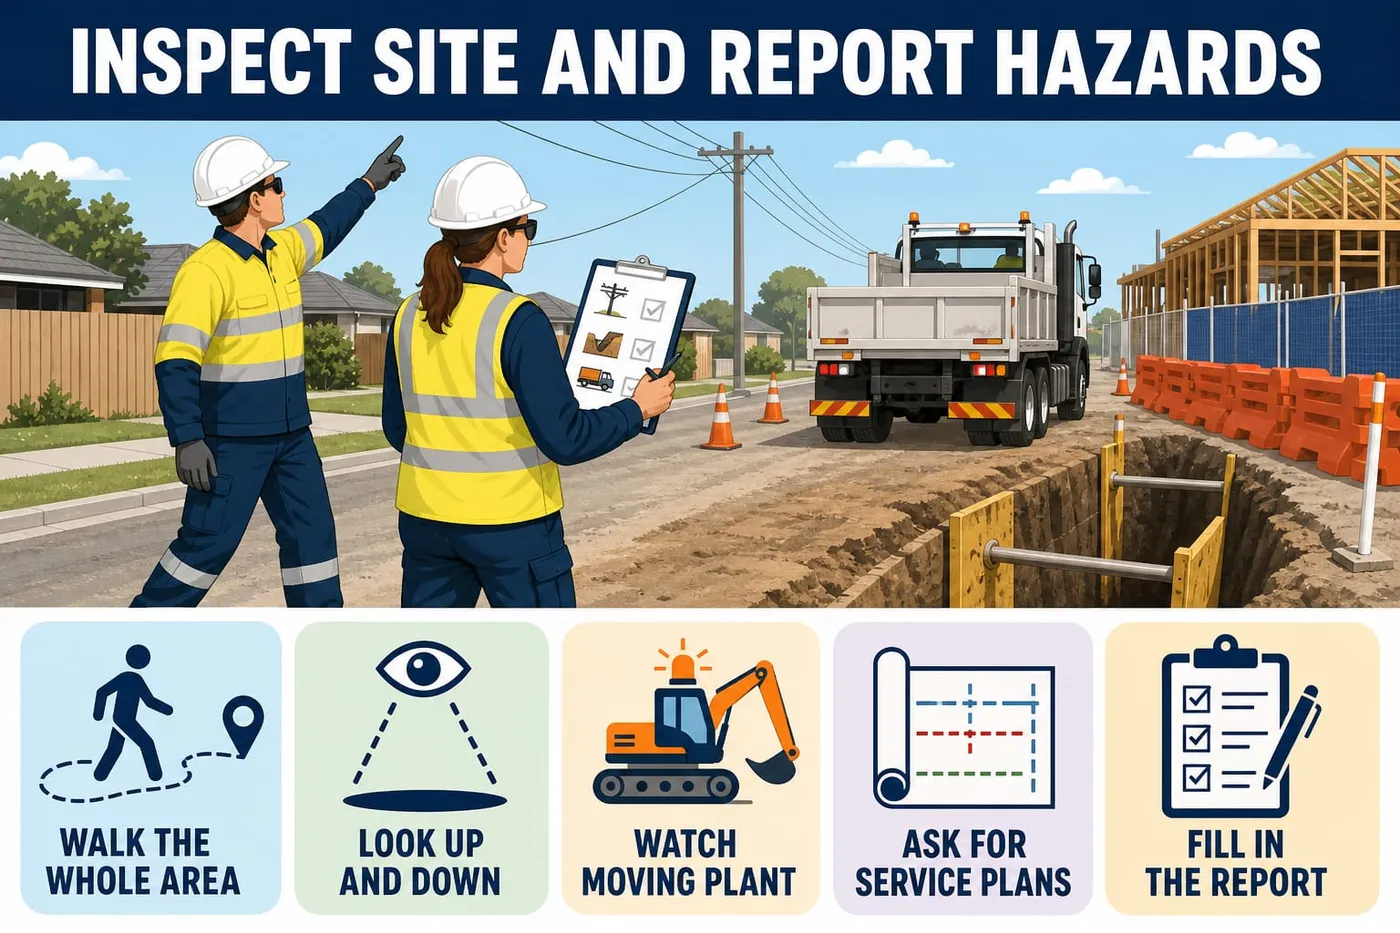
Done right when
- Every area you will level has been walked.
- Trench edges, spoil and trip points marked on your sketch.
- You can state the plant's route and where the pedestrian route runs.
- Water, shade breaks, SPF 50+ sunscreen and eye protection planned for.
- Plans on site and services located and marked on the ground.
Walk the whole work area with your leading hand before setting up.
Walk the slab area, the drain line and the street frontage.
Check Every area you will level has been walked.
Look up for overhead power lines.
Warning: Keep people, staves and tripods at least 3 m from overhead lines, and never measure the gap with a tape or staff.
Picture the staff fully extended to 5 m where you plan to stand it.
If: you cannot keep 3 m clear, stop and get Mick to arrange the distance with TasNetworks.
Look down for open trenches, spoil heaps and uneven ground.
Warning: Never stand a staff or walk a tripod along an unsupported trench edge.
The stormwater trench on this job is 1.8 m deep.
Check Trench edges, spoil and trip points marked on your sketch.
Watch for movement of powered mobile plant.
The excavator and tipper work near the slab area.
If: plant is working where you must level, wait or agree an exclusion area with the operator and Mick.
Check You can state the plant's route and where the pedestrian route runs.
Check the weather and sun exposure for the shift.
Sun, heat and haul road dust are hazards on this site.
Check Water, shade breaks, SPF 50+ sunscreen and eye protection planned for.
Stop at any material you cannot identify.
Warning: Do not cut, drill, sand, break or sweep it; keep people away.
Grey fibre sheeting on a building from before 2004 may contain asbestos.
If: you are unsure, treat it as asbestos and report it to the supervisor straight away.
Request the service plans from Before You Dig Australia.
Warning: Plans are a guide only; never drive a peg over a marked service until the supervisor says how it is avoided.
Needed before any peg, picket or post hole goes into the ground; the plans are free.
Check Plans on site and services located and marked on the ground.
Report every hazard you found on the site hazard report form.
Report what you saw, where it was and when.
If: a hazard is outside your role to fix, report it and keep clear until it is controlled.
Check Form completed and handed to Mick, with his action noted.
Activity: Hazard spotting walk at Lot 42
Practical, about 35 minutes
Use with the page: Inspect the site and report hazards. You walk the Lot 42 work area with your leading hand. You name what could hurt you and report it. In class your teacher plays Mick the supervisor. Staged hazards are props only. Work in pairs with a clipboard. Pairs waiting for the teacher sketch the work area and mark the trench edges.
- Walk the slab area, the drain line and the street frontage with your partner.
- Write down at least six hazards you can see.
- Name the excavator and tipper, the 1.8 m stormwater trench and the overhead power lines on the frontage.
- Name the uneven ground, the sun and heat, and the haul road dust.
- Report each hazard to Mick on the site hazard report form.
- Write beside each hazard what Mick tells you to do.
- Check for underground services before anyone puts a peg in the ground.
Activity: Fill in the JSA for the levelling job
Practical, about 35 minutes
Use with the page: Inspect the site and report hazards. You fill in the site JSA form for the levelling task and have it signed. JSA means job safety analysis. Use the hazards from your site walk. The header reads: Job 'Levelling, Lot 42 Kingston Rise' / Date / Crew 'Priya, Dan, (your work name)' / Supervisor 'Mick'.
- Fill in the JSA header using the job names above, not your own details.
- Break the levelling job into six steps, in the order you will do them.
- Write one hazard against each step.
- Write at least two controls against each step.
- Name the hierarchy level of each control in brackets.
- Sign the JSA and have Mick sign it.
- Hand the JSA in with your other records.
Performance criteria: 1.2
Learning content on this page was drafted with AI assistance by VET Creator and must be reviewed by a qualified trainer before use with students.
Element 1 — Plan and prepare
Confirm the health and safety requirements

Done right when
- You can name the triggers present on Lot 42.
- You can state the controls that apply to you.
- Your name on the sign-on sheet.
- Every step has at least one control, and the form is signed by you and the supervisor.
- The level of each control is named on the JSA.
Check whether the work triggers high risk construction work.
On this job: movement of powered mobile plant, and a trench deeper than 1.5 m. There are 18 types in all.
If: you are unsure whether a trigger applies, ask the supervisor before starting.
Check You can name the triggers present on Lot 42.
Read the SWMS for work around moving plant.
It lists the job steps, hazards, risks, controls, how controls are monitored and reviewed, and who is responsible.
Check You can state the controls that apply to you.
Sign on to the SWMS.
Your signature says you have read it and will work to it.
If: the work or the site changes from what the SWMS says, stop and tell the supervisor.
Check Your name on the sign-on sheet.
Fill in the site JSA for the levelling task.
Break the job into steps, then write a hazard and controls against each step.
Why: Where no high risk trigger applies a SWMS is not required by law, but the site's own JSA process still is.
Check Every step has at least one control, and the form is signed by you and the supervisor.
Choose each control using the hierarchy of control.
Eliminate first; then substitute, isolate or engineer; then administrative; PPE last.
Check The level of each control is named on the JSA.
Read the safety data sheet for the marking paint.
Section 2 hazards, section 4 first aid, section 7 handling and storage, section 8 PPE.
If: the SDS is more than five years old, ask the supervisor for the current sheet.
Check You can state the PPE and the first aid for splashes in the eye.
Confirm the site emergency arrangements at the pre-start.
Air horn alarm, assembly point in the car park by the site office, Priya is first aider, Mick is warden, kit in the site office.
Check You can say where you go and who you report to.
Rehearse the evacuation steps out loud with your crew.
Stop work. Make gear safe if it is safe to do so. Switch the laser off and lay the staff down. Leave by the evacuation route. Go to the assembly point. Report to the warden. Wait for the all-clear.
Rehearse what you do if someone is hurt.
Warning: Never touch a person who is in contact with an electrical source.
Check for danger first. Keep 10 m from any fallen power line. Get Priya. Call 000 for anyone badly hurt. Give first aid within your training. Report to Mick.
Fit your PPE and check it.
Hard hat squared and chin strap adjusted, glasses clean and unscratched, hi-vis fastened, boots laced, sunscreen on.
If: any item is damaged, replace it before starting; do not start work without it.
Check All PPE worn correctly and nothing cracked, torn or worn out.
Performance criteria: 1.3
Learning content on this page was drafted with AI assistance by VET Creator and must be reviewed by a qualified trainer before use with students.
Element 1 — Plan and prepare
Know what each levelling device can and cannot do
Done right when
- Every device in the store appears on your list with its make and model.
- An accuracy figure and a maximum range are written for each device.
- You can state the length of your straight edge and the distance it will cover.
- You can explain why ten steps are less reliable than one long sight.
- You can name a job on site where no sight line exists between the two points.
List the levelling devices available in the site store.
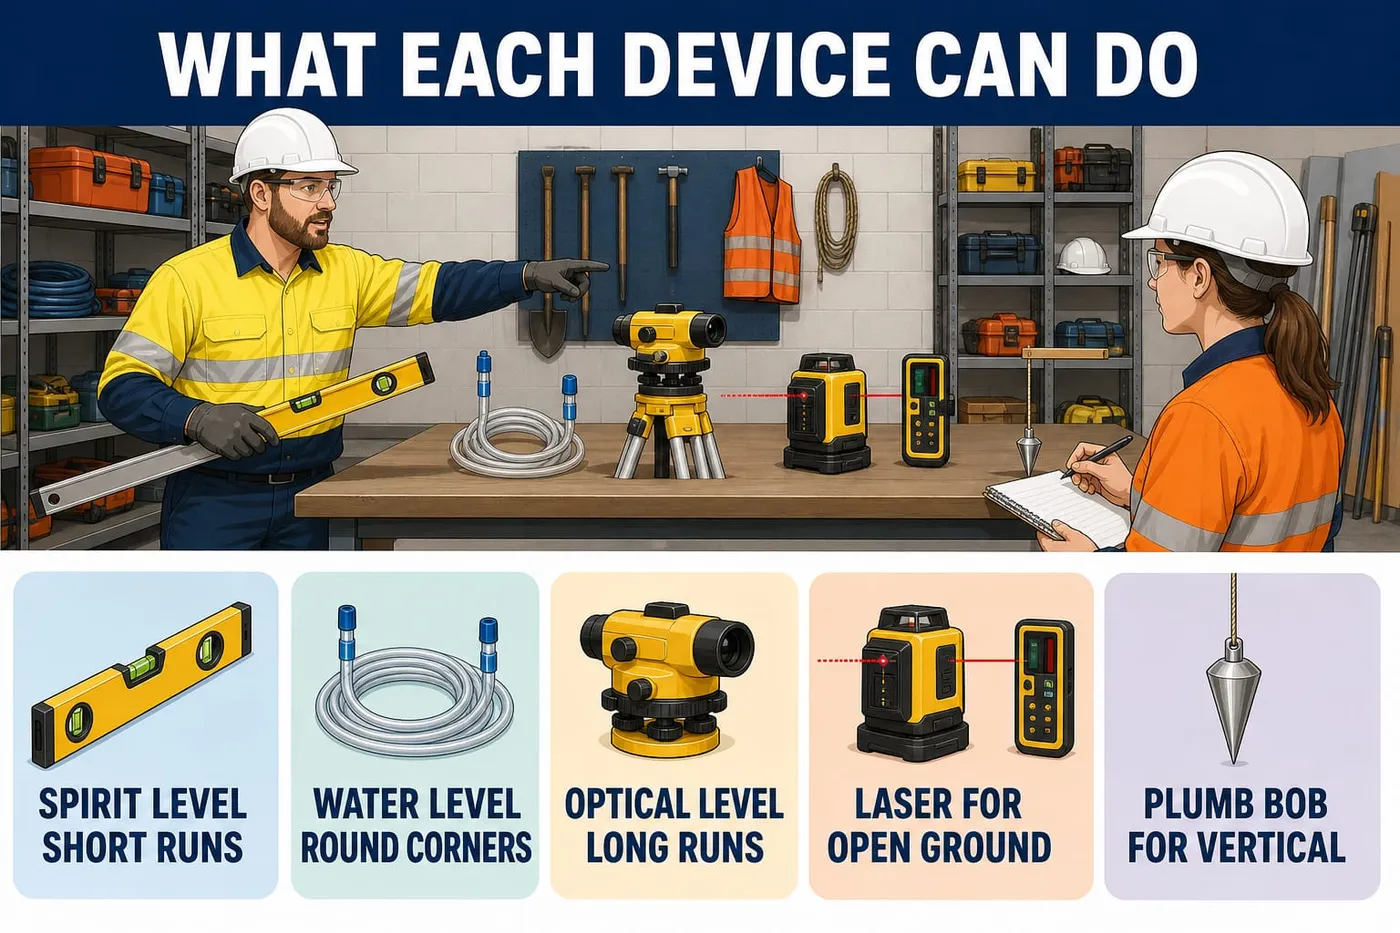
Typical kit: spirit level and straight edge, water level, automatic/optical level, laser level and detector, plumb bob.
Why: You cannot choose the best device until you know what is on hand.
Check Every device in the store appears on your list with its make and model.
Read the accuracy and working range for each device in its manual.
The manual states the accuracy over a stated distance; write the figure beside the device on your list.
Why: Accuracy and range are the two limits that decide if a device suits the job.
Check An accuracy figure and a maximum range are written for each device.
Choose a spirit level and straight edge for short, close-up transfers.
Good for one straight edge length, commonly up to about 3 m on formwork, door openings and short runs.
Why: It is quick, cheap and needs no set-up, but it only works as far as it reaches.
Check You can state the length of your straight edge and the distance it will cover.
Limit the number of times you step a straight edge along.
Warning: Stepping a straight edge across a whole slab can build an error of many millimetres and put the floor out of level.
Every step adds its own small error, so a long run of steps drifts off level. Check the level with a reverse reading first - see 'Check the levelling device against the maker's tolerance'.
Check You can explain why ten steps are less reliable than one long sight.
Choose a water level to carry a height around a corner or obstruction.
Water finds its own level in both ends of the tube, so the two ends do not need to see each other.
Why: No other basic device transfers a height through a wall or around a building.
Check You can name a job on site where no sight line exists between the two points.
Keep the water level hose shaded, unkinked and free of air.
Warning: A hose lying half in the sun can give a false height and the whole set-out follows it.
Sun on one end warms the water and shifts the reading; a kink or bubble stops the water settling.
Check Both menisci settle and stay still before you mark.
Choose an automatic or optical level for long runs with many points.
It reads a staff accurately over tens of metres and lets you book a whole run of levels from one set-up.
Why: It is the most accurate device in the basic kit for ground levels and closed runs.
Check You can state the furthest staff distance the manual allows for this instrument.
Allow for the automatic level needing two people and clear sight lines.
Warning: Never point the telescope at the sun or view a laser beam through it: it can blind you.
One person reads, one holds the staff; rain, heat shimmer and darkness all cut what you can read.
Check You can name two site conditions that would stop you using the optical level today.
Choose a laser level and detector for open ground and one-person work.
A rotating laser sweeps a level plane and the detector finds it on the staff, so one worker can work alone.
Why: It saves time over large areas such as slab and pad levels.
Check You can explain how the detector replaces the second person.
Allow for the laser's limits in bright sun, wind and long range.
The beam is hard to see outdoors without the detector, range drops with distance and a knocked tripod throws the plane out. Check the class on the label - see 'Check the levelling device against the maker's tolerance'.
Why: Knowing the limit stops you trusting a reading taken past it.
Check You can state the maximum detector range in this laser's manual.
Use a plumb bob to transfer a point vertically, never to find level.
The string hangs in line with gravity, which gives you plumb; wind and a swinging bob make it unreliable in the open.
Why: Plumb and level are different jobs and need different tools.
Check You can state the difference between level, plumb and line in your own words.
Confirm your device choice for each task with the leading hand.
Say which device you picked and the limit that made you pick it.
Why: A wrong choice found at the pre-start costs minutes, not a day's rework.
Check The leading hand agrees the device suits the distance and accuracy the job needs.
Activity: Build a device comparison chart
Written, about 20 minutes
Use with the page: Know what each levelling device can and cannot do. In pairs, build a one page comparison chart for five levelling devices. Then use the chart to pick a device for two small jobs your trainer describes. One example job is setting the height of a line of carpark bollards. Another is carrying a ceiling height through a doorway into the next room. Use four columns: Device / Typical accuracy and range / Best used for / Main limitation. Work from the manuals in the classroom, not from memory.
- Rule up the four columns and head them Device, Accuracy and range, Best used for, Main limitation.
- Copy this finished example row as your model: 'Water level | reads the same height at both ends, limited by hose length (20 m hose on hand) | carrying a ceiling height through a doorway into the next room | sun on one end warms the water and shifts the reading. It needs still water and no bubbles'.
- Fill a row for the spirit level and straight edge, using the straight edge length in the classroom.
- Fill a row for the automatic level, using the accuracy figure printed in the instrument manual.
- Fill a row for the laser level and detector, using the detector range in the laser manual.
- Fill a row for the plumb bob and write 'gives plumb, not level' as its limitation.
- Write two sentences under the chart naming the device you would pick for each of the trainer's two jobs and the limit that decided it.
- Swap charts with another pair and mark any limitation they missed.
Quick check
1. Which device is the best choice for transferring a height around a corner where the two points cannot see each other?
- A. Laser level and detector
- B. Spirit level and straight edge
- C. Automatic level and staff
- D. Water level
Show the answer
D. Water finds its own level in both ends of the tube, so no sight line is needed between the points.
Performance criteria: 1.4
Learning content on this page was drafted with AI assistance by VET Creator and must be reviewed by a qualified trainer before use with students.
Element 1 — Plan and prepare
Select and check the tools and equipment
Done right when
- Each project has a device listed against it on the check sheet.
- Nothing missing from the case inventory.
- No movement at the head when you twist it by hand.
- Staff stands plumb with the bubble centred and holds its length.
- Instrument complete and undamaged, serial number recorded on the sheet.
Match a levelling device to each project.
Use the automatic level for the slab and pad levels. Use the laser and detector for the drain run. Use the water level and the spirit level with a straight edge for the formwork and the sign.
Why: The device must suit the distance, the accuracy and whether you must go around a corner.
Check Each project has a device listed against it on the check sheet.
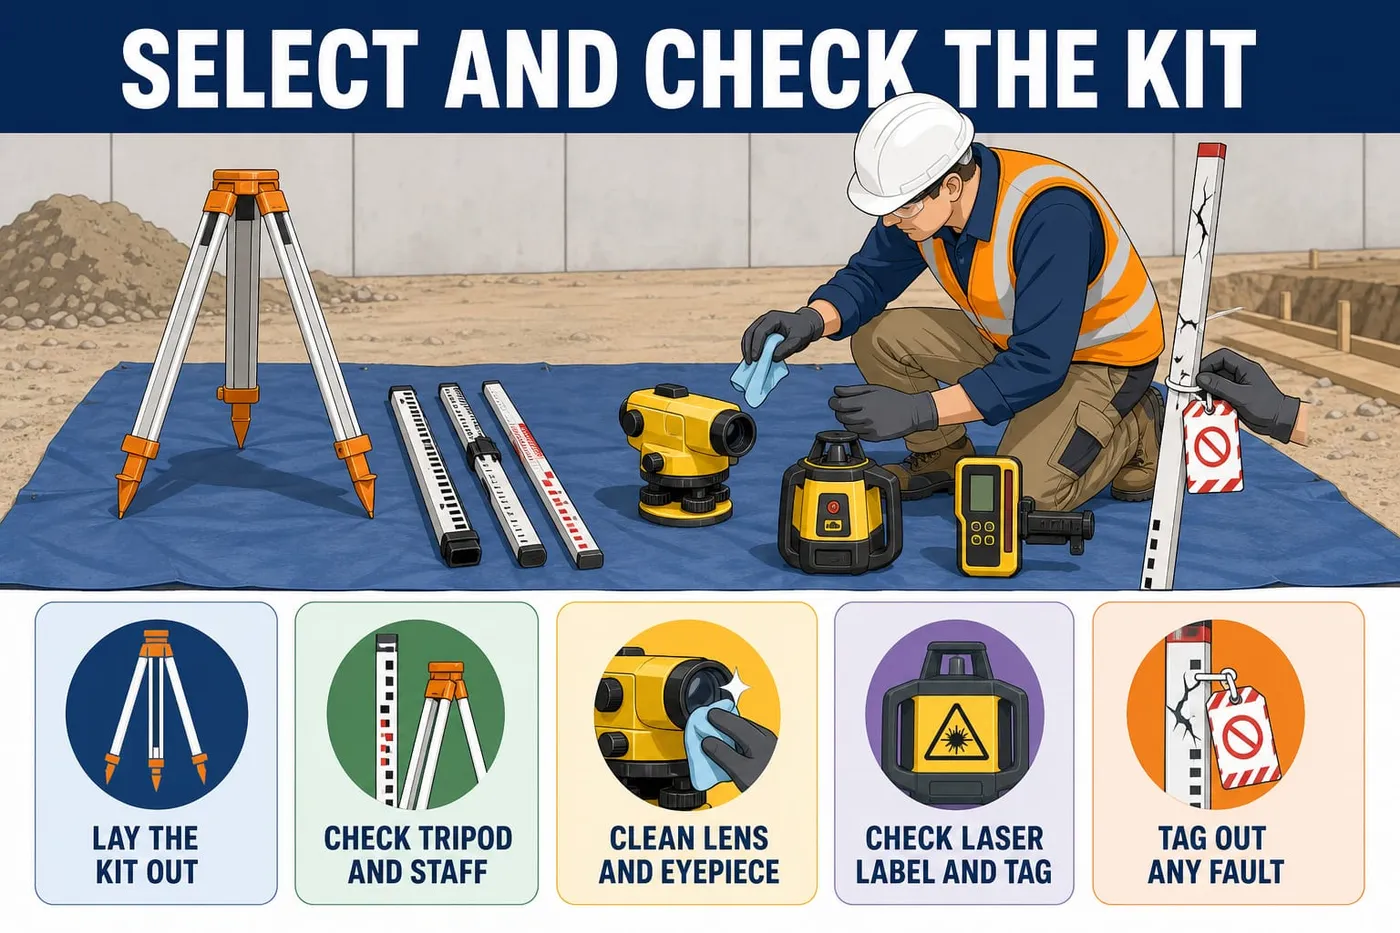
Lay the kit out on a clean, dry surface.
One item at a time, in the order of the check sheet.
Check Nothing missing from the case inventory.
Check the tripod.
Legs slide and clamp, wing nuts tight, feet pointed and sound, head clean.
If: a wing nut is loose, tighten it and re-check; if a leg is cracked, tag out and report.
Check No movement at the head when you twist it by hand.
Check the staff.
Sections extend and lock, clamps hold under weight, face clean and readable, foot clean, bubble intact.
If: a section slips under load, tag out and report.
Check Staff stands plumb with the bubble centred and holds its length.
Inspect the automatic level before fitting it.
Case undamaged, no loose parts, footscrews turn smoothly through their range.
Check Instrument complete and undamaged, serial number recorded on the sheet.
Clean the telescope lens and eyepiece.
Warning: Never use a rag, paper towel, your sleeve, or anything wet or with solvent on a lens.
Brush or blow the dust off first, then wipe with a clean, dry lens cloth.
If: a lens is chipped or the image stays hazy, tag out and report.
Read the class on the laser's label.
Only Classes 1, 1M, 1C, 2, 2M and 3R may be used in construction; this kit is Class 2.
If: the label shows Class 3B or Class 4, do not use it on site; report it.
Check Class read and recorded before the laser leaves the store.
Check the detector, target card and warning signs are in the kit.
Check Detector clamps firmly to the staff and gives an on-grade signal in the beam.
Check the test tag date on the laser charger and any lead.
Plug-in gear, leads and chargers are tested and tagged at least every three months.
If: the tag is missing or out of date, tag the item out and report it.
Check Tag present and dated within the last three months.
Flush and refill the water level hose with clean water.
No air bubbles and no kinks, both ends left open.
If: bubbles will not clear, re-fill the hose before taking it to the job.
Check A clear, unbroken column of water from end to end.
Rectify only the faults the manufacturer's manual lets you fix.
Warning: Never adjust an instrument's compensator, optics or electrics yourself.
Flat battery, dirty lens, dirty staff foot, loose tripod screw, air in the hose.
Check Fault fixed, item re-checked and the repair written on the check sheet.
Tag out any other faulty item and report it.
Fit the out-of-service tag, put the item aside, tell Mick and write it on the sheet.
Check Tagged item is out of use and the supervisor has been told.
Plan how you will carry the tripod, staff and pegs.
Warning: Carry a long staff horizontal and low when near the street frontage and its power lines.
Clear the path first, get help or a trolley for the peg bundle, keep the load close, turn with your feet.
Check No twisting under load and no carry made that needed two people but was done by one.
Fit a safety cap to every star picket as soon as it is driven.
Drive with the picket driver, two hands, hands off the picket head.
Why: An uncapped picket can impale someone who trips or bends onto it.
Check No exposed picket top anywhere people are working.
Activity: Choose and check the tripod, staff and level
Practical, about 30 minutes
Use with the page: Select and check the tools and equipment. You lay out the kit for Lot 42 in small teams. You choose what each project needs, then check the first items. Teams waiting their turn write up their check sheet so far.
- Write on the check sheet which device you will use for each project.
- Use the automatic level for Project A, the laser and detector for Project B.
- Use the water level and the spirit level with straight edge for Project C.
- Check the tripod: legs slide freely, wing nuts tight, feet sound, head clean.
- Check the 5/8" tripod thread is undamaged.
- Check the staff: sections extend and lock, clamps hold, face clean and readable.
- Check the staff foot is clean and the staff bubble is intact.
- Check the automatic level in its case for damage, and turn the footscrews through their range.
- Clean the lens by brushing the dust off first, then wiping with a clean dry lens cloth.
Activity: Check the laser kit and tag out a faulty item
Practical, about 30 minutes
Use with the page: Select and check the tools and equipment. You check the laser kit and the water level, then deal with a fault. Your teacher will have planted at least one fault. In class the teacher plays Mick. Fill in the pre-use equipment check sheet and hand it in.
- Check the laser label shows Class 2.
- Check the detector clamps to the staff and gives an on-grade signal.
- Check the charger's test tag is dated within the last three months.
- Check the water level hose for air bubbles and kinks.
- Fix only the faults the manual lets you fix, such as a flat battery or a loose tripod screw.
- Re-check each item you fixed and record what you did.
- Tag out any other faulty item with an out-of-service tag and take it out of use.
- Report the fault to Mick and write down the fault and who you told.
Quick check
1. You blow and wipe the level's lens properly, but the image is still hazy. Next step?
- A. Wipe the lens with a damp rag
- B. Use it with care for today's readings
- C. Tag it out and tell Mick
- D. Open the case and clean inside it
Show the answer
C. Cleaning is a fault you may fix. Anything still wrong with the optics is tagged out and reported for a competent person.
Performance criteria: 1.4
Learning content on this page was drafted with AI assistance by VET Creator and must be reviewed by a qualified trainer before use with students.
Element 1 — Plan and prepare
Confirm team roles and communication signals
Done right when
- Each person says their own role back.
- All three crew members use the same signal for the same meaning.
- Each signal is seen and copied from the working distance.
- Dan gives the right signal for each meaning you call out.
- Both radios send and receive clearly from the far end of the work area.
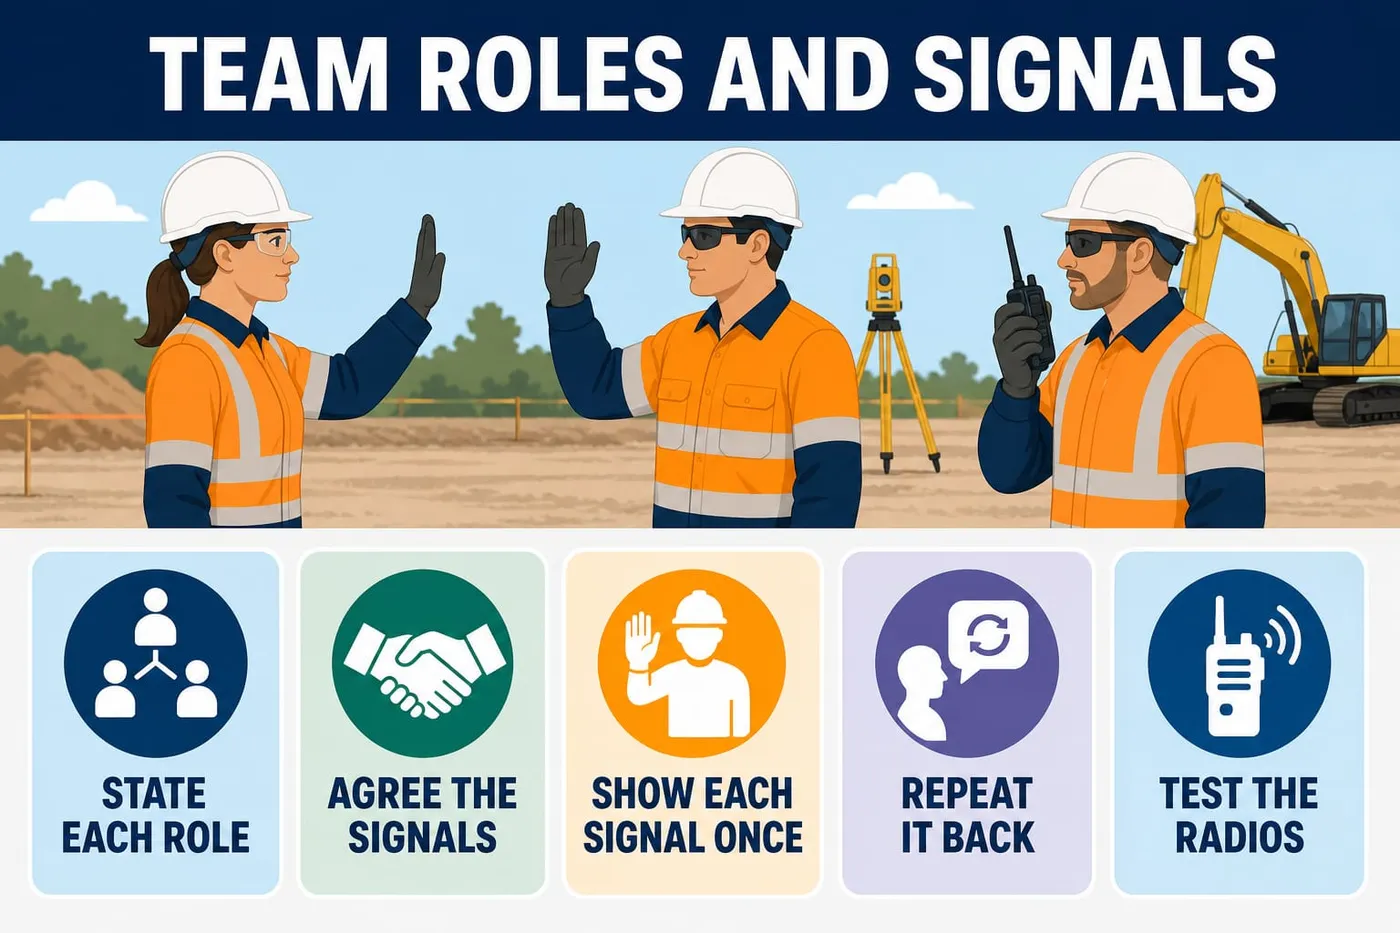
State each person's role at the pre-start.
Priya leads and books, Dan holds the staff, you set up and read the instrument.
Check Each person says their own role back.
Agree the hand signals the crew will use today.
Example set: open palm up = stop. Flat hand swept up = raise the staff or detector. Swept down = lower it. Thumb up = on-grade, reading taken. Hand circled = next point. Arms crossed overhead = come in, problem.
Why: Out past about 30 m, or with plant running, nobody will hear you.
Check All three crew members use the same signal for the same meaning.
Demonstrate each signal once to the crew.
Make signals big, above the shoulder, with the sun behind you if you can.
Check Each signal is seen and copied from the working distance.
Have Dan repeat each signal back to you.
If: a signal is confused with another, change it now and agree a clearer one.
Check Dan gives the right signal for each meaning you call out.
Set both radios to channel 4 and test them.
Use radios whenever you are out of sight of each other.
Check Both radios send and receive clearly from the far end of the work area.
Agree the whistle blast as the 'look at me' call.
Check Everyone turns and looks on one blast during the test.
Agree what happens if anyone loses sight of the staff hand.
Hold the reading, do not guess it, and call on the radio.
If: you cannot re-establish contact, stop work and walk to the staff hand.
Activity: Quiz: planning a safe levelling job at Lot 42
Written questions, about 35 minutes
Use with the page: Confirm the health and safety requirements. Answer these eight questions about planning the levelling work at Lot 42 Kingston Rise. Open each answer only after you have written yours down.
- Read each question and write your answer before you open the card.
- Mark your own answers and bring any you got wrong to your trainer.
1. You are about to drive a star picket as a recovery peg beside the car park. What must be done first?
- A. Get the BYDA plans and have services located and marked
- B. Drive the picket slowly and listen for anything hard underground
- C. Check the picket is capped, then drive it with two hands
- D. Ask the excavator operator if he remembers hitting any services
2. The tap check shows the level's cross-line settles on a different reading each time. What do you do?
- A. Average three readings and keep working for the rest of the day
- B. Open the cover and adjust the compensator yourself with the pin
- C. Tag it out and report it to Mick
- D. Swap the tripod and try the tap test again
3. You need to shoot levels along the street frontage where low voltage overhead lines run. What is the right move?
- A. Measure up to the wire with the staff so you know the clearance
- B. Keep at least 3 m clear and ask Mick about that line
- C. Work under the lines but keep the staff only half extended
- D. Fold the tripod and carry it upright under the wires
4. An excavator and a tipper are working near the slab area while you level. Is a SWMS required?
- A. No, because levelling is light work done away from the machines
- B. No, because you are working under direct supervision all shift
- C. Yes, movement of powered mobile plant is high risk construction work
- D. Only if you go within 5 m of the moving machine
5. Which control for the moving plant hazard sits highest in the hierarchy of control?
- A. Everyone wears hi-vis and a hard hat in the levelling area
- B. The whole crew is briefed about the plant at the pre-start
- C. Cones and bunting fence the area so plant cannot enter
- D. A sign is put up saying 'beware of moving plant'
6. The laser charger's test tag is dated nine months ago. What do you do?
- A. Use it, the laser itself is battery powered anyway
- B. Write a new date on the tag and keep going
- C. Tag it out and report it for testing
- D. Use it only through a residual current device
7. Before you open the marking paint, what tells you the PPE and first aid for it?
- A. The site safety plan kept in the office
- B. The safety data sheet from the supplier
- C. The SWMS written for work near moving plant
- D. The price ticket on the paint tin
8. You find broken grey fibre sheeting beside an old shed on the block, built in the 1970s. What is the correct action?
Performance criteria: 1.5
Learning content on this page was drafted with AI assistance by VET Creator and must be reviewed by a qualified trainer before use with students.
Element 1 — Plan and prepare
Check your understanding

Check your understanding
1. You cannot keep the staff 3 m clear of the overhead lines at the street frontage. What do you do?
- A. Stop and get Mick onto TasNetworks
- B. Measure the gap with the staff first
- C. Work on with a spotter watching you
- D. Hold the staff up only briefly
Show the answer
A. Nobody works inside the 3 m No Go Zone without TasNetworks' written authorisation, and you never measure the gap with a tape or staff.
2. An excavator working near your set-out makes the job high risk construction work, even with no trench on site.
- A. True
- B. False
Show the answer
A. Movement of powered mobile plant is one of the 18 high risk triggers on its own. So there must be a SWMS. You read it and sign on to it.
3. A plumb bob can be used to find a level line across a wall.
- A. True
- B. False
Show the answer
B. A plumb bob shows plumb (vertical); level is horizontal and needs a levelling device.
Performance criteria: 1.1, 1.2, 1.3, 1.4, 1.5
Learning content on this page was drafted with AI assistance by VET Creator and must be reviewed by a qualified trainer before use with students.
Element 2 — Set up and use levelling device
Set up and use levelling device

When this element is done properly, the levelling device is set up firm and level. The device is proved within the maker's tolerance. Heights are marked at the right spots on pegs, formwork and walls. A completed Level Record Sheet shows every reading and the reduced levels (RLs). The sheet also shows the arithmetic check and the misclosure.
Levelling means measuring and transferring heights across a site. Points end up at the same height, or a set height apart. A level that is 3 mm out over 30 m puts a slab out of tolerance. Nobody sees that mistake until the concrete is down. So the device is proved before the work starts, not after.
Know this. The datum on this job is TBM1 (temporary bench mark 1). It is the brass plug in the kerb at the site entry, assumed RL 100.000 m. RL (reduced level) is a point's height above that datum, in metres to three decimals.
You work in a crew of three on Lot 42 Kingston Rise. Priya is leading hand and books the readings. Dan holds the staff. You set up and read the instrument. In class your teacher plays the supervisor. Readings go on the Level Record Sheet as they are taken, never from memory. Every run closes back on TBM1.
Key points
- Get the required heights (FFL, FSL, pad and invert levels) off the drawings and confirm them with the leading hand before you set up.
- Set the tripod firm and low enough to read, centre the circular bubble, then kill parallax before any reading is taken.
- Prove the instrument first: compensator tap check every set-up, two peg test against the manual's tolerance (2 mm over 30 m on this level).
- Read only the long centre cross-line on the staff, to the nearest millimetre, with the staff held plumb and gently rocked for the lowest reading.
- Keep backsight and foresight distances about equal so any collimation error cancels itself out.
- Write each reading on the Level Record Sheet as you take it. Strike a wrong entry through once, write the correct figure beside it and initial it.
- Prove the job by re-setting the instrument in a second position and re-reading key points, and by closing the run back on TBM1.
- Only Class 1, 1M, 1C, 2, 2M or 3R lasers go on a construction site, and the beam is never viewed through the level's telescope.
What you need
- Tripod-mounted automatic level (optical level) with 24x telescope, circular bubble, three footscrews and stadia hairs, plus its case and manufacturer's manual
- Aluminium tripod with pointed feet, adjustable legs and 5/8 inch thread
- 5 m telescopic aluminium E-pattern levelling staff reading to 1 mm, with staff bubble
- Self-levelling rotating laser level (Class 2 on its label). Clamp-on detector and bracket. Laser target card. Warning signs. Its charger with a current test tag.
- 15 m clear 12 mm hose filled with clean water, open at both ends (water level)
- 1200 mm spirit level with horizontal and plumb vials, and a 3.6 m true aluminium straight edge
- 300 g steel plumb bob on braided line
- 8 m pocket tape, 30 m open-reel fibreglass tape and 1 m folding rule
- Marking kit. Lumber crayon. Carpenter's pencil. Chalk line with blue chalk. Marking paint. 75 mm clouts. 50 x 50 x 450 mm hardwood pegs. Star pickets with safety caps.
- Site plan at 1:200, slab plan at 1:100, the specification, the company Level Record Sheet, the two peg test record sheet and a clipboard
- PPE: hard hat, safety glasses, hi-vis vest, safety boots, gloves, SPF 50+ sunscreen
Performance criteria: 2.1, 2.2, 2.3, 2.4
Learning content on this page was drafted with AI assistance by VET Creator and must be reviewed by a qualified trainer before use with students.
Element 2 — Set up and use levelling device
Identify the required heights from the work instructions
Done right when
- The FFL figure you write down matches the figure on the drawing exactly.
- Every pad on the plan has an RL written on your list.
- Datum and its RL are written in the Level Record Sheet header.
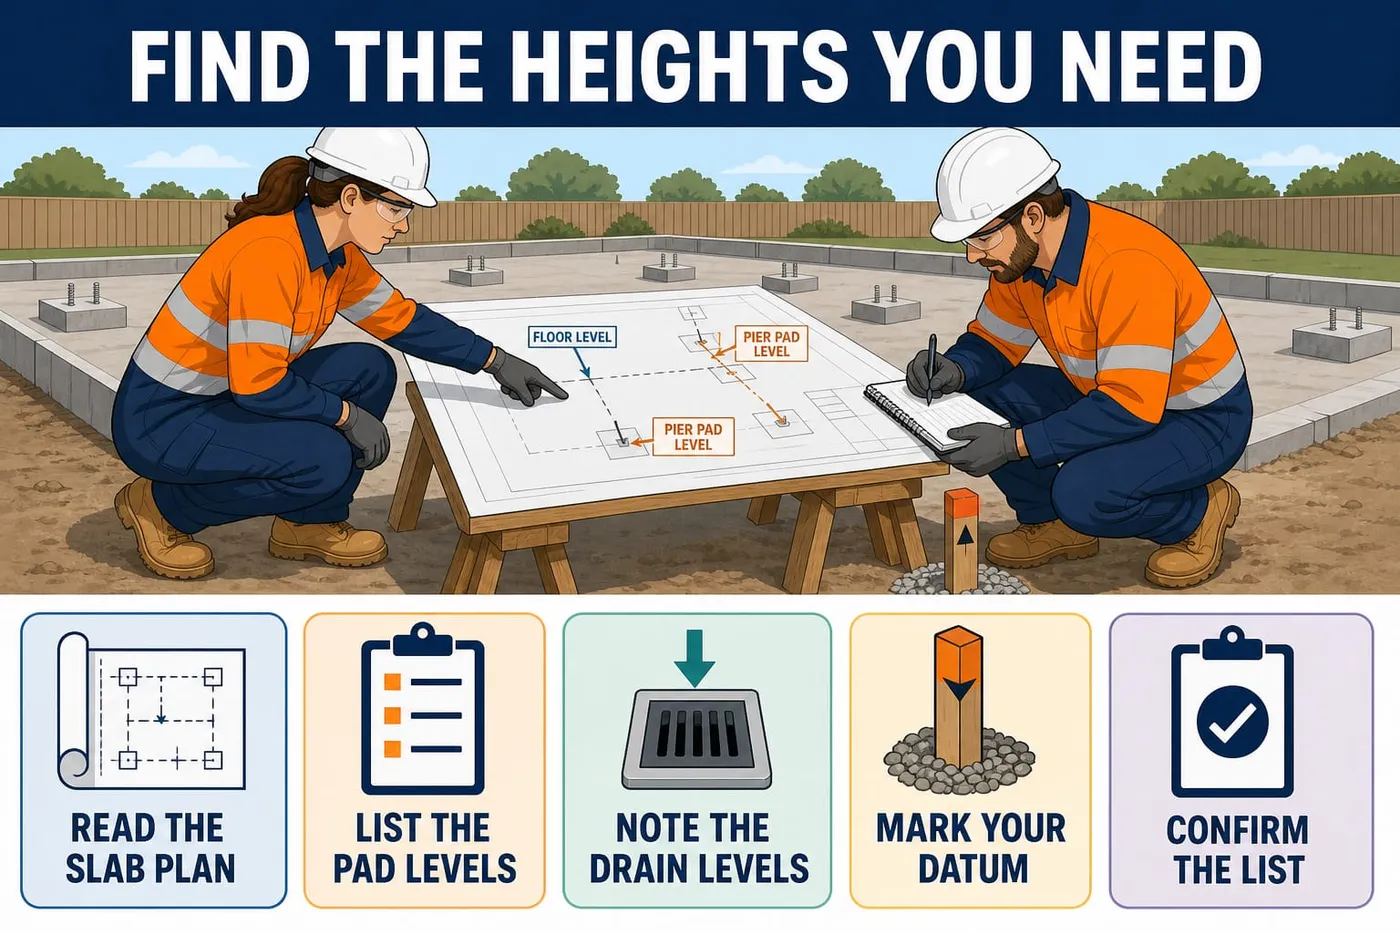
Read the slab plan at 1:100 for the finished floor level (FFL).
FFL is written against the floor plan, in metres to three decimals.
If: no height is written, do not scale it - ask Priya or Mick for the figure.
Check The FFL figure you write down matches the figure on the drawing exactly.
List the pier pad and pad levels for the masonry piers and steel columns.
Pad RLs are usually on the footing plan, not the floor plan.
Check Every pad on the plan has an RL written on your list.
Note the invert levels and grade for the stormwater line.
Why: The drain's fall is set from the invert - the inside bottom of the pipe.
If: the grade is given but not the downstream invert, work it out and have it confirmed.
Mark the datum you will work from on your list.
On this job it is TBM1, the brass plug in the kerb, assumed RL 100.000.
Check Datum and its RL are written in the Level Record Sheet header.
Confirm the whole list of heights with the leading hand before setting up.
Why: Five minutes at the plan is cheaper than a slab poured low.
If: a figure on the plan and the specification disagree, stop and ask the supervisor.
Activity: Worked example: reducing a closed level run on the house slab
Written, about 60 minutes
Use with the booking and reducing stages. You work through the whole Lot 42 run with the leading hand's figures, reduce it by the height of plane of collimation (HPC) method, then prove the same run by the rise and fall method. Follow each line on a blank Level Record Sheet so you end up with a finished sheet of your own.
- Fill in the header: Job - Lot 42 Kingston Rise; Date; Instrument serial no.; Datum - TBM1 kerb plug RL 100.000; Crew - Priya, Dan, you.
- Write the backsight (BS) on TBM1: 1.235. HPC = known RL + BS = 100.000 + 1.235 = 101.235.
- Write the intermediate sight (IS) on pier pad P1: 1.610. RL = HPC - IS = 101.235 - 1.610 = 99.625.
- Write the foresight (FS) to change point CP1: 0.985. RL = 101.235 - 0.985 = 100.250.
- Move the level, then write the new BS on CP1: 1.420. New HPC = 100.250 + 1.420 = 101.670.
- Write the final FS back on TBM1: 1.673. RL = 101.670 - 1.673 = 99.997.
- Work the misclosure: 99.997 - 100.000 = -0.003 m = -3 mm, so the run finished 3 mm low. Inside the job tolerance of plus or minus 5 mm, so accept it.
- Do the arithmetic check: sum of BS 1.235 + 1.420 = 2.655. Sum of FS 0.985 + 1.673 = 2.658. 2.655 - 2.658 = -0.003, which equals 99.997 - 100.000.
- Now reduce the same run by rise and fall: 1.235 - 1.610 = -0.375, a fall of 0.375, so P1 RL = 100.000 - 0.375 = 99.625.
- Continue: 1.610 - 0.985 = +0.625, a rise, so CP1 RL = 99.625 + 0.625 = 100.250; then 1.420 - 1.673 = -0.253, a fall, so TBM1 RL = 100.250 - 0.253 = 99.997.
- Check the rise and fall sheet: rises 0.625 minus falls (0.375 + 0.253 = 0.628) = -0.003, the same answer as the HPC sheet and the same as 99.997 - 100.000.
- Sign and date both sheets and write in Remarks: 'Misclosure -3 mm, within plus or minus 5 mm. Accepted.'
Activity: Worked example: two peg test on the automatic level
Practical, about 75 minutes
Use with the tolerance check stage. You prove the automatic level is within the tolerance in its manual before it is used on the slab. The figures below are the ones your crew got on a practice pair of pegs. You repeat the test with the real instrument and write your own figures on the two peg test record sheet.
- Drive pegs A and B 30 m apart on firm ground and set the level exactly halfway between them, about 15 m from each peg.
- Centre the circular bubble, kill parallax, then read the staff on A: a1 = 1.452; read the staff on B: b1 = 1.308.
- While the level is still at the midpoint, check the sights are balanced. Read the stadia hairs on B: upper 1.382 minus lower 1.234 = 0.148. Work the distance: 100 x 0.148 = 14.8 m. That matches the half-distance of about 15 m. The centre hair reading, 1.308, is the mean of the two stadia readings. That also proves you read the right hairs.
- Work the true height difference: a1 - b1 = 1.452 - 1.308 = +0.144 m, so A is 144 mm lower than B.
- Move the level to about 2 m from peg A, re-level it, and read A: a2 = 1.390.
- Work the correct far reading: b2' = a2 - (a1 - b1) = 1.390 - 0.144 = 1.246.
- Read B from the new position: b2 = 1.249. Collimation error = b2 - b2' = 1.249 - 1.246 = +0.003 m = +3 mm over 30 m. Positive, so the line of sight points up.
- Compare with this instrument's manual tolerance (example figure for this level): 2 mm over 30 m. 3 mm is outside, so tag the level out of service and report it to Mick - never adjust it yourself.
- Write the readings, the error in mm with its sign, the manual tolerance and your pass/fail decision on the two peg test record sheet, then sign it.
Activity: Worked example: fall, grade and invert levels on the stormwater line
Written, about 45 minutes
Use with the drainage stage. The specification says the stormwater line runs at a grade of 1 in 100 over 12.000 m, with an upstream invert level (the inside bottom of the pipe) of RL 99.400. You work out the fall, the downstream invert, then check what the laser actually reads in the trench.
- Work the fall: fall = distance divided by X, so 12.000 divided by 100 = 0.120 m = 120 mm.
- Write the grade both ways for the record: 1 in 100 = 1%.
- Work the downstream invert: 99.400 - 0.120 = RL 99.280.
- Find the beam height: stand the staff on TBM1 (RL 100.000), slide the detector to on-grade, read 1.450, so beam RL = 100.000 + 1.450 = 101.450.
- Read the downstream invert: staff on the pipe invert, detector on-grade, reading 2.165, so RL = 101.450 - 2.165 = 99.285.
- Check it against the required level: 99.285 - 99.280 = +0.005 m = +5 mm high. The supervisor's tolerance for inverts on this job (example figure) is plus or minus 10 mm, so record PASS.
- Write all four figures on the Level Record Sheet - required invert, measured invert, difference in mm with its sign, and pass or fail - then have Priya initial it.
Performance criteria: 1.1, 2.1
Learning content on this page was drafted with AI assistance by VET Creator and must be reviewed by a qualified trainer before use with students.
Element 2 — Set up and use levelling device
Set up the automatic level

Done right when
- The tripod head sits roughly level by eye before the instrument goes on.
- No leg moves when you push the head sideways.
- No leg slips when weight is leaned on the head.
- Bubble sits fully inside the circle from every direction of the telescope.
- Cross-lines are crisp before you look at the staff.
Pick a firm spot about halfway between the backsight and foresight points.
Warning: Never set up inside the No Go Zone of the street power lines - see Element 1.
Why: Balanced sight distances cancel out any collimation error.
If: the ground is soft or trafficked, move to firm ground clear of the plant route.
Spread the tripod legs evenly to about shoulder width.
Check The tripod head sits roughly level by eye before the instrument goes on.
Push each tripod foot firmly into the ground with your boot.
Warning: Keep feet and fingers clear of the pointed tripod shoes.
Check No leg moves when you push the head sideways.
Tighten the leg wing nuts.
Check No leg slips when weight is leaned on the head.
Screw the level onto the tripod head.
Warning: Never let go of the instrument before the screw is tight - a dropped level is written off.
Hold the instrument until the 5/8 inch thread is fully home.
Centre the circular bubble using the footscrews.
Bubble between footscrews 1 and 2, thumbs turning inwards, then footscrew 3 alone.
If: the bubble will not centre, re-level the tripod head and start again.
Check Bubble sits fully inside the circle from every direction of the telescope.
Focus the cross hairs on a plain background such as the sky.
Turn the eyepiece until the lines are jet black and sharp.
Check Cross-lines are crisp before you look at the staff.
Focus the telescope on the staff.
Check Staff markings are sharp and the numbers readable.
Remove parallax by moving your eye behind the eyepiece.
If the cross-line appears to slide across the staff, re-focus.
If: it still slides, re-do the eyepiece focus before any reading.
Check Cross-line stays on the same staff graduation as your eye moves.
Activity: Set up, shoot and transfer levels on the Lot 42 slab and garage
Practical, about 180 minutes
Use with every stage of this element. You work in a crew of three under supervision. You set up the automatic level and prove it. You shoot the ground and pier pad levels. You mark the formwork height with the water level and the straight edge. You then prove your work from a second set-up. Everything is written down as you go.
- Highlight the required heights on the slab plan at 1:100 - FFL (finished floor level), pier pad RLs and the garage formwork height - and confirm them with Priya.
- Set the tripod firm with legs spread and feet pushed in, mount the level, centre the circular bubble with the footscrews, and do the compensator tap check.
- Shoot a backsight on TBM1, then intermediate sights on three ground set-out points and two pier pads, booking each reading to three decimals as it is taken.
- Move the instrument through a change point to a second position, re-read two of the pier pads, and show the two RLs agree within the job tolerance of plus or minus 5 mm.
- Close the run back on TBM1, work the misclosure and the arithmetic check, and write the result in the Remarks column.
- Transfer the garage formwork height from the datum mark with the water level. Mark it with a pencil line and a nail. Carry it along the form with the spirit level and 3.6 m straight edge. Reverse the edge end for end every second step.
- Mark the entry sign height on the wall at the measured RL with crayon. Drive and label the offset and recovery pegs clear of the trench. Sketch the marked levels and peg positions on your record sheet.
Performance criteria: 2.2
Learning content on this page was drafted with AI assistance by VET Creator and must be reviewed by a qualified trainer before use with students.
Element 2 — Set up and use levelling device
Check the levelling device against the maker's tolerance
Done right when
- The centre line bounces and settles back on the same reading.
- Collimation error worked in mm with its sign, against the manual's tolerance (2 mm over 30 m on this level).
- Bubble reads the same both ways; any difference means the vial is out by half that amount.
- Label reads Class 1, 1M, 1C, 2, 2M or 3R.
- No air bubbles visible anywhere in the hose.
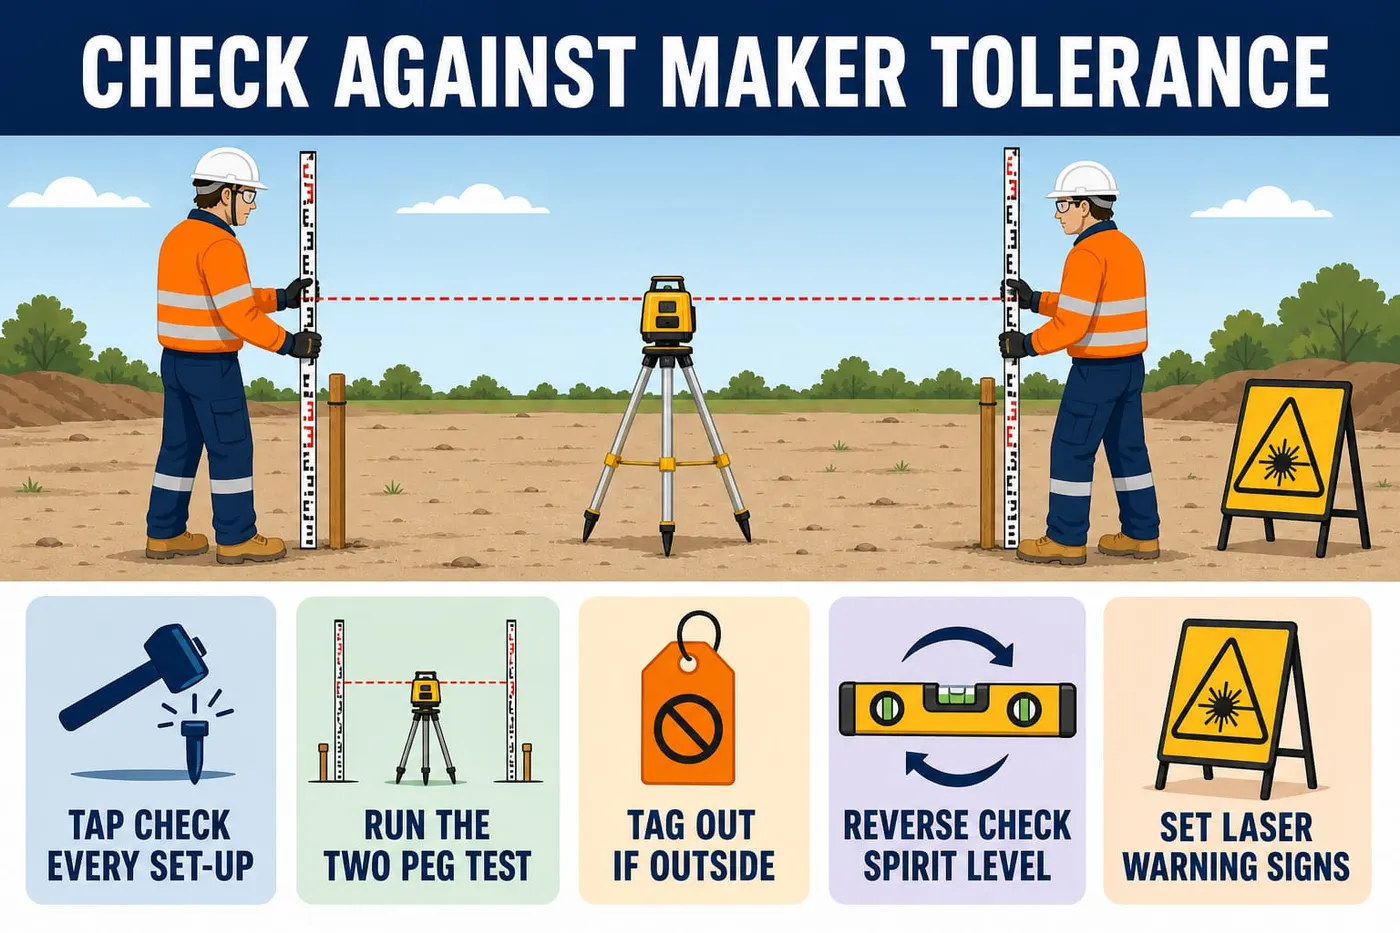
Do the compensator tap check at every set-up.
Warning: Never point the telescope at the sun - it can blind you.
Sight the staff, then turn the footscrew nearest the line of sight about one eighth of a turn.
If: the reading does not return, tag the level out and report it to the supervisor.
Check The centre line bounces and settles back on the same reading.
Run a two peg test before the job starts.
Pegs 30 to 50 m apart, instrument halfway, then about 2 m from peg A.
Check Collimation error worked in mm with its sign, against the manual's tolerance (2 mm over 30 m on this level).
Tag out and report a level outside its tolerance.
Warning: Never turn an adjusting screw yourself - only a competent person adjusts an instrument.
If: it is outside tolerance, draw a replacement from the store and re-test it.
Check a spirit level with a reverse reading before using it.
Mark its position, note the bubble, turn it end for end onto the same marks.
If: the readings differ, take the level out of service and report it.
Check Bubble reads the same both ways; any difference means the vial is out by half that amount.
Check the laser class on the instrument label before switching it on.
Warning: Class 3B and Class 4 lasers must never be used on a construction site.
If: the class is higher or the label is missing, do not use it and tell the supervisor.
Check Label reads Class 1, 1M, 1C, 2, 2M or 3R.
Set out laser warning signs around the controlled area before switching the laser on.
Warning: Never look into the beam or its reflection, and never view it through the telescope.
Fill the water level hose with clean water and run the bubbles out.
Both ends open, no kinks, whole hose kept out of the sun.
Check No air bubbles visible anywhere in the hose.
Quick check
1. Your two peg test shows 6 mm error over 30 m; the manual allows 2 mm. What now?
- A. Turn the adjusting screw until it reads right
- B. Draw another level from the store and re-test
- C. Keep using it with short, even sights
- D. Note the error and allow for it in the readings
Show the answer
B. Outside the manual's tolerance the level is tagged out and reported — only a competent person adjusts an instrument.
Performance criteria: 1.4, 2.2
Learning content on this page was drafted with AI assistance by VET Creator and must be reviewed by a qualified trainer before use with students.
Element 2 — Set up and use levelling device
Shoot the levels and book the readings
Done right when
- Reading written on the sheet in the BS column before the staff moves.
- You take the lowest reading seen during the rock.
- HPC written in the HPC column, three decimals.
- Each IS reading is written down as it is taken, never from memory.
- RL written to three decimals beside its point name.
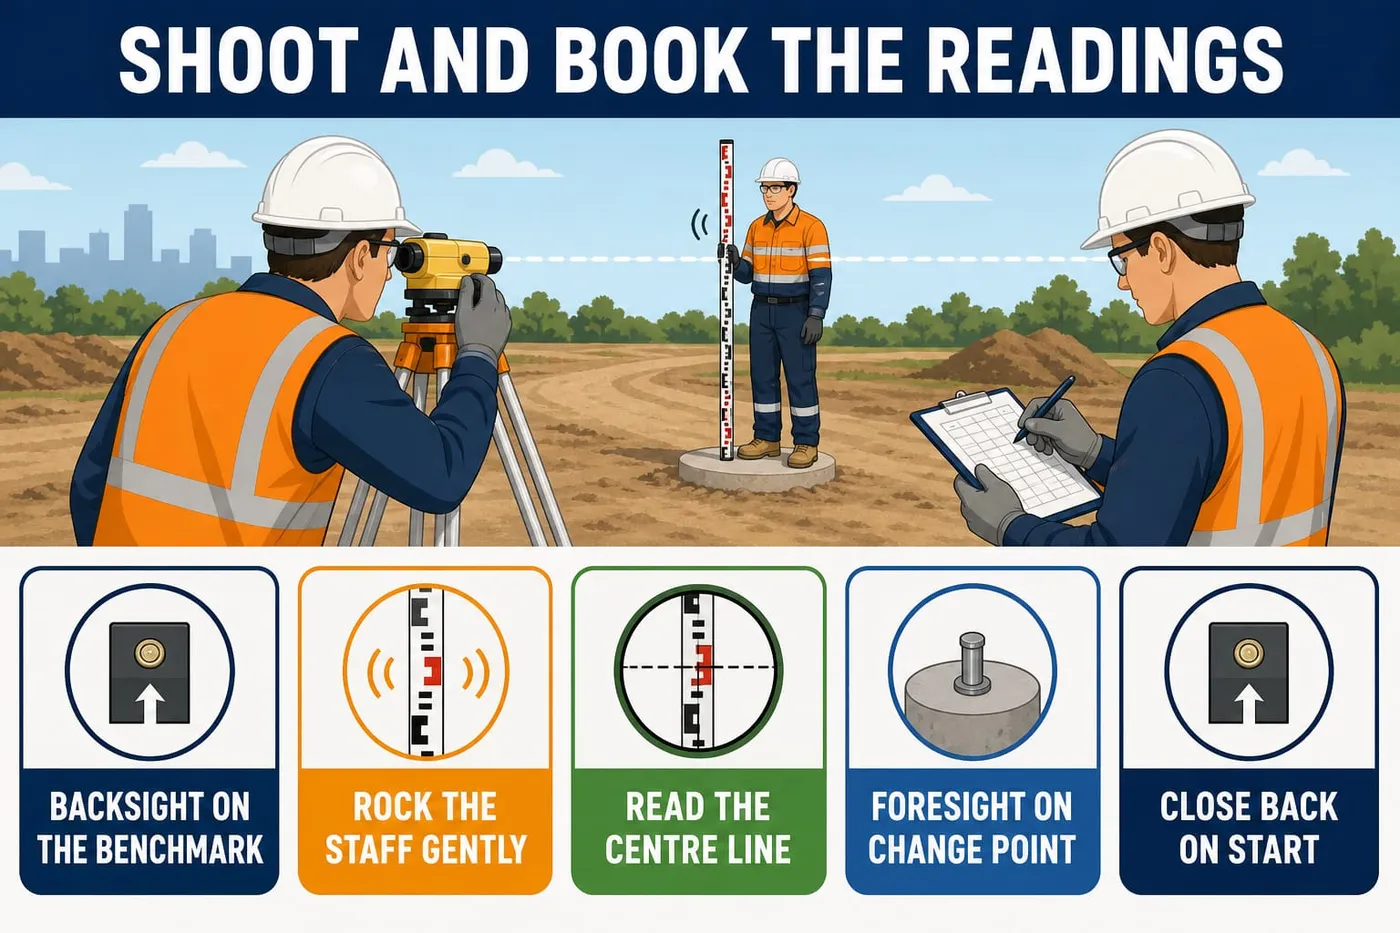
Take the backsight on TBM1 with the staff held plumb.
Read the long centre cross-line only, in metres to three decimals.
Check Reading written on the sheet in the BS column before the staff moves.
Ask the staff hand to rock the staff gently towards and away from you.
Thumb up means the reading is taken.
Check You take the lowest reading seen during the rock.
Work the HPC for this set-up.
HPC = known RL + backsight.
Check HPC written in the HPC column, three decimals.
Shoot each intermediate point in turn.
Check Each IS reading is written down as it is taken, never from memory.
Work each point's RL.
RL = HPC - the reading at that point.
Check RL written to three decimals beside its point name.
Shoot a foresight onto a firm change point before moving the instrument.
A change point must be solid - a kerb, a peg top or a steel plate, never loose soil.
If: the change point moves or sinks, re-start the run from the last good point.
Re-set the instrument past the change point.
Check Circular bubble re-centred, parallax re-checked, compensator tapped.
Take the new backsight on the change point.
New HPC = change point RL + new BS.
Check New HPC written on the sheet before any further reading.
Close the run back on TBM1 with a final foresight.
Check Every run started on the datum finishes on the datum.
Performance criteria: 2.3, 2.4
Learning content on this page was drafted with AI assistance by VET Creator and must be reviewed by a qualified trainer before use with students.
Element 2 — Set up and use levelling device
Transfer and mark heights at the required locations
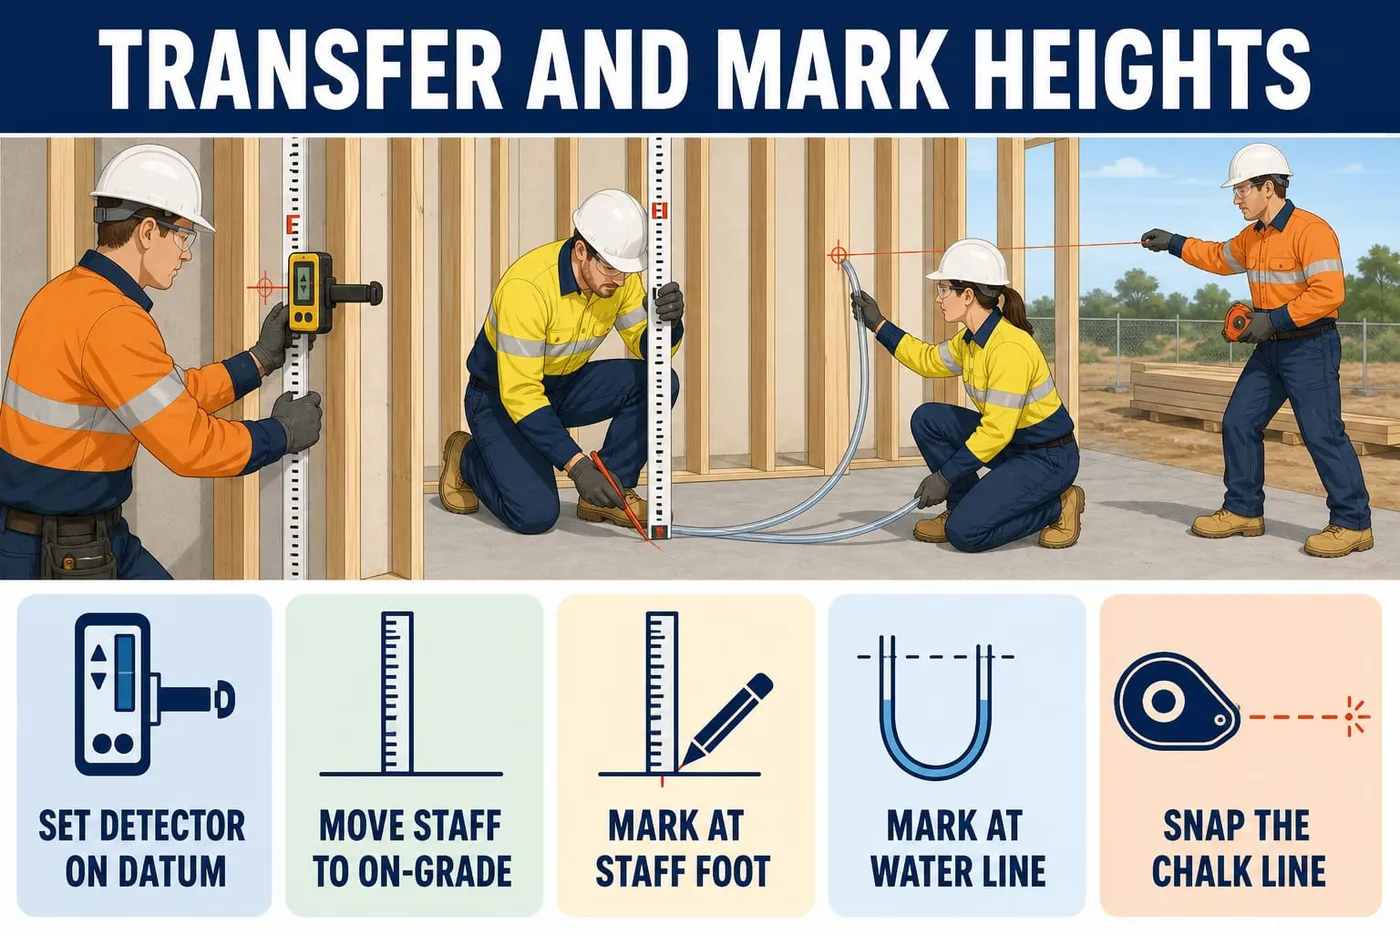
Done right when
- Detector clamped tight and does not slip when the staff is moved.
- Foot of the staff is then at the datum height.
- Mark is a fine line with the RL written beside it, not a smear.
- Water stops moving for at least five seconds before the mark is made.
- Datum end still sits exactly on the mark, proving the transfer.
Set the detector on the staff at the datum until it signals on-grade.
Clamp the detector where it beeps steady - that reading is the beam height above the datum.
Check Detector clamped tight and does not slip when the staff is moved.
Move the whole staff against the new surface until the detector reads on-grade again.
If: the detector will not pick up, check the beam path is clear and the laser is still level.
Check Foot of the staff is then at the datum height.
Mark the surface at the foot of the staff.
A pencil line on timber, crayon on concrete, marking paint on ground.
Check Mark is a fine line with the RL written beside it, not a smear.
Hold the water level end on the datum mark until the bottom of the meniscus sits on it.
Warning: Keep the hose shaded; warm water at one end gives a false mark.
The meniscus is the curved top of the water - read the bottom of the curve at both ends.
Mark the far wall at the bottom of the meniscus once the water settles.
Check Water stops moving for at least five seconds before the mark is made.
Re-read the datum end before moving the hose.
Check Datum end still sits exactly on the mark, proving the transfer.
Rest the straight edge on the marked height with the spirit level centred on top.
Check Bubble centred, both ends of the edge bearing on solid packing.
Step the straight edge along in full lengths, marking each step.
Reverse the edge end for end every second step so any error in the edge cancels.
Check Number of steps and the 3.6 m edge length recorded on the sheet.
Hang the plumb bob to carry a marked point vertically up or down.
Let the bob stop swinging before you mark.
Check String steady and clear of the surface; mark made at the bob point.
Drive pegs or clouts to the marked height where a physical mark is needed.
A nail mark lets a string line be pulled and felt.
Check Peg or nail head sits on the marked line, with the RL written on the peg.
Place offset and recovery pegs clear of the excavation.
Warning: Fit a safety cap on every star picket as soon as it is driven.
Why: They let the set-out point be re-established after the machine has cut the ground.
If: a peg is inside the machine's working area, move it further out and record the new offset.
Snap a chalk line between the marks where a continuous level line is wanted.
Check Line is straight, crisp and runs through every mark.
Performance criteria: 2.3
Learning content on this page was drafted with AI assistance by VET Creator and must be reviewed by a qualified trainer before use with students.
Element 2 — Set up and use levelling device
Measure and mark with tapes and rules
Done right when
- The tape you pick is non-conductive and you can say why.
- Figures are readable and the hook is firm and square.
- You can point to the millimetre graduations on both the tape and the rule.
- A second person can see the zero sitting on the mark before you read.
- The tape makes a straight line with no visible dip.
Select a fibreglass tape for any measuring near overhead power lines.
Warning: Never measure a power line's height or your distance to it with a tape or staff; keep at least 3 m clear and ask TasNetworks.
Fibreglass does not conduct; a steel tape does. Ask the supervisor before working anywhere near lines.
Check The tape you pick is non-conductive and you can say why.
Inspect the tape blade and hook before every use.
Run the first metre out and look for kinks, tears, worn figures and a loose or bent end hook.
Why: A bent hook shifts every measurement by the same amount without you seeing it.
Check Figures are readable and the hook is firm and square.
Check the tape and rule read in millimetres.
Levelling figures on drawings are in millimetres or metres to three places; a tape in another unit invites a conversion mistake.
Check You can point to the millimetre graduations on both the tape and the rule.
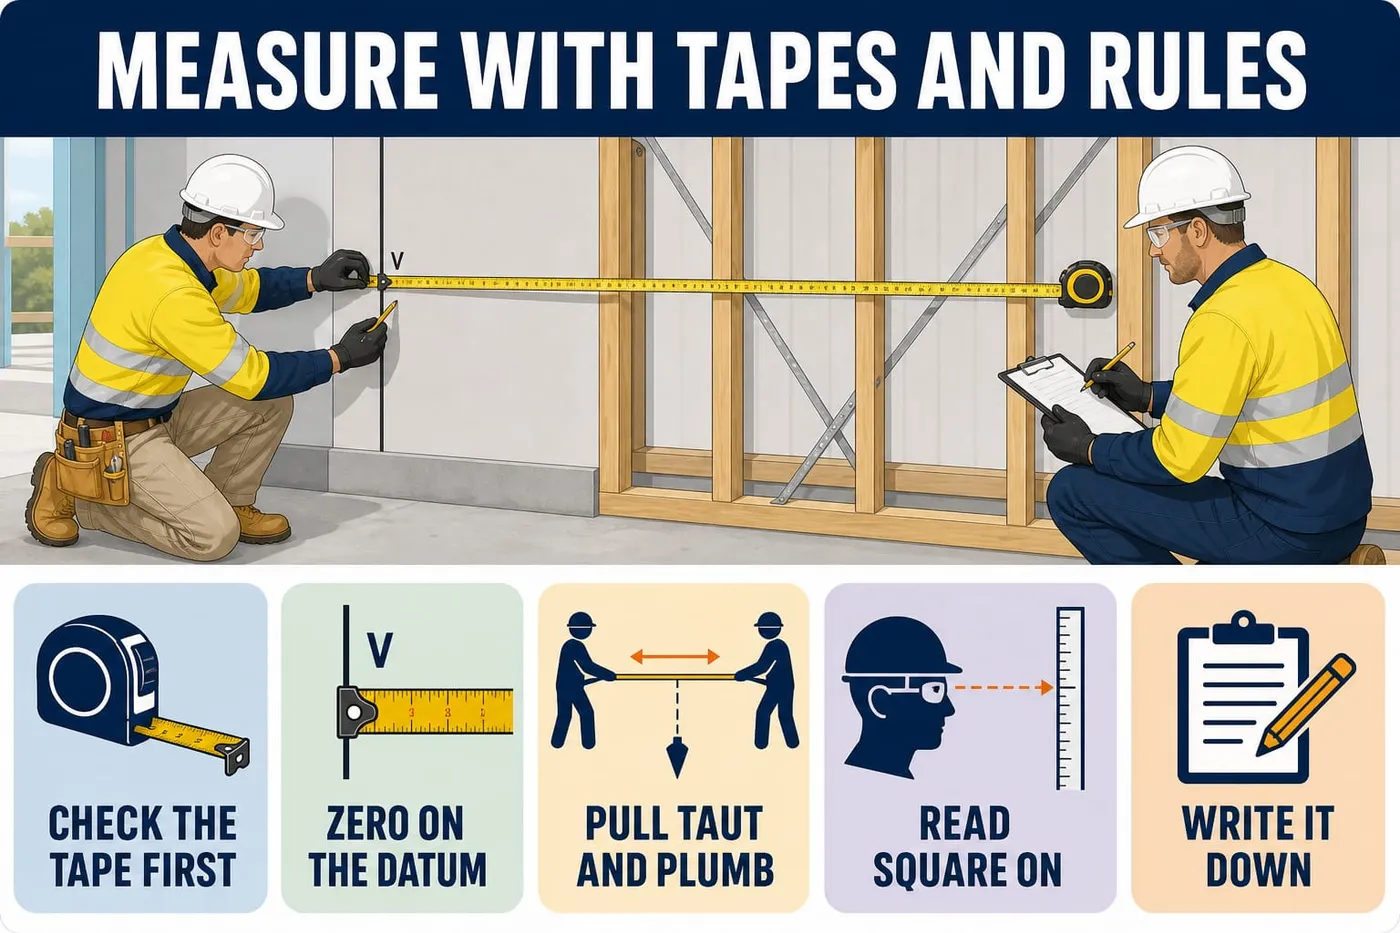
Hold the tape zero exactly on the datum mark.
Hook the tape over a peg edge or have your partner hold the zero on the pencil mark. Do not start at the 100 mm line without allowing for it.
Check A second person can see the zero sitting on the mark before you read.
Pull the tape taut and straight between the two points.
A long tape sags in the middle and reads too long; keep steady, even tension.
Why: Sag in a 10 m run can add several millimetres to a set-out dimension.
Check The tape makes a straight line with no visible dip.
Hold the tape plumb when measuring a vertical height.
Steady the tape against the wall or check it with the plumb vial of a spirit level.
Check The tape runs square to the floor line, not leaning.
Read the tape square-on with your eye in line with the mark.
Looking from the side makes the graduation appear to shift against the surface.
Check Two people reading the same mark get the same figure.
Use a steel rule or folding rule for short measurements.
A rigid rule sits flat and reads cleanly to the nearest millimetre on packers, pegs and formwork.
Check Short dimensions are read to the nearest millimetre, not estimated.
Mark the measured point with a fine pencil line and a V.
The point of the V shows the exact position; a thick crayon blob can hide 5 mm. Use chalk, a nail or a clout where the surface or the job requires it.
Check Another worker can put the tape back on the same point from your mark.
Write each measurement down as you take it.
Warning: Writing up from memory at smoko is how heights get swapped and the wrong level gets built.
Enter it in the field book or record sheet straight away, in the column it belongs to.
Check No figure is carried in your head between points.
Re-measure every critical dimension once before you leave the point.
Measure the second time from the opposite end or by a different person.
Why: A second measure catches a misread figure while it is still cheap to fix.
Check Both measurements agree within the job's tolerance.
Report any tape or rule that is kinked, torn or unreadable.
Tag it out of service and tell the supervisor; see 'Check, report and store'.
Check The faulty tape is tagged and out of the kit, not back in the ute.
Activity: Tape and rule accuracy run
Practical, about 25 minutes
Use with the page: Measure and mark with tapes and rules. Work in pairs in the practical yard. Measure and record six dimensions on an existing timber fence or garden shed. Do not use a slab or pier job. Measure three horizontal spacings between posts. Measure three heights from the ground to the top rail. Use a fibreglass tape for the long ones. Use a steel rule for anything under 300 mm. Each partner measures every dimension on their own. Compare your figures before writing the final one.
- Rule up a record sheet with this finished header: 'Job: fence check, back yard bay 2 | Date: 14/03 | Measured by: A. Nguyen | Checked by: T. Blair | Tape: 30 m fibreglass, No. 7 | Units: mm'.
- Rule four columns: Point, Measure 1 (mm), Measure 2 (mm), Agreed figure (mm).
- Copy this sample first line: 'Post 1 to Post 2 | 2405 | 2407 | 2406'.
- Measure each post spacing with the tape taut and the zero on the post face.
- Measure each top rail height with the tape held plumb against the post.
- Have your partner measure the same point and enter the second figure.
- Strike through once any figure you enter in the wrong column, write the correct one beside it and initial it.
- Write one sentence under the table saying which dimension differed the most and what caused it.
- Hand the finished sheet to your trainer with both names on it.
Quick check
1. A 10 m tape is left to sag in the middle of a long measurement. What happens to the reading?
- A. It reads correctly if the tape is fibreglass
- B. It reads too short
- C. It reads too long
- D. It is unaffected
Show the answer
C. The sagging tape follows a longer path than the straight line, so the distance reads too long.
Performance criteria: 2.3
Learning content on this page was drafted with AI assistance by VET Creator and must be reviewed by a qualified trainer before use with students.
Element 2 — Set up and use levelling device
Check the readings from a second set-up
Done right when
- Bubble centred and reading returns after the tap.
- New HPC worked and written down before any check reading.
- Each check RL is within the job tolerance of plus or minus 5 mm of the first RL.
- Misclosure stated as a signed figure in mm, for example -3 mm.
- Both sides of the check give the same figure.
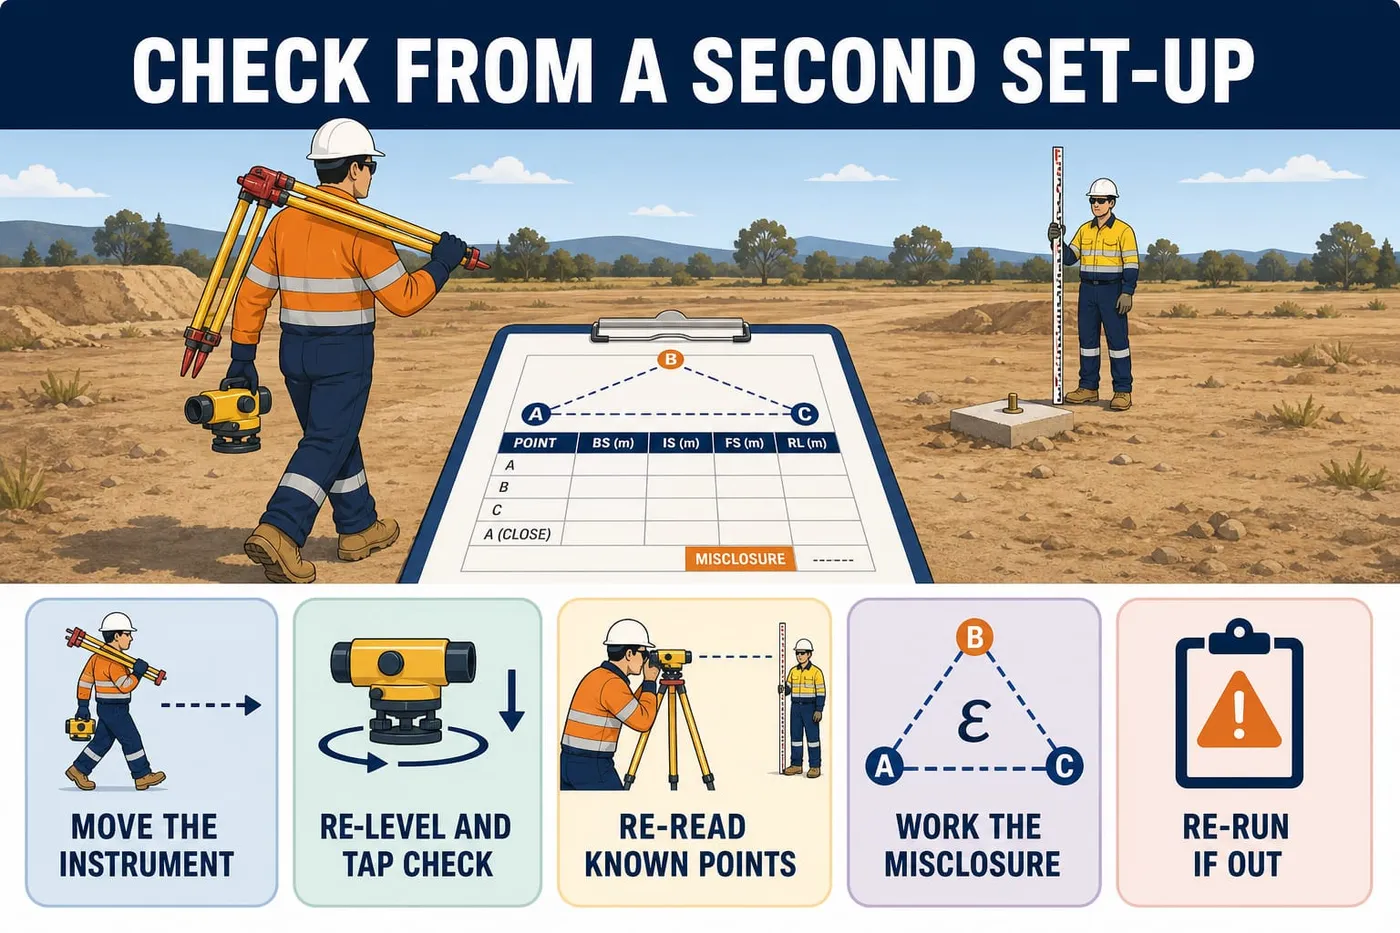
Move the instrument to a different position well away from the first.
Why: Two independent set-ups catch a bad reading, a sunk tripod or a staff error.
Re-level the instrument and repeat the compensator tap check.
Check Bubble centred and reading returns after the tap.
Take a fresh backsight on TBM1 or a known point.
Check New HPC worked and written down before any check reading.
Re-read at least two of the points you already shot.
Check Each check RL is within the job tolerance of plus or minus 5 mm of the first RL.
Work the misclosure of the closed run.
Misclosure = RL obtained back at TBM1 minus its known RL, in mm with its sign.
Check Misclosure stated as a signed figure in mm, for example -3 mm.
Do the arithmetic check on the sheet.
Sum of backsights minus sum of foresights equals last RL minus first RL.
If: they do not match, re-do the arithmetic before you touch the instrument again.
Check Both sides of the check give the same figure.
Re-run the levels when the misclosure is outside tolerance.
Warning: Never adjust a reading to make a run close.
If: it closes outside plus or minus 5 mm, re-run from the datum and book it fresh.
Performance criteria: 2.2, 2.3
Learning content on this page was drafted with AI assistance by VET Creator and must be reviewed by a qualified trainer before use with students.
Element 2 — Set up and use levelling device
Document the results and hand them over
Done right when
- No blank boxes in the header.
- All figures in metres to three decimals, legible in your workplace's pen or pencil.
- Misclosure in mm with its sign, and accepted or re-run stated.
- Sketch is labelled well enough for another crew to find the marks.
- Your name and the date appear on every sheet.
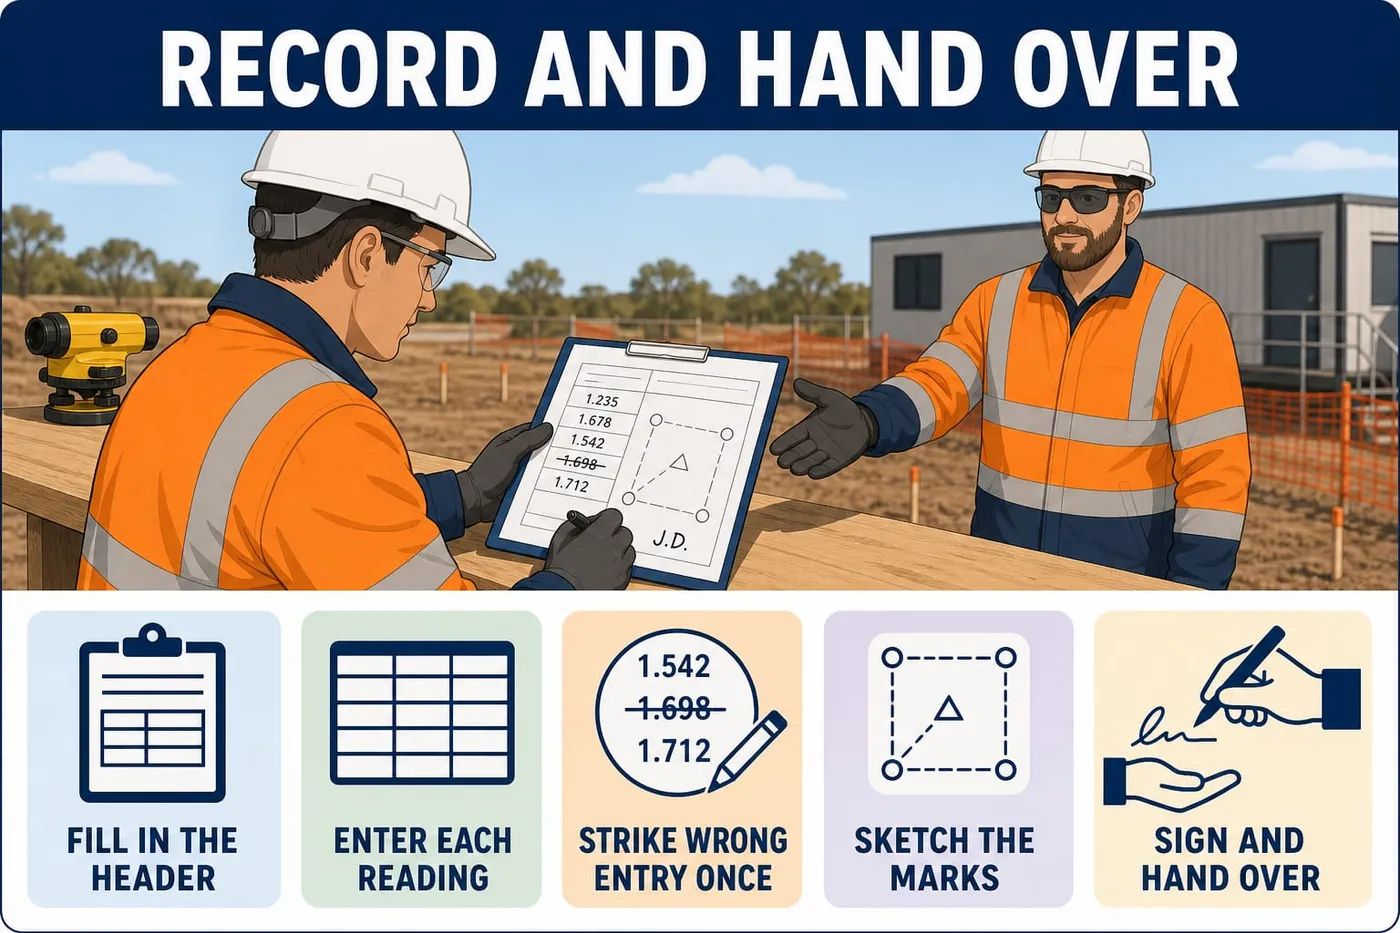
Complete the Level Record Sheet header.
Job, date, instrument serial number, datum and RL, and crew names.
Check No blank boxes in the header.
Enter every reading in its own column as it was taken.
Point / BS / IS / FS / HPC / RL / Distance / Remarks.
Check All figures in metres to three decimals, legible in your workplace's pen or pencil.
Strike through any wrong entry once so it stays readable.
Warning: Never rub out a reading or write over the top of one.
Write the correct figure beside it, then initial and date the change.
Write the misclosure and the arithmetic check in the footer.
Check Misclosure in mm with its sign, and accepted or re-run stated.
Draw a sketch of the marked levels and peg positions.
Show north, the TBM, each marked point with its RL, and the offset distances.
Check Sketch is labelled well enough for another crew to find the marks.
Sign and date the sheet.
Check Your name and the date appear on every sheet.
Hand the sheets to the leading hand or supervisor for checking.
Why: The record is the proof of the work; a sheet in your pocket is no record at all.
If: the supervisor queries a figure, go back and re-shoot the point rather than changing the sheet.
Activity: Quiz: setting up, reading and recording levels
Written questions, about 30 minutes
Use with the page: Shoot the levels and book the readings. Answer these eight questions about the levelling work on Lot 42. Open each card only after you have written your own answer down.
- Write your answers on paper first, one line each.
- Open each card and compare the answer with yours.
1. You are reading the staff through the automatic level and can see three horizontal lines across it. Which one do you read?
- A. The top short line
- B. The bottom short line
- C. The long centre line
- D. Whichever is closest to a whole number
2. The detector is clamped on the staff at the datum. How do you mark that height on a new wall?
- A. Slide the detector down the staff until the beam signals on-grade again
- B. Keep the detector clamped, move the staff until on-grade, mark at its foot
- C. Measure down from the beam with a tape and mark at that figure
- D. Move the tripod closer to the wall and re-level the instrument first
3. You read a backsight of 1.235 on TBM1, which has an RL of 100.000. What is the height of plane of collimation (HPC)?
- A. 98.765
- B. 100.000
- C. 101.235
- D. 1.235
4. A hire laser arrives with Class 3B on its label. What do you do?
- A. Use it, but keep everyone else away
- B. Do not use it on site and tell the supervisor
- C. Use it only with safety glasses on
- D. Use it indoors only
5. Halfway through the water level transfer you notice a run of small bubbles in the hose and one end is lying in full sun. Why does this matter and what do you do?
6. You write 1.160 in the booking sheet but the staff actually read 1.610. How do you fix it?
- A. Rub it out and write the right figure
- B. Write 1.610 over the top of it
- C. Strike it through once, write 1.610 beside it and initial and date it
- D. Start a fresh sheet and copy everything across from memory
7. The specification calls for a 1 in 100 grade over 12.000 m. How much fall is that?
- A. 12 mm
- B. 100 mm
- C. 120 mm
- D. 1200 mm
8. You close your run back on TBM1 and get RL 99.992 against the known 100.000, with a job tolerance of plus or minus 5 mm. What do you do?
- A. Record a misclosure of -8 mm and re-run the levels
- B. Spread the 8 mm across your readings
- C. Accept it, 8 mm is close enough on a slab
- D. Change the TBM value to 99.992
Performance criteria: 2.4
Learning content on this page was drafted with AI assistance by VET Creator and must be reviewed by a qualified trainer before use with students.
Element 2 — Set up and use levelling device
Check your understanding
Check your understanding
1. The cross-line seems to slide up and down the staff when you move your head. What do you do?
- A. Shift the staff closer to the level
- B. Re-focus the eyepiece on the cross-lines
- C. Read it anyway, the difference is close enough
- D. Re-centre the circular bubble and read again
Show the answer
B. That sliding is parallax, and it is killed by re-focusing the eyepiece on the cross-lines before any reading is taken.
2. Your run closes 8 mm out, so you shave a millimetre off a few readings to make it close.
- A. True
- B. False
Show the answer
B. Never adjust a reading to make a run close — outside plus or minus 5 mm you re-run from the datum and book it fresh.
3. Setting the level about halfway between the two points cancels out collimation error.
- A. True
- B. False
Show the answer
A. Equal backsight and foresight distances mean the same error sits in both readings, so it drops out of the difference.
4. A steel tape is a safe choice for measuring work close to overhead power lines.
- A. True
- B. False
Show the answer
B. Steel conducts; use a non-conductive fibreglass tape, stay outside the No Go Zone and never measure to a line.
Performance criteria: 2.1, 2.2, 2.3, 2.4
Learning content on this page was drafted with AI assistance by VET Creator and must be reviewed by a qualified trainer before use with students.
Element 3 — Clean up
Clean up

At the end of this element the work area is clear and safe. Every offcut, peg and wrapper is in the right bin. The site's waste management plan is the written plan saying which bin each material goes in. The levelling kit is clean, dry and checked. It is booked back into the store. Any fault is tagged out and reported.
Clean up is part of the levelling job, not something extra at the end. The pegs, string, offcuts and clouts you leave behind become trip hazards and puncture hazards for the next crew. A dirty instrument also costs money: grit on a tripod thread or mud in a staff section wrecks gear that is worth thousands.
Clearing up has two halves. First the work area: pull or protect pegs, pick up rubbish, and sort every material into the bin the site's waste management plan sets out. Second the kit: clean it, dry it, check it, and store it the way the manufacturer's manual says.
Pack-up is also your last serviceability check — the look-over and function check that proves a tool is complete, undamaged and working. A fault you find now gets tagged out and reported tonight, so the crew is not stuck tomorrow morning. Write what you found on the post-use equipment check sheet while you have the tool in your hand.
Key points
- Clear the work area before you touch the kit — pull or cap every peg and picket you no longer need.
- Sort waste into the bins the site's waste management plan and signage set out, not by habit.
- Treated timber offcuts and broken treated pegs are never burned, mulched or put in green waste.
- Brush or blow dust off a lens first, then wipe with a clean dry lens cloth only — never a rag, sleeve or solvent.
- Wipe and dry the tripod, staff, tapes and hose before they go in the case; damp gear corrodes and seizes.
- Drain the water level hose and coil it without kinks; flat battery goes on the charger, not back in the box.
- A fault you cannot fix under the manual means tag it out and report it to the supervisor — never adjust it yourself.
- Fill in the post-use equipment check sheet as you pack, and hand it to the supervisor with your records.
What you need
- Site waste management plan and bin signage for Lot 42 Kingston Rise
- Marked waste bins: general waste, untreated timber, cardboard, plastics, scrap metal
- Labelled container for treated timber offcuts and broken treated pegs
- Safety data sheet (SDS) for the marking paint
- Automatic level, tripod and 5 m E-pattern staff in their cases
- Self-levelling rotating laser (Class 2), clamp-on detector, laser target card and warning signs
- Laser charger with a current test tag
- 15 m clear water level hose and a bucket to drain it into
- 1200 mm spirit level, 3.6 m aluminium straight edge, 300 g plumb bob
- 8 m pocket tape, 30 m open-reel fibreglass tape, 1 m folding rule
- Soft brush or blower and a clean, dry lens cloth
- Clean dry rags, stiff brush and a scraper for mud on tripod feet and staff shoe
- Out-of-service tags, pen, pre-use and post-use equipment check sheet
- Claw hammer and crowbar for pulling redundant pegs, bucket for loose clouts
- PPE: hard hat, safety glasses, hi-vis, gloves, safety boots, sunscreen SPF 50+
Performance criteria: 3.1, 3.2
Learning content on this page was drafted with AI assistance by VET Creator and must be reviewed by a qualified trainer before use with students.
Element 3 — Clean up
Clear the work area
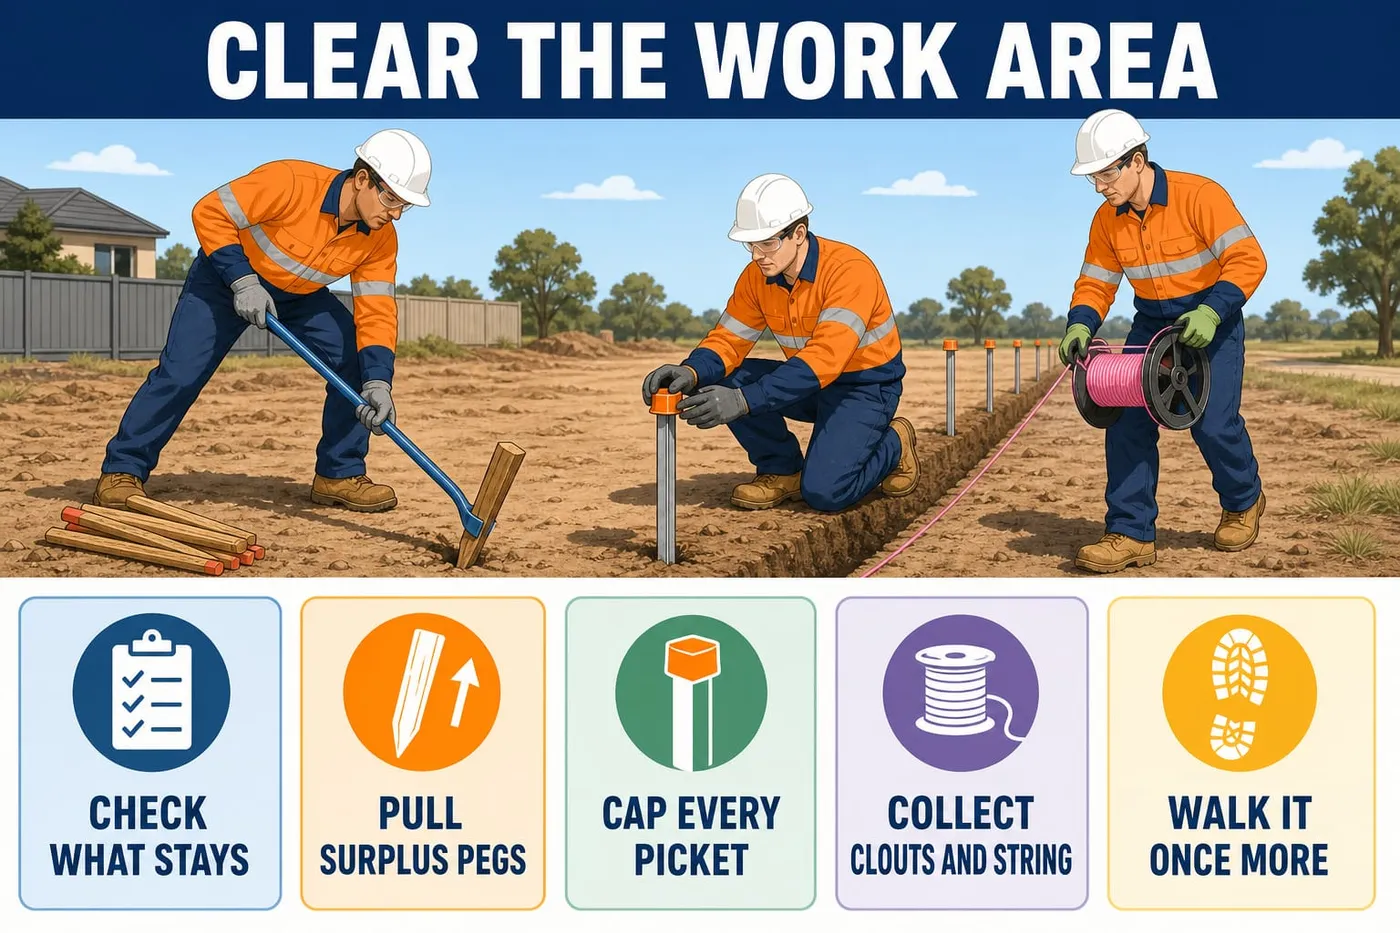
Done right when
- Pegs to be kept are named out loud and left untouched.
- No peg stub left standing above ground.
- No exposed picket head anywhere in the work area.
- Nails are in the bucket, not on the ground.
- String is coiled, not left strung across the access path.
Confirm with the leading hand which pegs and marks stay in place.
Offset and recovery pegs hold levels for later work.
If: nobody can tell you, leave the peg in and ask Mick.
Check Pegs to be kept are named out loud and left untouched.
Pull the surplus hardwood pegs with the crowbar.
Warning: Keep your fingers clear of the claw and the peg head.
Lever against a block of timber, not against the new concrete.
Check No peg stub left standing above ground.
Cap every star picket that is staying in the ground.
Push the safety cap fully down onto the head.
Why: An uncapped picket can impale someone who falls onto it.
Check No exposed picket head anywhere in the work area.
Collect all clouts, string line and chalk tubs.
Loose nails hide in churned ground and in the barrow.
Check Nails are in the bucket, not on the ground.
Wind in and coil any string lines you set.
Check String is coiled, not left strung across the access path.
Walk the whole area once looking for anything left behind.
Look along the trench edge and under the formwork.
Check No tools, rubbish or trip hazards remain.
Report any hazard you cannot fix to the supervisor.
An unguarded trench edge is not yours to fix.
If: the hazard could hurt someone before you find Mick, stand clear and warn others first.
Activity: Clearing the slab and trench area at Lot 42
Practical, about 40 minutes
Use with the page: Clear the work area. You and your crew have finished shooting the pier pad and drain levels. The area is scattered with surplus pegs, clouts, string line and paint tins. You clear it so the next crew walks onto a safe, tidy site.
- Ask Priya and Mick which pegs stay — offset and recovery pegs are not to be pulled.
- Pull the surplus hardwood pegs with the crowbar and stack them in one pile.
- Fit a safety cap to every star picket still standing before anyone works near it.
- Pick up all clouts, string line and chalk tubs; put loose nails straight into the bucket.
- Walk the area once more looking down the line of the trench for anything left behind.
- Report any hazard you cannot fix, such as an unguarded trench edge, to Mick.
Performance criteria: 3.1
Learning content on this page was drafted with AI assistance by VET Creator and must be reviewed by a qualified trainer before use with students.
Element 3 — Clean up
Sort and remove waste

Done right when
- Each piece is named as treated or untreated before it is binned.
- No nails, plastic or paint left in with the timber.
- Each material is in the bin its sign names.
- The tin is stored or disposed of the way the sheet and site plan direct.
- Path is clear enough to walk without tripping.
Read the site waste management plan and the bin signage.
Why: Bin colours and groupings differ from site to site.
If: a bin is unlabelled, ask the supervisor rather than guess.
Check every timber offcut and peg for an end stamp.
The stamp shows the preservative and the hazard class, H1 to H6.
If: you cannot identify the timber, treat it as treated.
Check Each piece is named as treated or untreated before it is binned.
Place untreated timber offcuts in the timber recycling bin.
Check No nails, plastic or paint left in with the timber.
Place the treated pine offcuts in the labelled treated timber container.
Warning: Treated timber is never burned, mulched or put in green waste.
If: the container is full, stop and tell the supervisor; do not use another bin.
Put cardboard, plastics and scrap metal in their marked recycling bins.
Check Each material is in the bin its sign names.
Read the marking paint safety data sheet before handling the part-used tin.
Warning: Never tip paint or rinse water onto the ground or into a drain.
Section 7 covers handling and storage; section 8 covers PPE.
Check The tin is stored or disposed of the way the sheet and site plan direct.
Sweep or barrow the loose spoil and dust off the access path.
Check Path is clear enough to walk without tripping.
Activity: Sorting the levelling job's waste into the site bins
Practical, about 35 minutes
Use with the page: Sort and remove waste. You have a barrow of materials off the levelling job. It holds untreated timber offcuts. It holds treated pine pegs with H4 end stamps. It also holds cardboard peg packaging and empty plastic chalk bottles. The last items are bent clouts and a part-used tin of marking paint. You sort them using the site's waste management plan and the bin signage.
- Read the site waste management plan and the signs on each bin before you tip anything.
- Check the end stamp on each peg for a hazard class (H1 to H6) marking.
- Put untreated timber, cardboard, plastics and scrap metal into their marked recycling bins.
- Put the treated pine offcuts in the labelled container for treated timber — never a green waste or burn pile.
- Read the marking paint SDS and store or dispose of the tin the way section 7 and the plan direct.
- Tell Mick what went where if you were unsure about any item.
Quick check
1. Broken treated pine pegs can go in the green waste bin because they are timber.
- A. True
- B. False
Show the answer
B. Treated timber is never burned, mulched or put in green waste — it goes where the site waste plan and the council direct.
Performance criteria: 3.1
Learning content on this page was drafted with AI assistance by VET Creator and must be reviewed by a qualified trainer before use with students.
Element 3 — Clean up
Clean the equipment
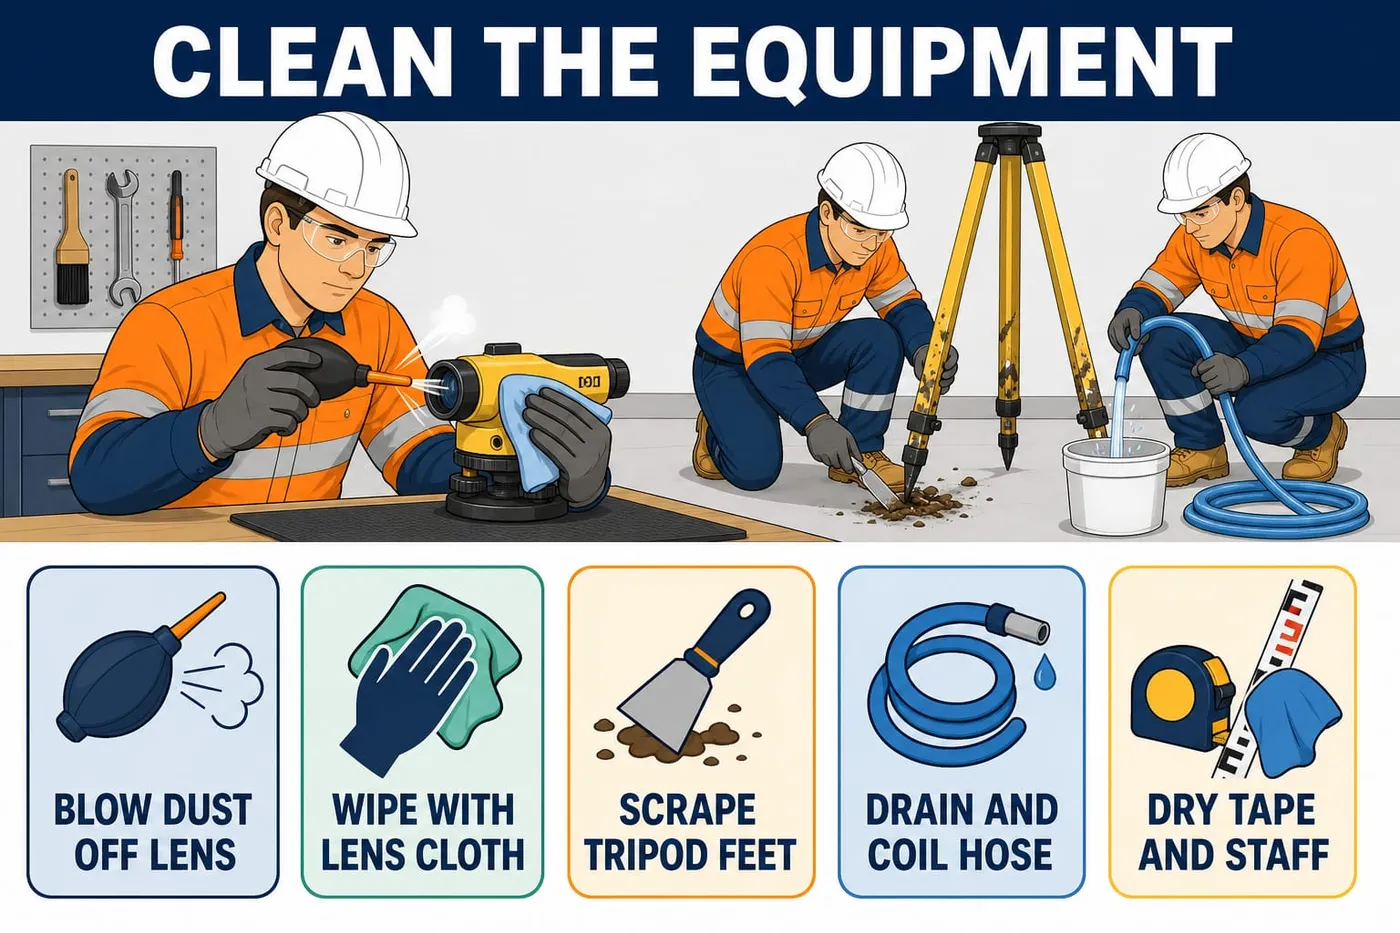
Done right when
- Glass is clear with no smears when you sight through it.
- No mud or grit left around the footscrews.
- Legs are dry to the touch and slide freely.
- Sections slide and lock without forcing.
- Detector window is clean and the clamp slides freely.
Brush or blow the dust off the level's lens and eyepiece first.
Warning: Never wipe grit across glass; it scratches the lens coating.
Wipe the lens with a clean, dry lens cloth.
Warning: Never use a rag, paper towel, sleeve, or a wet or solvent cloth.
Check Glass is clear with no smears when you sight through it.
Wipe the level's body and case lid with a clean dry rag.
Check No mud or grit left around the footscrews.
Scrape the mud off the tripod feet.
Dry mud in the leg clamps stops them gripping next time.
Wipe the tripod legs dry before folding them.
Check Legs are dry to the touch and slide freely.
Clean the mud off the staff foot and wipe each section.
Grit in the sections jams the telescopic locks.
Check Sections slide and lock without forcing.
Wipe the laser body, detector and target card with a dry cloth.
Check Detector window is clean and the clamp slides freely.
Drain the water level hose into a bucket.
Check No water left trapped in the hose.
Coil the hose in loose loops with no kinks.
Why: A kink traps air bubbles and spoils the next transfer.
Dry the fibreglass tape as you wind it back onto the reel.
If: the tape is muddy, wipe it with a damp rag then dry it before reeling.
Check Tape is dry and wound flat, not twisted.
Wipe the spirit level, straight edge and plumb bob dry.
Check Straight edge faces are clean so they sit flat next time.
Quick check
1. The level's lens is covered in fine dust. What do you do first?
- A. Brush or blow the dust off
- B. Wipe it with your sleeve
- C. Wipe it with a damp rag
- D. Spray it with solvent
Show the answer
A. Wiping grit across glass scratches the coating, so remove the dust first, then use a clean dry lens cloth only.
Performance criteria: 3.2
Learning content on this page was drafted with AI assistance by VET Creator and must be reviewed by a qualified trainer before use with students.
Element 3 — Clean up
Check, report and store
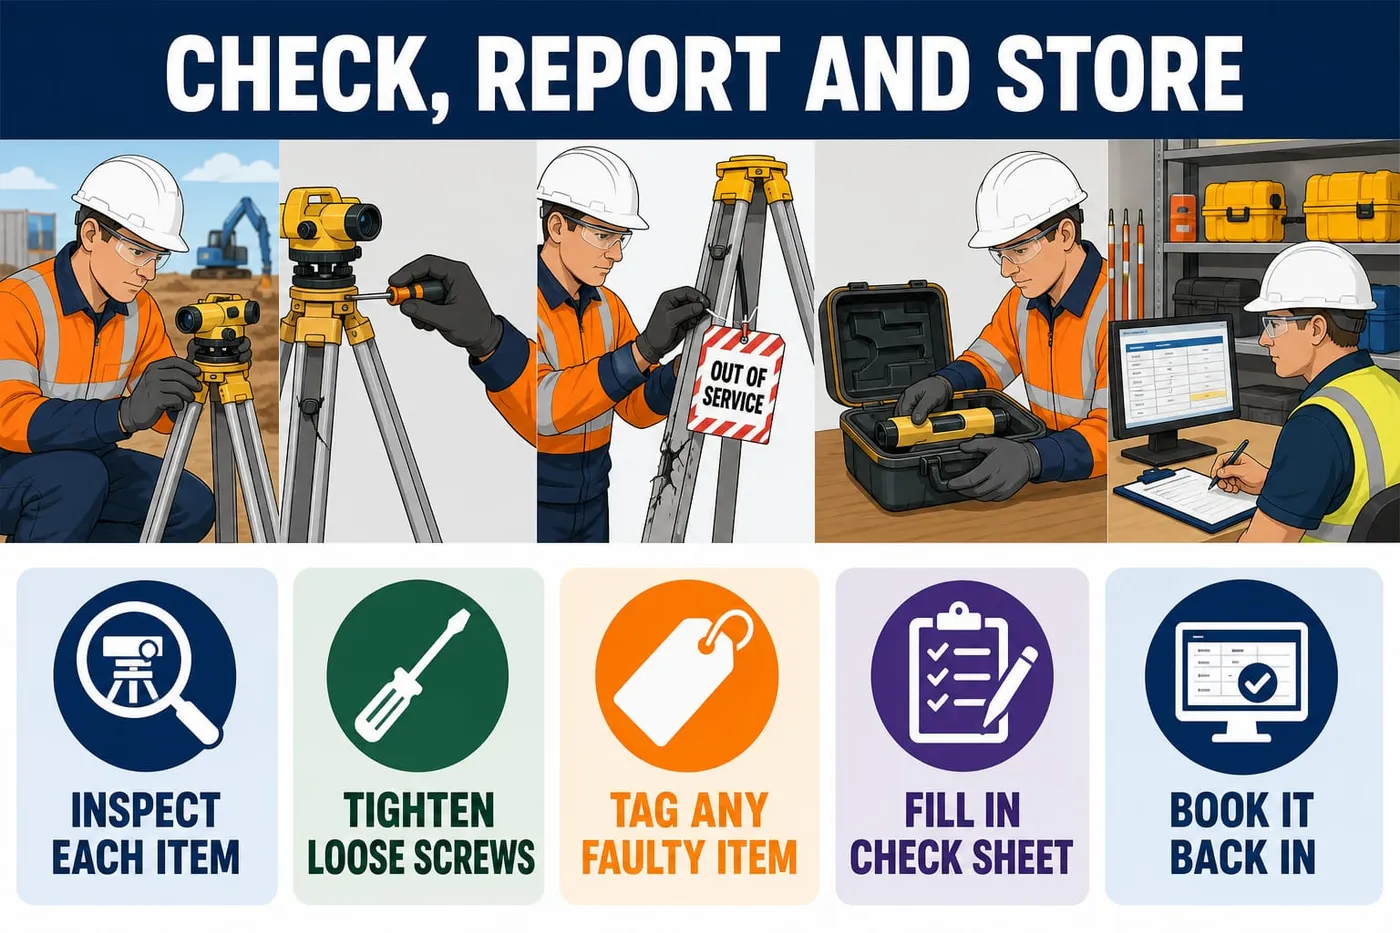
Done right when
- Every item in the kit has been looked at, not just counted.
- Legs hold position when the tripod is stood up and leaned on.
- Charger shows it is charging and the tag is in date.
- Mick knows the item, the fault and the time you found it.
- Every line has a result and any fault is described in words.
Inspect each item as you handle it for damage.
Look for cracked vials, bent staff sections, frayed plumb line.
Check Every item in the kit has been looked at, not just counted.
Tighten any loose tripod wing nut or head screw.
Why: This is a fix the manual allows the user to make.
Check Legs hold position when the tripod is stood up and leaned on.
Put the laser battery on its charger.
Check the charger's test tag date is current before plugging in.
If: the tag is missing or expired, do not use the charger; tag it out and report it.
Check Charger shows it is charging and the tag is in date.
Attach an out-of-service tag to any faulty item.
Warning: Never adjust or repair an instrument's compensator, optics or electrics yourself.
If: the fault is anything beyond a clean, a battery or a loose screw, tag it out.
Report every tagged item to the supervisor before you leave.
Check Mick knows the item, the fault and the time you found it.
Write each item and its result on the post-use equipment check sheet.
Write it as you handle the item, never from memory later.
If: you write a wrong entry, strike it through once, write the correct entry beside it and initial it.
Check Every line has a result and any fault is described in words.
Place the level in its case in its moulded seat.
Check Case closes without forcing and the instrument does not move inside.
Return the staff to its sleeve with sections collapsed and locked.
Check Staff is closed to its shortest length.
Return all equipment to the store and book it in.
Check Store record shows every item back; nothing is left in the ute or on site.
Hand the check sheet to the supervisor with your level records.
Check Supervisor has the signed sheet and the Level Record Sheets together.
Activity: Worked example: completing the post-use equipment check sheet
Practical, about 30 minutes
Use with the page: Check, report and store. This is the pack-up record for the Lot 42 job. It is filled in line by line so you can see what good looks like. Copy the format onto your own sheet as you pack your kit. Write each line as you handle the item.
- Write the header: Job — Lot 42 Kingston Rise. Date — 14/05. Crew — Priya, Dan, student. Checked by — student.
- Line 1: Automatic level, serial AL-2291 — lens brushed and wiped with dry lens cloth, bubble intact, footscrews free. Result: serviceable, cased.
- Line 2: Tripod — feet scraped, legs wiped dry, wing nuts tight. Result: serviceable, stored upright in rack.
- Line 3: 5 m E-pattern staff — mud cleaned off shoe, sections wiped dry, locks working. Result: serviceable, in sleeve.
- Line 4: Rotating laser (Class 2) and detector — case wiped, detector clamp free, battery flat. Action: battery on charger overnight. Charger test tag current to 08/25.
- Line 5: 30 m fibreglass tape — wound in wet, dried before reeling. 8 m pocket tape — return spring sticks and will not retract. Action: TAGGED OUT, reported to Mick 2:45 pm.
- Line 6: Water level hose — drained into bucket, coiled loose, no kinks. Result: serviceable, hung in store.
- Write the footer: Faults reported to supervisor — yes, 1 item (8 m pocket tape). Sign and date it. Hand the sheet in with your Level Record Sheets.
Activity: Pack-up and waste quiz
Written questions, about 25 minutes
Use with the page: Check, report and store. Answer these nine questions about clearing up and putting the levelling kit away at Lot 42. Open each card after you have decided your answer.
- Read each question and decide your answer before you open the card.
- Write your answer down so you can discuss it with your trainer afterwards.
1. There is dust on the automatic level's eyepiece at pack-up. What do you do?
- A. Brush the dust off, then wipe with a dry lens cloth
- B. Wipe it clean with the sleeve of your hi-vis shirt
- C. Breathe on the glass and rub it with a paper towel
- D. Spray it with degreaser and buff it dry with a rag
2. You pull up short treated pine pegs stamped H4. Where do they go?
- A. The green waste bin with the grass clippings and offcuts
- B. The burn pile at the back of the lot
- C. The labelled treated timber container
- D. The mulcher, so the landscaper can use the chips
3. The 8 m pocket tape's return spring has stopped working. What is the right action?
- A. Pull the case apart and re-tension the spring yourself
- B. Put it back in the kit and tell the next crew verbally
- C. Throw it in the general waste bin with the other rubbish
- D. Tag it out and report it to Mick
4. Who sets the rules behind the site's waste bins?
- A. Only the builder's own site office rules
- B. The environment regulator, the council and the WHS Regulations
- C. The bin hire company that delivers and empties the skips
- D. Whoever is first on site each morning that week
5. The water level hose is still full at pack-up. What do you do?
- A. Coil it up full so it is ready to use tomorrow
- B. Drain it into a bucket, then coil it without kinks
- C. Tip the water out over the freshly poured concrete
- D. Leave it lying full across the site access track
6. The laser's battery is flat when you pack up. What is the correct step?
- A. Put it in the case flat and sort it out in the morning
- B. Swap in a battery from another trade's charger in the shed
- C. Put the battery on its charger with a current test tag
- D. Leave the laser running on site to use the last of it
7. Which item should NOT be put in a waste bin at the end of the job?
- A. Cardboard packaging off the new pegs
- B. Bent clouts picked up off the ground
- C. A usable straight edge
- D. Torn plastic sheeting from the pier pads
8. Name two things you must do to the tripod before it goes back in the rack.
9. Why do you fill in the post-use equipment check sheet while you are packing rather than later?
Performance criteria: 3.2
Learning content on this page was drafted with AI assistance by VET Creator and must be reviewed by a qualified trainer before use with students.
Element 3 — Clean up
Check your understanding

Check your understanding
1. Packing up, you find the automatic level's compensator doesn't settle. What's the call?
- A. Pack it and mention it next week
- B. Tag it out and tell Mick
- C. Adjust the footscrew to fix it
- D. Tap it until it settles
Show the answer
B. Anything beyond a clean, a battery or a loose screw is tagged out and reported — only a competent person adjusts it.
2. A muddy tape should be wiped with a damp rag, then dried before you reel it in.
- A. True
- B. False
Show the answer
A. That's right — mud and water left on the tape corrode and seize the gear in the case.
Performance criteria: 3.1, 3.2
Learning content on this page was drafted with AI assistance by VET Creator and must be reviewed by a qualified trainer before use with students.